Epson Stylus C86 Start Here Card - Page 6
Windows 2000, Finishing Windows Installation
 |
View all Epson Stylus C86 manuals
Add to My Manuals
Save this manual to your list of manuals |
Page 6 highlights
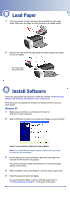
Windows 2000 1 Make sure your printer is connected and turned on. Then turn on your computer. 2 Wait for Windows to detect your printer and display a screen like this: DON'T CLICK ANY BUTTONS ON THIS SCREEN. Note: If a screen like this doesn't appear, make sure your printer is turned on and connected. 3 Put the Epson CD in your CD-ROM or DVD drive and wait a few seconds for the CD to be recognized. 4 Click Next on the Found New Hardware Wizard screen. 5 When you see this sceen, click the Search for option, then click Next. 6 Click CD-ROM drive, then click Next. Make sure Specify a location is not checked. 7 At the next screen, click Next. Installation proceeds automatically. 8 When installation halts, click Finish. 9 Read the agreement and click Agree. Continue with the instructions in "Finishing Windows Installation". Finishing Windows Installation 1 Make sure you have paper loaded in the printer. Then click Print a Test Page to check that your printer is set up correctly. 2 Click Install Epson Software Film Factory. If you want the program, click Install. If you see a message about installing QuickTime,® click Yes and follow the instructions on the screen. You don't need a registration number. 3 Click Install Printer User's Guide. 4 Click Add Epson Photo Website Links and follow the instructions on the screen. The click Back to return to the Options menu. 5 Click Install Epson Web-To-Page and follow the instructions on the screen. 6 When you're finished, click Exit to close the Options Menu. 7 When you see the Epson Product Registration screen, register your printer as instructed, then remove the Epson CD. You're ready to print! See your Quick Guide for details.
-
 1
1 -
 2
2 -
 3
3 -
 4
4 -
 5
5 -
 6
6 -
 7
7 -
 8
8
 |
 |
