Epson Stylus C86 Start Here Card - Page 7
Macintosh - driver
 |
View all Epson Stylus C86 manuals
Add to My Manuals
Save this manual to your list of manuals |
Page 7 highlights
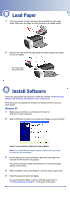
Macintosh Note: To print from Macintosh Classic applications as well as OS X applications, follow the steps below in OS X, then restart your Macintosh in OS 9 and follow the steps below again. 1 Make sure your printer is connected and turned on. Then turn on your Macintosh. 2 Put the Epson CD in your CD-ROM or DVD drive and wait a few seconds for the CD to be recognized. 3 If the CD-ROM window doesn't open automatically, double-click the Epson CD-ROM icon. Then double-click Epson installer. 4 When you see the license agreement, read it and click Agree. 5 At the Options Menu, click Install Printer Driver. In Mac OS X, enter your administrator password and click OK. 6 Follow the instructions on the screen to install the software. 7 Click Install Epson Software Film Factory. If you want the program, click Install and follow the instructions on the screen. 8 Click Install Printer User's Guide. 9 Click Share Photos Online and follow the instructions on the screen. 10 Click Explore Photo Projects Online and follow the instructions on the screen. 11 When you're finished, click Exit to close the Options Menu. 12 When you see the Epson Product Registration screen, register your printer as instructed, then remove the Epson CD and restart your Macintosh. Continue with the instructions below for your operating system. Mac OS X 1 Open the Applications folder on your hard drive, then open the Utilities folder and select Print Center or Printer Setup Utility. If necessary, click Add. 2 On the Printer List screen, click the Add button. 3 Select EPSON USB from the pull-down list, click Stylus C86, then select All from the Page Setup drop-down list. Note: If you don't see your printer in the Printer List, make sure the printer is turned on and connected. 4 Click Add. You see the printer list with the Stylus C86 and Stylus C86 (Sheet Feeder - Borderless) printer options. 5 Close the Print Center or Printer Setup Utility. You're ready to print! See your Quick Guide for details. Mac OS 9 1 Open the Apple® menu and select Chooser. 2 Click the C86 Series icon, click your USB port, and turn on Background printing. 3 Close the Chooser. You're ready to print! See your Quick Guide for details.
-
 1
1 -
 2
2 -
 3
3 -
 4
4 -
 5
5 -
 6
6 -
 7
7 -
 8
8
 |
 |
