Epson Stylus COLOR 670 Special Edition Product Information Guide - Page 10
Examining the Nozzle Check Pattern, Aligning the Print Head, Cleaning the Printer
 |
View all Epson Stylus COLOR 670 Special Edition manuals
Add to My Manuals
Save this manual to your list of manuals |
Page 10 highlights
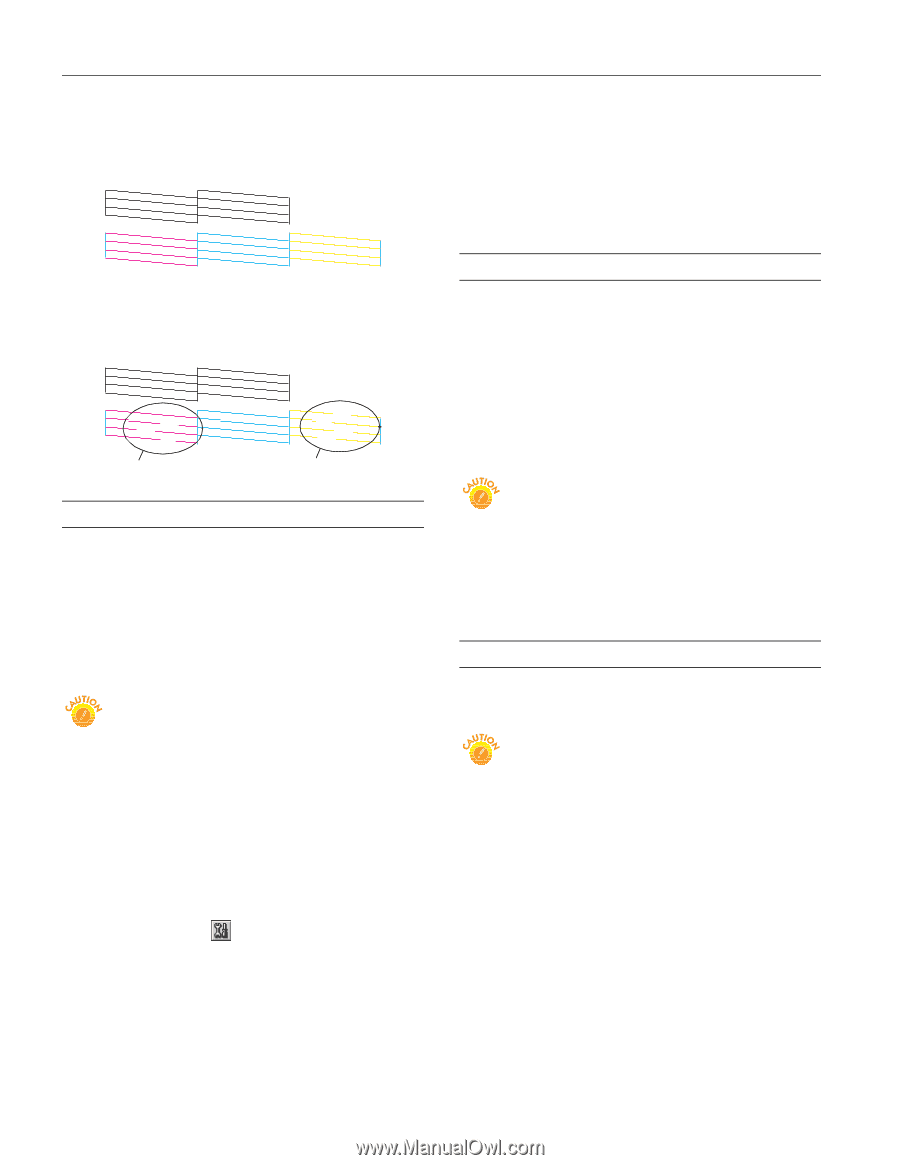
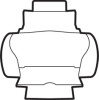
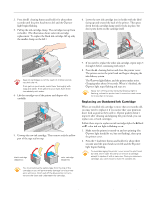
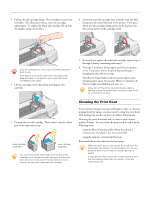
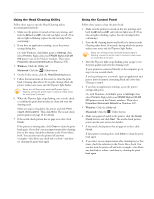
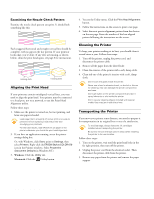
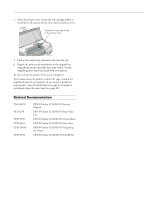
EPSON Stylus COLOR 670 Examining the Nozzle Check Pattern Examine the nozzle check pattern you print. It should look something like this: Each staggered horizontal and straight vertical line should be complete, with no gaps in the dot pattern. If your printout looks okay, you're done. If any dots are missing, as shown below, clean the print head again; see page 8 for instructions. missing dots missing dots Aligning the Print Head If your printouts contain misaligned vertical lines, you may need to align the print head. Your printer must be connected to a local port, not on a network, to use the Print Head Alignment utility. Follow these steps: 1. Make sure the printer is turned on, but not printing, and letter-size paper is loaded. Load paper that's at least 8.27 inches (210 mm) wide to prevent ink from spraying inside the printer and smudging your printouts. For the best results, load EPSON ink jet paper in the printer whenever you check the print head alignment. 2. If you have an application running, access the printer settings dialog box. Or, with Windows, click Start, point to Settings, then select Printers. Right-click the EPSON Stylus COLOR 670 icon in the Printers windows. Select Properties (Document Defaults in Windows NT). 3. Windows: Click the Utility tab. Macintosh: Click the Utility button. 4. You see the Utility menu. Click the Print Head Alignment button. 5. Follow the instructions on the screen to print a test page. 6. Select the most precise alignment pattern from the choices on the test page. Enter the number of the best aligned pattern following the instructions on the screen. Cleaning the Printer To keep your printer working at its best, you should clean it several times a year. Follow these steps: 1. Turn off the printer, unplug the power cord, and disconnect the printer cable. 2. Remove all the paper from the sheet feeder. 3. Clean the exterior of the printer with a soft, damp cloth. 4. Clean ink out of the printer's interior with a soft, damp cloth. Don't touch the gears inside the printer. Never use a hard or abrasive brush, or alcohol or thinner for cleaning; they can damage the printer components and case. Don't get water on the printer components and don't spray lubricants or oils inside the printer. Don't use any cleaning sheets included with special media; they may jam inside the printer. Transporting the Printer If you move your printer some distance, you need to prepare it for transportation in its original box or one of a similar size. To avoid damage, always leave the ink cartridges installed when transporting the printer. Be sure to remove the tape used in step 4 after installing the printer in its new location. Follow these steps: 1. Turn on the printer, wait until the print head locks in the far right position, then turn off the printer. 2. Unplug the power cord from the electrical outlet. Then disconnect the printer cable from the printer. 3. Remove any paper from the printer and remove the paper support. 10 - EPSON Stylus COLOR 670 2/00
-
 1
1 -
2
-
3
-
4
-
 5
5 -
 6
6 -
 7
7 -
 8
8 -
 9
9 -
 10
10 -
 11
11
 |
 |