Epson Stylus Photo R3000 Basics - Page 9
Feed the paper up to the line on the tray. Make sure the paper is flush against, the right.
 |
View all Epson Stylus Photo R3000 manuals
Add to My Manuals
Save this manual to your list of manuals |
Page 9 highlights
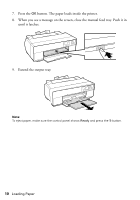
4. Open the front cover, then push the center of the manual feed tray to extend it. 5. Insert a single sheet of fine art paper. Insert it short edge first with the printable side face-up. Note: Load paper short edge first, no matter which way your photo faces. Check the paper package for any additional loading instructions. 6. Feed the paper up to the line on the tray. Make sure the paper is flush against the right. Loading Paper 9
-
 1
1 -
2
-
3
-
 4
4 -
 5
5 -
 6
6 -
 7
7 -
 8
8 -
 9
9 -
 10
10 -
 11
11 -
 12
12 -
 13
13 -
 14
14 -
15
-
16
-
17
-
18
-
19
-
20
-
21
-
22
-
23
-
24
-
25
-
26
-
27
-
28
-
29
-
30
-
31
-
32
-
33
-
34
-
35
-
36
-
37
-
38
-
39
-
40
-
41
-
42
-
43
-
44
-
45
-
46
-
47
-
48
-
49
-
50
-
51
-
52
-
53
-
54
-
55
-
56
-
57
-
58
-
59
-
60
-
61
-
62
-
63
-
64
-
65
-
66
-
67
-
68
 |
 |
Loading Paper
9
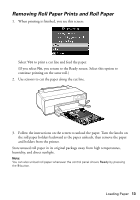
4.
Open the front cover, then push the center of the manual feed tray to extend
it.
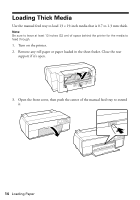
5.
Insert a single sheet of fine art paper. Insert it short edge first with the
printable side face-up.
Note:
Load paper short edge first, no matter which way your photo faces. Check the
paper package for any additional loading instructions.
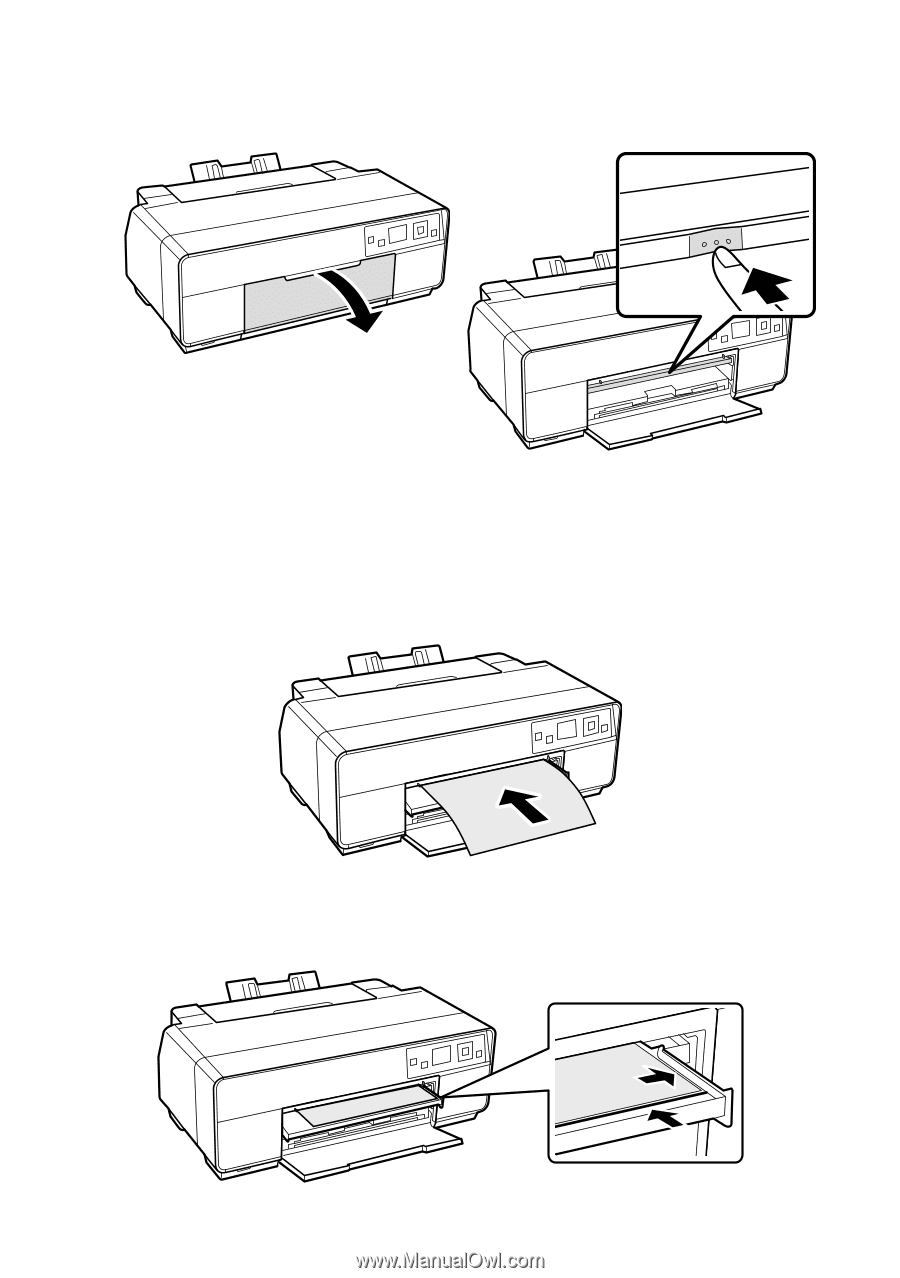
6.
Feed the paper up to the line on the tray. Make sure the paper is flush against
the right.