Epson Stylus Photo R300M Start Here Card - Page 2
Turn On the Printer - software
 |
View all Epson Stylus Photo R300M manuals
Add to My Manuals
Save this manual to your list of manuals |
Page 2 highlights
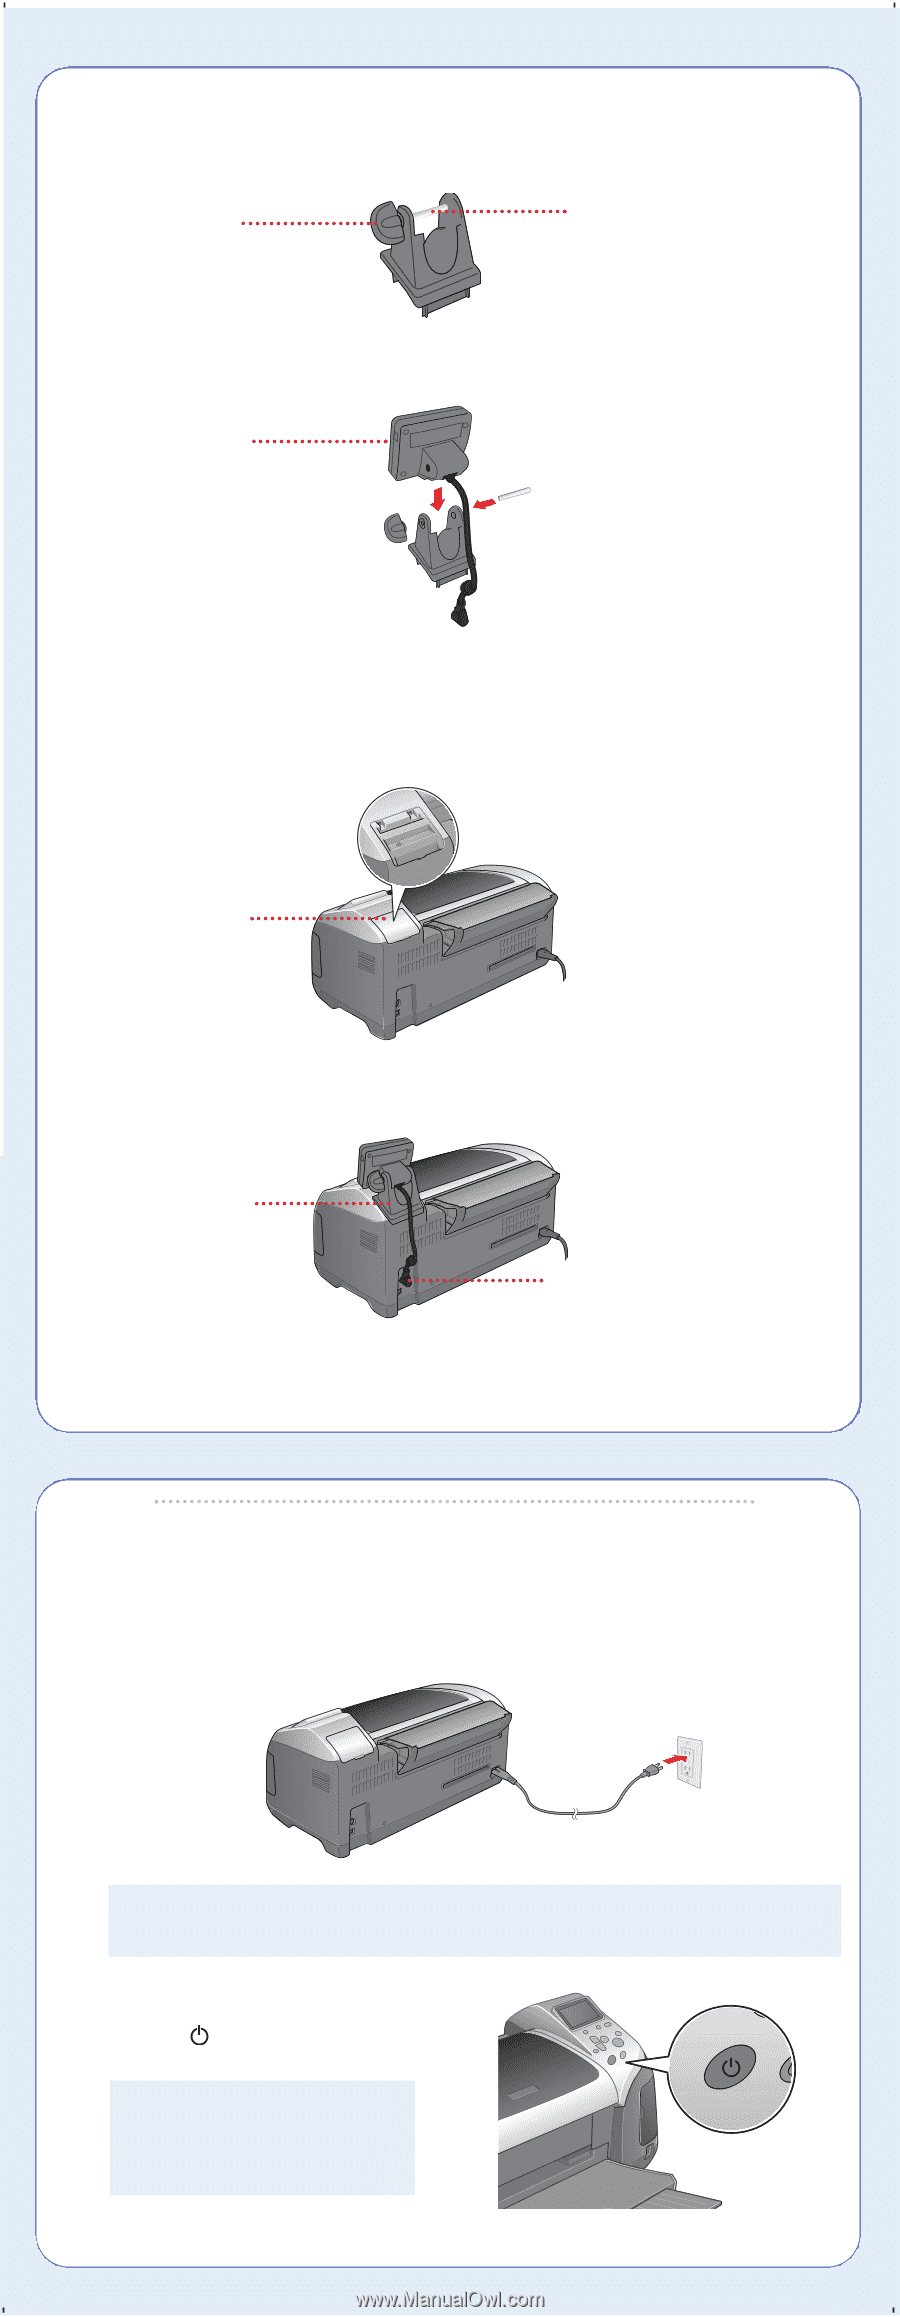
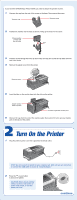
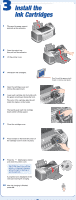
If you have the EPSON Stylus Photo R300M, you need to attach the preview monitor. 1 Unscrew the cap from the end of the screw on the base. Then remove the screw. Unscrew cap Remove screw 2 Position the monitor into the base as shown, lining up the holes for the screw. Place monitor in base and line up holes 3 Push the screw through the holes (it can fit only one way) and screw the cap back onto the end of the screw. 4 Remove the plastic cover from the printer. Remove cover 5 Insert the tabs on the monitor base into the slots on the printer. Attach monitor base to printer Connect to preview monitor port 6 Remove the cap from the end of the monitor cable, then connect it to the preview monitor port on the back of the printer. 2 Turn On the Printer 1 Plug the printer's power cord into a grounded electrical outlet. STOP: Do not connect the printer to your computer yet. Wait until you are instructed to connect the USB cable in section 5, "Install Software." 2 Press the power button to turn on the printer. CAUTION: Never use an external switch, such as a wall switch or power strip switch, to turn the printer on or off. continue
-
 1
1 -
 2
2 -
 3
3 -
 4
4 -
 5
5 -
 6
6
 |
 |