Epson Stylus Photo RX600 Product Information Guide - Page 5
Loading Special Papers, Envelopes - ink
 |
View all Epson Stylus Photo RX600 manuals
Add to My Manuals
Save this manual to your list of manuals |
Page 5 highlights
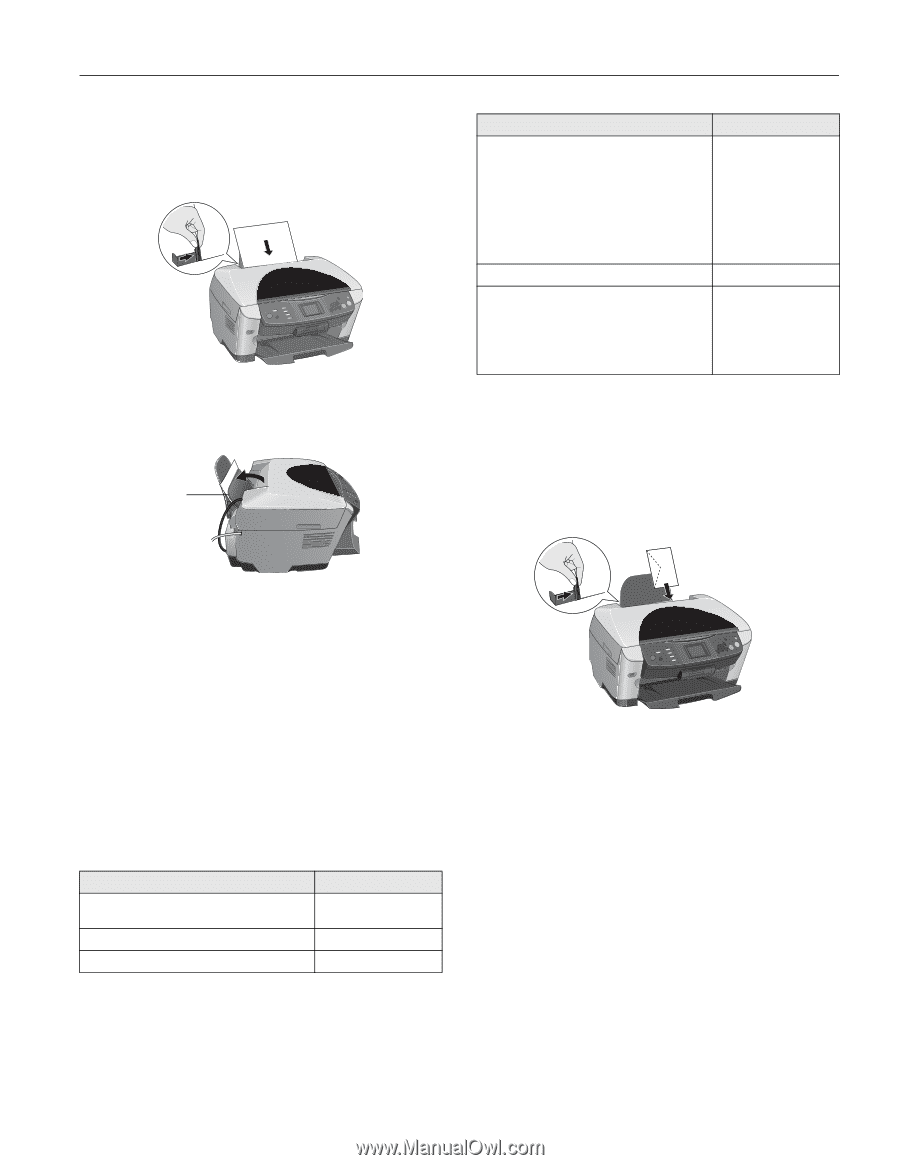
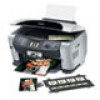
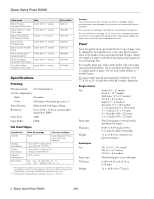
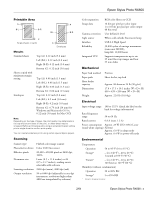
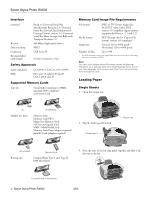
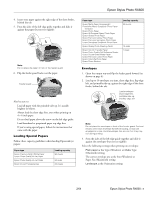
Epson Stylus Photo RX600 4. Insert your paper against the right edge of the sheet feeder, behind the tab. 5. Press the sides of the left edge guide together and slide it against the paper (but not too tightly). Note: Do not place the paper in front of the feeder guard. 6. Flip the feeder guard back over the paper. Feeder guard Also be sure to: ❏ Load all paper with the printable side up. It's usually brighter or whiter. ❏ Always load the short edge first, even when printing on 4 × 6 inch paper. ❏ Do not load paper above the arrow on the left edge guide. ❏ Load letterhead or preprinted paper top edge first. ❏ If you're using special paper, follow the instructions that came with the paper. Loading Special Papers Follow these capacity guidelines when loading Epson ink jet papers: Paper type Epson Premium Bright White Paper Epson Photo Quality Ink Jet Paper Epson Photo Quality Ink Jet Cards Epson Ink Jet Transparencies Loading capacity 80 sheets 30 cards 30 sheets Paper type Epson Matte Paper Heavyweight PremierArt Matte Scrapbook Photo Paper for Epson Epson Photo Paper Epson All-Purpose Glossy Photo Paper Epson Glossy Photo Paper Epson Premium Glossy Photo Paper Epson Premium Semigloss Photo Paper Epson Semigloss Scrapbook Photo Paper Epson Glossy Photo Greeting Cards Epson Iron-On Transfer Paper Epson Photo Quality Self Adhesive Sheets Epson Double-Sided Matte Paper Epson Premium Luster Photo Paper Epson ColorLife Photo Paper Epson Photo Stickers Loading capacity 20 sheets 10 cards 1 sheet Envelopes 1. Open the output tray and flip the feeder guard forward (as shown on page 4). 2. Load up to 10 envelopes at a time, short edge first, flap edge left, and printable side up, against the right edge of the sheet feeder, behind the tab. Load envelopes short edge first, printable side up, and flap edge left Note: Do not place the envelopes in front of the feeder guard. For best results, press each envelope flat before loading, or load one envelope at a time. Avoid envelopes that are too thin; they may curl during printing. 3. Press the sides of the left edge guide together and slide it against the envelopes (but not too tightly). Select the following settings when printing on envelopes: ❏ Plain paper as the Type (Windows) or Media Type (Macintosh) setting ❏ The correct envelope size as the Size (Windows) or Paper Size (Macintosh) setting ❏ Landscape as the Orientation setting 2/04 Epson Stylus Photo RX600 - 5
-
 1
1 -
 2
2 -
 3
3 -
 4
4 -
 5
5 -
 6
6 -
 7
7 -
 8
8 -
 9
9 -
 10
10 -
 11
11 -
12
-
13
-
14
-
15
-
16
-
17
-
18
 |
 |