Epson Stylus Pro 9000 Product Information Guide - Page 12
Transporting the Printer, resealable bags. - print head
 |
View all Epson Stylus Pro 9000 manuals
Add to My Manuals
Save this manual to your list of manuals |
Page 12 highlights
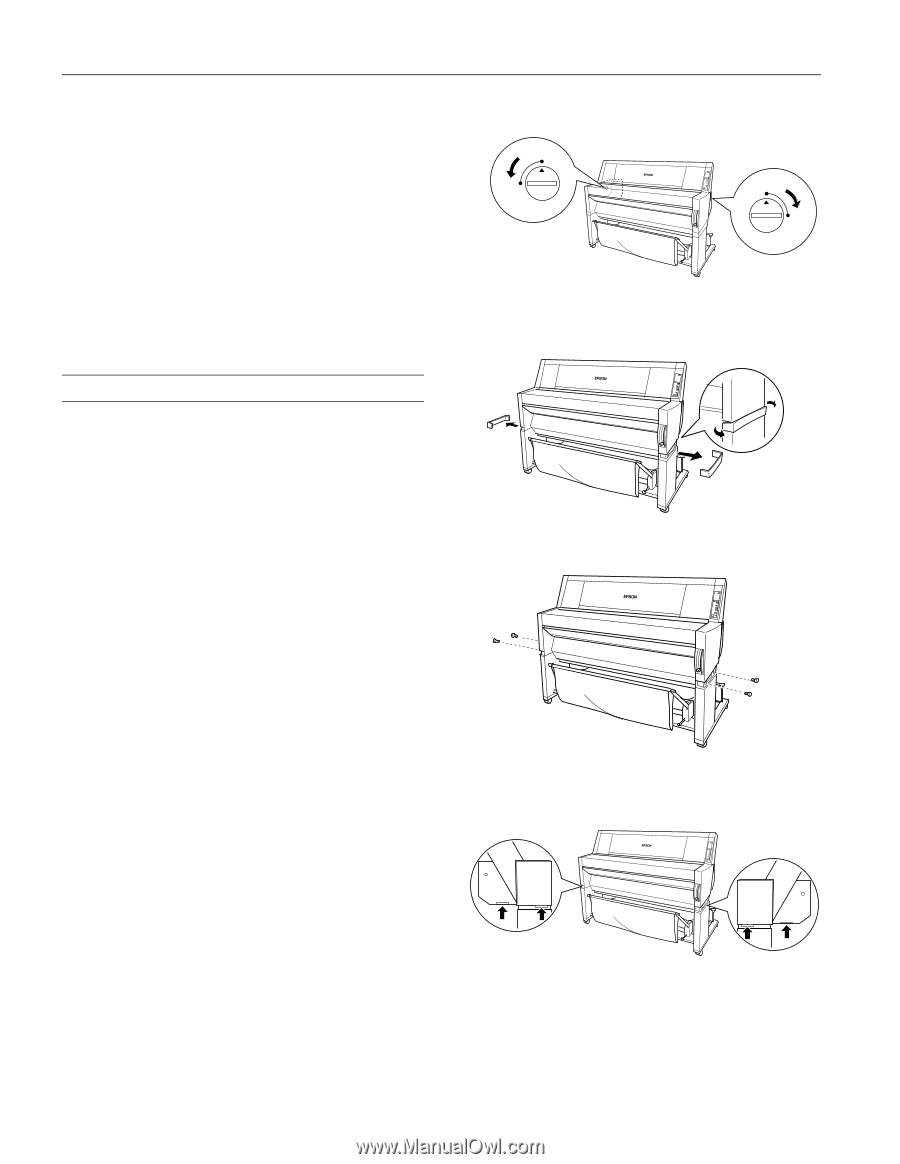
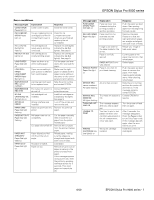
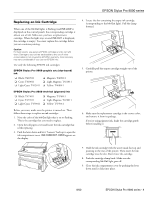
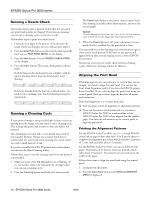
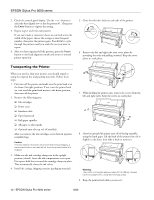
EPSON Stylus Pro 9000 series 2. Check the control panel display. Use the + or - button to select the best aligned row or line for pattern #1. Then press the Enter button to register the setting. 3. Repeat steps 1 and 2 for each pattern. If you can't make a consistent choice as you look across the width of the paper, choose the average or most frequent number, then print the pattern again. Press Enter to cycle through the patterns until you reach the one you want to repeat. 4. After you have registered all the patterns, press the Pause button to exit head alignment mode and return to normal printer operation. 5. Close the ink valve locks on each side of the printer. Open Close Open Close 6. Remove the left and right side joint cover plates by spreading the ends and pulling outward. Keep the cover plates in a safe place. Transporting the Printer When you need to ship your printer, you should repack it using the original box and packing materials. Follow these steps: 1. First turn off the printer and make sure the print head is in the home (far right) position. If not, turn the printer back on, wait until the print head moves to the home position, then turn off the printer. 2. Remove the following parts: ❏ Ink cartridges ❏ Power cord ❏ Interface cable ❏ Paper hammock ❏ Roll paper spindles ❏ All paper or other media ❏ Optional auto take-up reel (if installed) After you remove the ink cartridges, store them in separate, resealable bags. Caution: If for any reason the printer will not be level during shipping, a service technician must drain all ink from the printer before it is shipped. 3. Make sure the ink cartridge clamps are in the upright position (closed). Leave the ink compartment cover open. Use tape to hold the cover and the cartridge clamps in place. This automatically closes the ink valves. 4. Install the carriage shipping restraint (packaging material). 7. While holding the printer unit, remove the screws from the left and right sides. Keep the screws in a safe place. 8. Have four people lift printer unit off of the leg assembly, using the hand grips. Lift the back of the printer first, tilt it slightly to the front, then slide it back to remove it. Warning: The printer unit weighs approximately 212 lb (96 kg). Always have four people lift it, using the hand grip areas. 9. Keep the printer level while you move it. 12 - EPSON Stylus Pro 9000 series 8/00
-
 1
1 -
2
-
3
-
4
-
5
-
6
-
 7
7 -
 8
8 -
 9
9 -
 10
10 -
 11
11 -
 12
12 -
 13
13 -
 14
14
 |
 |