Epson Stylus Pro 9000 Product Information Guide - Page 8
SelecType Menu Map, Printing a Status Check, Checking Ink Levels and Component Life - parts
 |
View all Epson Stylus Pro 9000 manuals
Add to My Manuals
Save this manual to your list of manuals |
Page 8 highlights
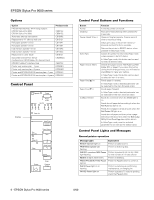
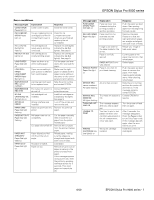
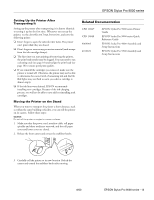
EPSON Stylus Pro 9000 series SelecType Menu Map The following illustration shows the SelecType™ menus, along with the settings available for each one. PRINTER SETTING MENU: PLATEN GAP PAGE LINE INTERFACE PARA. I/F CODE PAGE ROLL MARG PAPER SIZE CHK PAPER ALIGN CHK INIT. PANEL READY TEST PRINT MENU: NOZZLE CHECK STATUS CHECK PRINTER STATUS MENU: VERSION INK LEFT-K INK LEFT-C INK LEFT-M INK LEFT-LC INK LEFT-LM INK LEFT-Y CUTTER LIFE TOTAL PRINTS WASTE INK CR MOTOR PF MOTOR HEAD UNIT CLEANER HEAD ALIGNMENT MENU: PAPER THICK. ADJUST. PATT. #1 #2 #3 #4 #5 #6 #7 #8 #9 #10 #11 #12 CUTTER REPLACE MENU: CUT. REPLACE OPEN LOWER COVER REPLACE CUTTER CLOSE LOWER COVER PAPER CONFIG. MENU: PAPER NUMBER THICK. PAT. PAPER THICK. NO. DRYING TIME SUCTION Printing a Status Check The status check shows the current default settings, amount of ink remaining in each cartridge, page count, and the status of various printer parts. Follow these steps to print the status check: 1. Load a sheet of paper in the printer. (You can print test pages on roll paper, but you will waste paper.) 2. Press the SelecType button on the control panel. Press it repeatedly until you see TEST PRINT MENU on the display. 3. Press the Item button until you see STATUS CHECK=PRINT on the display. 4. Press the Enter button. The status check prints. The amount of ink left or component life is indicated as follows: E*****F = full (or full life remaining) E**** F = 3/4 full (or 3/4 life remaining) E*** F = 1/2 full (or 1/2 life remaining) E** F = 1/4 full (or 1/4 life remaining) E* F = nearly empty (or sevice life near end) E F = empty (or service life ended) 5. Press the SelecType button to exit the Test Print menu. Checking Ink Levels and Component Life You can view printer status information on the control panel display without printing a status check. Follow these steps: 1. Press the SelecType button on the control panel. Press it several times until you see PRINTER STATUS MENU on the display. 2. Press the Item button. You see VERSION on the display. This indicates the firmware version installed in your printer. 3. Continue pressing the Item button to display the amount remaining for each of the 6 inks or life remaining for a number of printer parts. The indicators read as follows: E*****F = full (or full life remaining) E**** F = 3/4 full (or 3/4 life remaining) E*** F = 1/2 full (or 1/2 life remaining) E** F = 1/4 full (or 1/4 life remaining) E* F = nearly empty (or service life near end) % F = less than 10% of ink or service life remaining Following is a list of the items displayed. Note that all parts on the list (except the ink cartridges and paper cutter) need to be replaced by an authorized EPSON service center. INK LEFT-K (black) INK LEFT-C (cyan) INK LEFT-M (magenta) INK LEFT-LC (light cyan) INK LEFT-LM (light magenta) INK LEFT-Y (yellow) CUTTER LIFE (paper cutter) TOTAL PRINTS WASTE INK (waste ink system) CR MOTOR (carriage motor) PF MOTOR (paper feed motor) HEAD UNIT (print head) CLEANER (cleaning unit) 4. Press the SelecType button to exit the Printer Status menu. 8 - EPSON Stylus Pro 9000 series 8/00
-
 1
1 -
2
-
 3
3 -
 4
4 -
 5
5 -
 6
6 -
 7
7 -
 8
8 -
 9
9 -
 10
10 -
 11
11 -
 12
12 -
 13
13 -
14
 |
 |
