Epson Stylus Pro 9880 UltraChrome User's Guide - Page 110
Choosing Advanced Black and White Photo Settings, setting that corresponds to the paper you are
 |
View all Epson Stylus Pro 9880 UltraChrome manuals
Add to My Manuals
Save this manual to your list of manuals |
Page 110 highlights
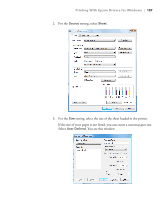
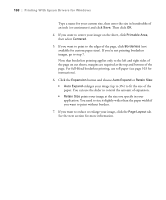
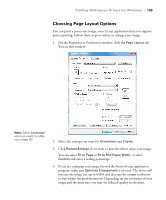
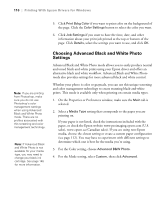
110 | Printing With Epson Drivers for Windows 5. Click Print Bckg Color if you want to print color on the background of the page. Click the Color Settings button to select the color you want. 6. Click Job Settings if you want to have the time, date, and other information about your print job printed at the top or bottom of the page. Click Details, select the settings you want to use, and click OK. Note: If you are printing from Photoshop, make sure you do not use Photoshop's color management settings when using Advanced Black and White Photo mode. There are no profiles associated with this screening and color management technology. Note: If Advanced Black and White Photo is not available for your media type, you may need to change your black ink cartridge. See page 145 for more information. Choosing Advanced Black and White Photo Settings Advanced Black and White Photo mode allows you to easily produce neutral and toned black-and-white prints using your Epson driver and offers an alternative black and white workflow. Advanced Black and White Photo mode also provides settings for more advanced black and white control. Whether your photo is color or grayscale, you can use this unique screening and color management technology to create stunning black-and-white prints. This mode is available only when printing on certain media types. 1. On the Properties or Preferences window, make sure the Main tab is selected. 2. Select a Media Type setting that corresponds to the paper you are printing on. If your paper is not listed, check the instructions included with the paper, or check the Epson website www.proimaging.epson.com (U.S. sales), www.epson.ca (Canadian sales). If you are using non-Epson media, choose the closest setting or create a custom paper configuration (see page 112). You may have to experiment with different settings to determine which one is best for the media you're using. 3. For the Color setting, choose Advanced B&W Photo. 4. For the Mode setting, select Custom, then click Advanced. 110
-
 1
1 -
2
-
3
-
4
-
5
-
6
-
7
-
8
-
9
-
10
-
11
-
12
-
13
-
14
-
15
-
16
-
17
-
18
-
19
-
20
-
21
-
22
-
23
-
24
-
25
-
26
-
27
-
28
-
29
-
30
-
31
-
32
-
33
-
34
-
35
-
36
-
37
-
38
-
39
-
40
-
41
-
42
-
43
-
44
-
45
-
46
-
47
-
48
-
49
-
50
-
51
-
52
-
53
-
54
-
55
-
56
-
57
-
58
-
59
-
60
-
61
-
62
-
63
-
64
-
65
-
66
-
67
-
68
-
69
-
70
-
71
-
72
-
73
-
74
-
75
-
76
-
77
-
78
-
79
-
80
-
81
-
82
-
83
-
84
-
85
-
86
-
87
-
88
-
89
-
90
-
91
-
92
-
93
-
94
-
95
-
96
-
97
-
98
-
99
-
100
-
101
-
102
-
103
-
104
-
 105
105 -
 106
106 -
 107
107 -
 108
108 -
 109
109 -
 110
110 -
 111
111 -
 112
112 -
 113
113 -
 114
114 -
 115
115 -
116
-
117
-
118
-
119
-
120
-
121
-
122
-
123
-
124
-
125
-
126
-
127
-
128
-
129
-
130
-
131
-
132
-
133
-
134
-
135
-
136
-
137
-
138
-
139
-
140
-
141
-
142
-
143
-
144
-
145
-
146
-
147
-
148
-
149
-
150
-
151
-
152
-
153
-
154
-
155
-
156
-
157
-
158
-
159
-
160
-
161
-
162
-
163
-
164
-
165
-
166
-
167
-
168
-
169
-
170
-
171
-
172
-
173
-
174
-
175
-
176
-
177
-
178
-
179
-
180
-
181
-
182
-
183
-
184
-
185
-
186
-
187
-
188
-
189
-
190
-
191
-
192
-
193
-
194
-
195
-
196
-
197
-
198
-
199
-
200
-
201
-
202
-
203
-
204
-
205
-
206
-
207
-
208
-
209
-
210
-
211
-
212
-
213
-
214
-
215
-
216
-
217
-
218
 |
 |