Epson Stylus Pro Product Information Guide - Page 11
Loading Special Papers and Transparencies, Loading Envelopes and Heavy Paper, Ink Jet Printers - 360
 |
View all Epson Stylus Pro manuals
Add to My Manuals
Save this manual to your list of manuals |
Page 11 highlights
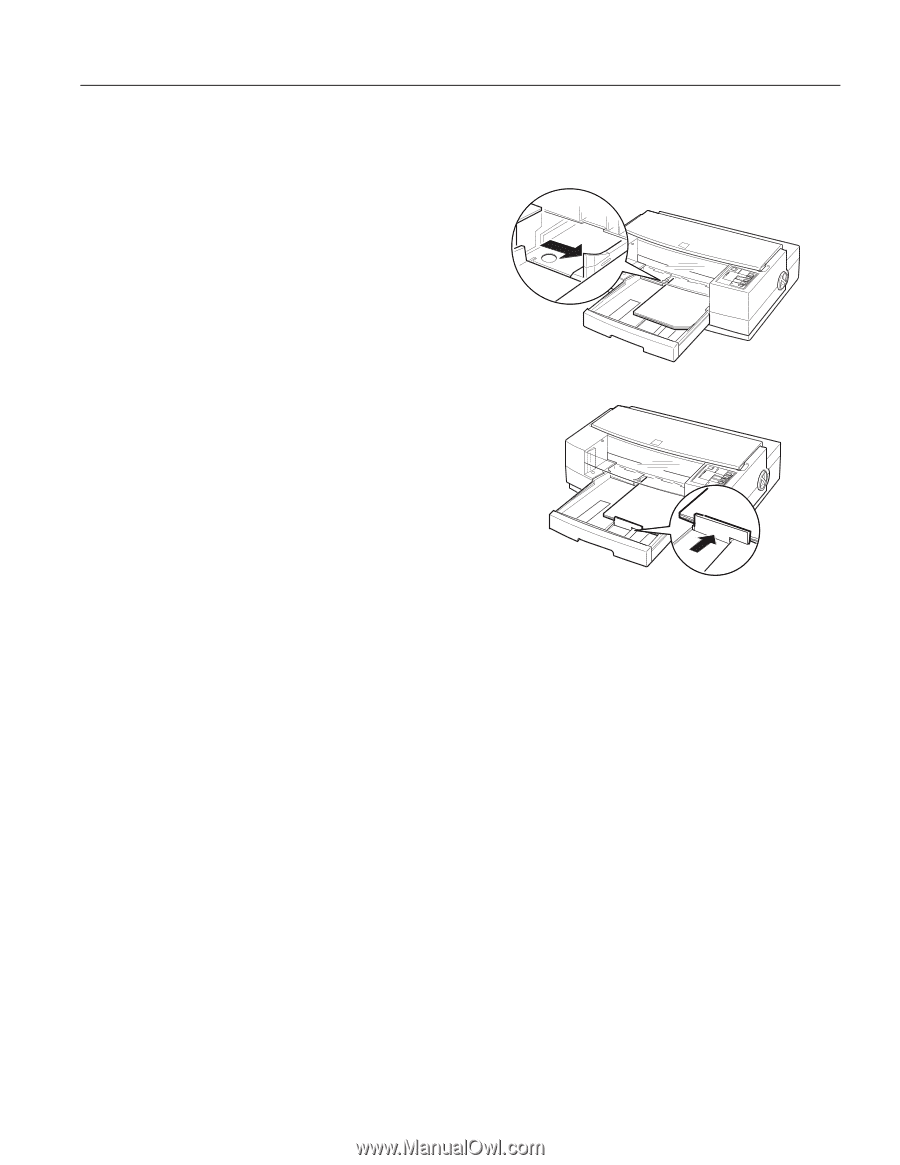
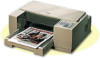
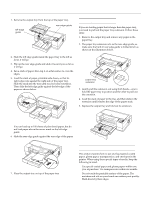
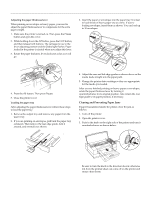
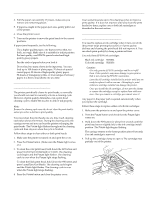
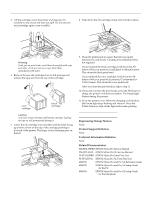
EPSON Stylus Pro and Pro XL t Be sure to load paper with the printable surface face down. The printable side is whiter than the other, and is usually identified on the package. t When printing on high-quality glossy paper or transparencies, remove each sheet from the output tray immediately after it is printed. Make sure each sheet is dry before stacking. t Return unused sheets to their original package as soon as possible after you finish printing. Unfavorable storage conditions-especially high temperature, humidity, and direct sunlight-can damage the media. t Remember to select the appropriate setting in the driver software before you print. t If the paper doesn't feed properly or jams, see the later section on clearing and preventing paper jams. Loading Special Papers and Transparencies Follow these guidelines when printing on coated paper, glossy paper, or transparencies: t Use special coated paper for 360 or 720 dpi or transparencies only under these normal operating conditions: Temperature: 59° to 77° F (15° to 25° C) Humidity: 40% to 60% RH t When printing on glossy paper, remove each sheet from the output tray as soon as it is printed and do not stack sheets until they are completely dry. The paper tray can hold 70 sheets of coated paper, 30 sheets of high-quality glossy paper, or 50 transparencies. Follow these steps to load special papers and transparencies: 1. Remove the output tray from the top of the paper tray. 2. Slide the left edge guide inside the paper tray to the left as far as it will go and slide the rear edge guide toward the front of the printer as far as it will go. 3. Fan a stack of paper; then tap it on a flat surface to even the edges. 4. Before you load paper, make sure the printable surface is face down. For coated papers, the printable side is whiter than the other side. For glossy paper and transparencies, the printable side is face down when the cut corner is positioned as shown in the following illustration. Load the paper or transparencies firmly against the right side of the paper tray. Slide the stack into the tray until you feel some resistance. Then slide the left edge guide against the left edge of the paper stack. 5. Slide the rear edge guide against the rear edge of the paper. 6. Change the printer driver settings to match the paper or transparencies you loaded. Loading Envelopes and Heavy Paper This section explains how to load envelopes and heavy paper. When printing, follow these guidelines: t Do not use envelopes that are curled, folded, or bent. t Do not use envelopes that are too thin; they may curl during printing. t Do not choose 720 dpi resolution for envelope printing. t If you are using a DOS application, you may be able to select 720 dpi if your DOS program supports 720 dpi printing. You can select from Bi-D, Uni-D, or Auto print directions using the Default setting mode. The Uni-D setting is recommended when printing at 720 dpi. t When loading heavy paper (paper that is thick or stiff), it is recommended that you load one sheet at a time. Ink Jet Printers 8/1/95 EPSON Stylus Pro and Pro XL-11
-
 1
1 -
2
-
3
-
4
-
5
-
 6
6 -
 7
7 -
 8
8 -
 9
9 -
 10
10 -
 11
11 -
 12
12 -
 13
13 -
 14
14
 |
 |