Epson Stylus Pro Product Information Guide - Page 9
CALIBRATING THE PRINTER, Using a PC, Using a Macintosh, LOADING PLAIN PAPER
 |
View all Epson Stylus Pro manuals
Add to My Manuals
Save this manual to your list of manuals |
Page 9 highlights
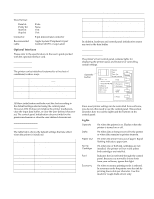
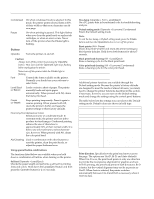
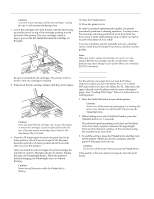
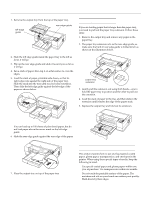
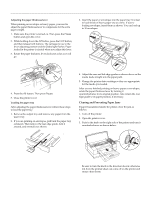
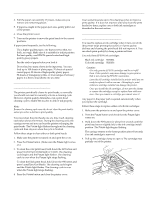
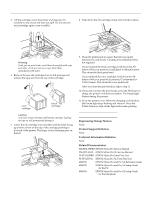
EPSON Stylus Pro and Pro XL Calibrating the Printer The printer is calibrated at the factory so that vertical lines in your text and graphics are properly aligned. If you notice misaligned images in printouts, however, calibrate the printer with the Bi-D Calibration Utility. You may need to do this after moving the printer to a new location, for example. Using a PC Follow these steps to calibrate the printer using a PC: 1. If you did not install the Bi-D Calibration Utility on the hard disk, insert the Windows printer driver diskette in your computer's diskette drive. 2. Make sure Windows Program Manager is running. 3. Choose Run from the File menu. The Run dialog box appears. 4. Type the directory name where the utility is located. For example, type A:CALIBRAT (or C:\directory\CALIBRAT if on your hard disk). Then press Enter. 5. When you see the Calibration Utility screen, make sure Stylus Pro or Pro XL is selected as the printer. If it isn't, use ↑ or ↓ to select it. Also make sure Print calibration pattern is selected at the bottom of the screen. (Use the Tab key to move down, if necessary.) 6. Press Enter to start calibrating. 7. The next screen prompts you to align the black and color heads. Press Enter to choose Yes. (To align only the black print head, press Tab to select No.) Wait for 1 minute while the printer prints a page of multiple patterns of vertical lines, each identified by an offset value. In most patterns, the vertical lines are slightly misaligned. Look for the pattern that is most closely aligned. | | Aligned | | Not aligned 8. Enter the offset value of the pattern that is most closely aligned. The printer prints a confirmation sheet with the offset value for the pattern you selected. 9. If the lines are not aligned, press Tab to move to Re-Align; then press Enter to repeat the calibration. 10.When you are satisfied with the alignment, press Enter to select Done. Using a Macintosh Follow these steps to calibrate the printer using a Macintosh: 1. Open the Stylus COLOR folder and double-click Bi-D Calibration Utility. 2. You see a prompt asking you to choose the interface type. Click Serial or Network, as appropriate. 3. You see the Bi-D Calibration Utility screen. First specify whether you connected the printer to the modem or printer port by clicking the appropriate icon. 4. Click the Pattern 1 button to align the print heads using the first pattern page. Wait for about two minutes while the printer prints a page containing multiple patterns of vertical lines, each assigned with an offset value. In most patterns, the vertical lines are slightly misaligned. Look for the pattern that is most closely aligned. | | Aligned | | Not aligned 5. Enter the offset value of the pattern that is most closely aligned in the No. box and click OK. The printer prints a confirmation page. 6. Repeat steps 4 and 5, selecting the Pattern 2 through Pattern 5 buttons and entering the offset value of the pattern that is most closely aligned on each pattern page. 7. When you finish, click Quit. If you notice later that the vertical alignment of your printed pages is off, repeat the calibration procedure. Loading Plain Paper The following procedure describes how to load plain bond paper. You can load up to 100 sheets of plain paper. For information on loading oversized paper or special types of media, see the next sections. Always load paper with the printable surface down. The printable surface is marked with an arrow on most plain paper packaging. Ink Jet Printers 8/1/95 EPSON Stylus Pro and Pro XL-9
-
 1
1 -
2
-
3
-
 4
4 -
 5
5 -
 6
6 -
 7
7 -
 8
8 -
 9
9 -
 10
10 -
 11
11 -
 12
12 -
 13
13 -
 14
14
 |
 |
