Epson SureColor F6070 User Manual - Page 77
Cutter Maintenance, Replace Cutter, See Removing Roll Paper
 |
View all Epson SureColor F6070 manuals
Add to My Manuals
Save this manual to your list of manuals |
Page 77 highlights
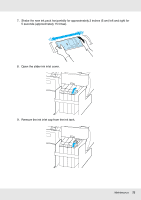
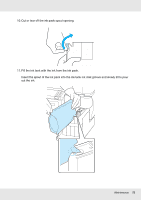
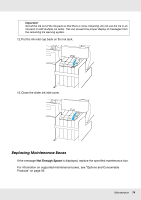
Buttons that are used in the following settings: 1. Remove any paper from the printer. See "Removing Roll Paper" on page 33. 2. Confirm that the printer is ready to print. Press the l/r buttons to highlight - and press the OK button. The Maintenance menu will be displayed. 3. Press the d/u buttons to highlight Cutter Maintenance and press the OK button. 4. Press the d/u buttons to highlight Replace Cutter and press the OK button. 5. The cutter will move to the replacement position. 6. Remove the old cutter from the printer. Loosen the screw holding the cutter in place using a cross-head screwdriver and pull the cutter straight out. Maintenance 77
-
 1
1 -
2
-
3
-
4
-
5
-
6
-
7
-
8
-
9
-
10
-
11
-
12
-
13
-
14
-
15
-
16
-
17
-
18
-
19
-
20
-
21
-
22
-
23
-
24
-
25
-
26
-
27
-
28
-
29
-
30
-
31
-
32
-
33
-
34
-
35
-
36
-
37
-
38
-
39
-
40
-
41
-
42
-
43
-
44
-
45
-
46
-
47
-
48
-
49
-
50
-
51
-
52
-
53
-
54
-
55
-
56
-
57
-
58
-
59
-
60
-
61
-
62
-
63
-
64
-
65
-
66
-
67
-
68
-
69
-
70
-
71
-
 72
72 -
 73
73 -
 74
74 -
 75
75 -
 76
76 -
 77
77 -
 78
78 -
 79
79 -
 80
80 -
 81
81 -
 82
82 -
83
-
84
-
85
-
86
-
87
-
88
-
89
-
90
-
91
-
92
-
93
-
94
-
95
-
96
-
97
-
98
-
99
-
100
-
101
-
102
-
103
-
104
-
105
-
106
-
107
-
108
-
109
-
110
-
111
 |
 |
Maintenance
77
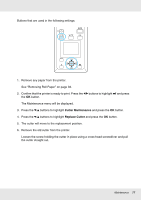
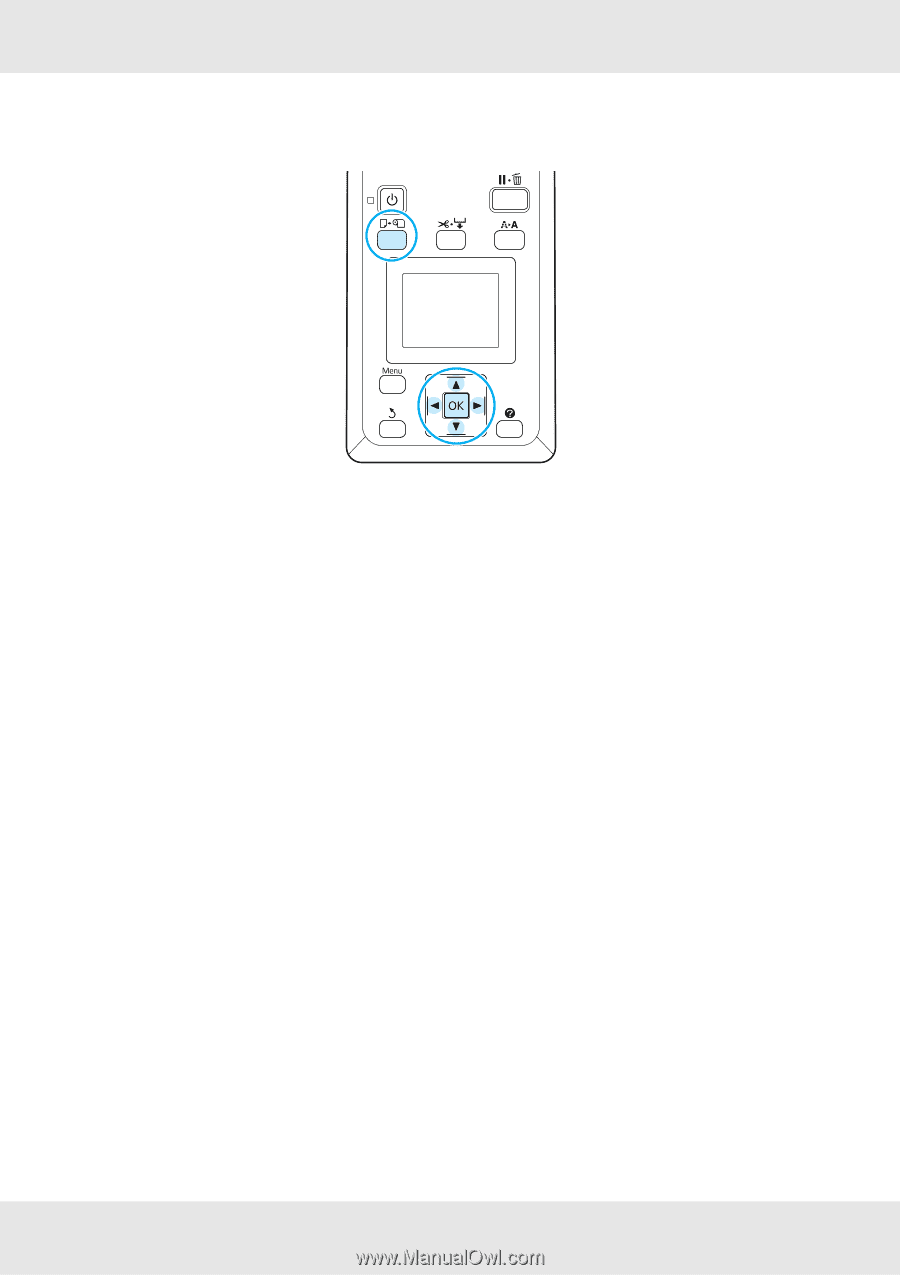
Buttons that are used in the following settings:
1.
Remove any paper from the printer.
See “Removing Roll Paper” on page 33.
2.
Confirm that the printer is ready to print. Press the
l
/
r
buttons to highlight
-
and press
the
OK
button.
The Maintenance menu will be displayed.
3.
Press the
d
/
u
buttons to highlight
Cutter Maintenance
and press the
OK
button.
4.
Press the
d
/
u
buttons to highlight
Replace Cutter
and press the
OK
button.
5.
The cutter will move to the replacement position.
6.
Remove the old cutter from the printer.
Loosen the screw holding the cutter in place using a cross-head screwdriver and pull
the cutter straight out.