Epson T3270 User Manual - Page 38
Performing a Test Print, Aligning the Print Head
 |
View all Epson T3270 manuals
Add to My Manuals
Save this manual to your list of manuals |
Page 38 highlights
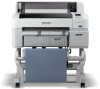
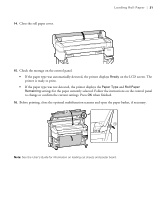
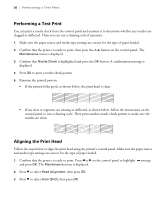
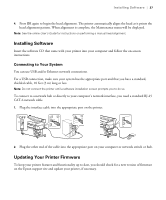
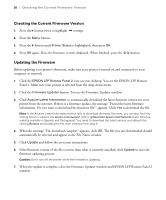
36 | Performing a Test Print Performing a Test Print You can print a nozzle check from the control panel and examine it to determine whether any nozzles are clogged or deflected. Then you can run a cleaning cycle if necessary. 1. Make sure the paper source and media type settings are correct for the type of paper loaded. 2. Confirm that the printer is ready to print, then press the Maintenance menu is displayed. button on the control panel. The 3. Confirm that Nozzle Check is highlighted and press the OK button. A confirmation message is displayed. 4. Press OK to print a nozzle check pattern. 5. Examine the printed pattern. • If the pattern looks good, as shown below, the print head is clean. • If any dots or segments are missing or deflected, as shown below, follow the instructions on the control panel to run a cleaning cycle. Then print another nozzle check pattern to make sure the nozzles are clean. Aligning the Print Head Follow the steps below to align the print head using the printer's control panel. Make sure the paper source and media type settings are correct for the type of paper loaded. 1. Confirm that the printer is ready to print. Press l or r on the control panel to highlight settings and press OK. The Maintenance menu is displayed. 2. Press d to select Head Alignment, then press OK. 3. Press d to select Auto (Bi-D), then press OK.
-
 1
1 -
2
-
3
-
4
-
5
-
6
-
7
-
8
-
9
-
10
-
11
-
12
-
13
-
14
-
15
-
16
-
17
-
18
-
19
-
20
-
21
-
22
-
23
-
24
-
25
-
26
-
27
-
28
-
29
-
30
-
31
-
32
-
 33
33 -
 34
34 -
 35
35 -
 36
36 -
 37
37 -
 38
38 -
 39
39 -
 40
40 -
 41
41 -
 42
42 -
 43
43 -
44
-
45
-
46
-
47
-
48
-
49
-
50
-
51
-
52
-
53
-
54
-
55
-
56
-
57
-
58
-
59
-
60
-
61
-
62
-
63
-
64
-
65
-
66
-
67
-
68
-
69
-
70
-
71
-
72
-
73
-
74
-
75
-
76
-
77
-
78
-
79
-
80
-
81
-
82
-
83
-
84
-
85
-
86
-
87
-
88
-
89
-
90
-
91
-
92
-
93
-
94
-
95
-
96
-
97
-
98
-
99
-
100
-
101
-
102
-
103
-
104
-
105
-
106
-
107
-
108
-
109
-
110
-
111
-
112
-
113
-
114
-
115
-
116
-
117
-
118
-
119
-
120
-
121
-
122
-
123
 |
 |