Epson T3270 User Manual - Page 39
Installing Software, Connecting to Your System, Updating Your Printer Firmware
 |
View all Epson T3270 manuals
Add to My Manuals
Save this manual to your list of manuals |
Page 39 highlights
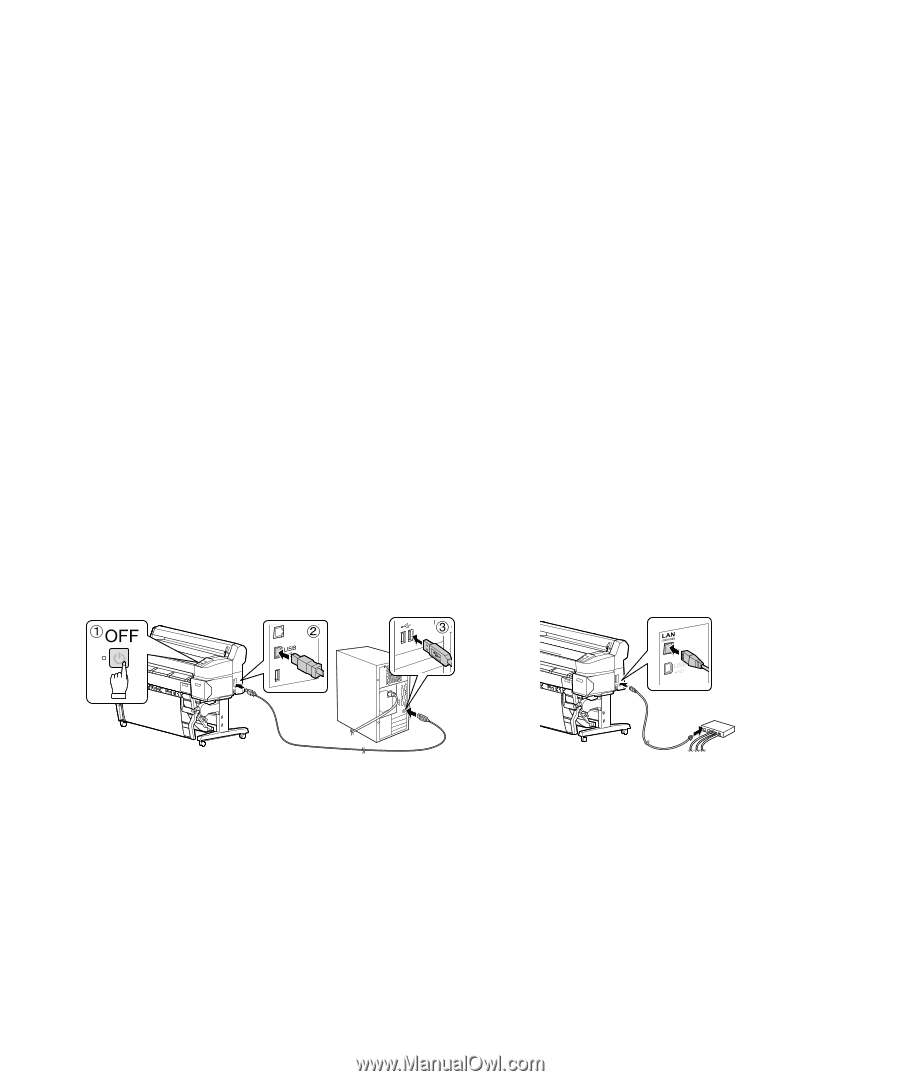
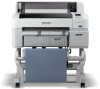
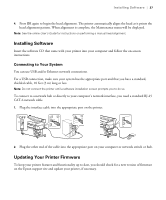
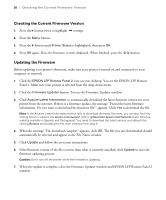
Installing Software | 37 4. Press OK again to begin the head alignment. The printer automatically aligns the head as it prints the head alignment pattern. When alignment is complete, the Maintenance menu will be displayed. Note: See the online User's Guide for instructions on performing a manual head alignment. Installing Software Insert the software CD that came with your printer into your computer and follow the on-screen instructions. Connecting to Your System You can use USB and/or Ethernet network connections. For a USB connection, make sure your system has the appropriate port and that you have a standard, shielded cable, 10 feet (3 m) long or less. Note: Do not connect the printer until a software installation screen prompts you to do so. To connect to a network hub or directly to your computer's network interface, you need a standard RJ-45 CAT-6 network cable. 1. Plug the interface cable into the appropriate port on the printer. 2. Plug the other end of the cable into the appropriate port on your computer or network switch or hub. Updating Your Printer Firmware To keep your printer features and functionality up to date, you should check for a new version of firmware on the Epson support site and update your printer, if necessary.
-
 1
1 -
2
-
3
-
4
-
5
-
6
-
7
-
8
-
9
-
10
-
11
-
12
-
13
-
14
-
15
-
16
-
17
-
18
-
19
-
20
-
21
-
22
-
23
-
24
-
25
-
26
-
27
-
28
-
29
-
30
-
31
-
32
-
33
-
 34
34 -
 35
35 -
 36
36 -
 37
37 -
 38
38 -
 39
39 -
 40
40 -
 41
41 -
 42
42 -
 43
43 -
 44
44 -
45
-
46
-
47
-
48
-
49
-
50
-
51
-
52
-
53
-
54
-
55
-
56
-
57
-
58
-
59
-
60
-
61
-
62
-
63
-
64
-
65
-
66
-
67
-
68
-
69
-
70
-
71
-
72
-
73
-
74
-
75
-
76
-
77
-
78
-
79
-
80
-
81
-
82
-
83
-
84
-
85
-
86
-
87
-
88
-
89
-
90
-
91
-
92
-
93
-
94
-
95
-
96
-
97
-
98
-
99
-
100
-
101
-
102
-
103
-
104
-
105
-
106
-
107
-
108
-
109
-
110
-
111
-
112
-
113
-
114
-
115
-
116
-
117
-
118
-
119
-
120
-
121
-
122
-
123
 |
 |