Epson TM-T20II Users Manual Software - Page 22
Custom Install, Displaying the Select Software Screen
 |
View all Epson TM-T20II manuals
Add to My Manuals
Save this manual to your list of manuals |
Page 22 highlights
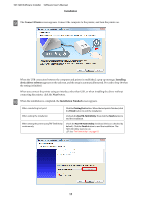
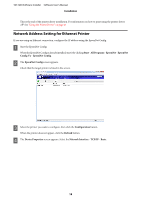
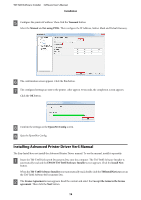
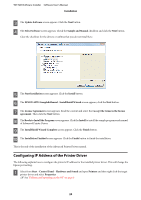
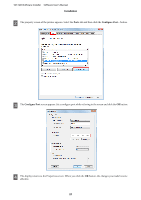
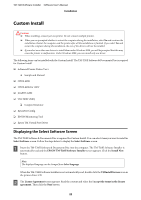
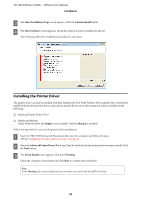
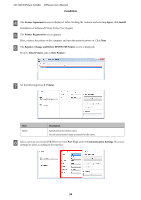
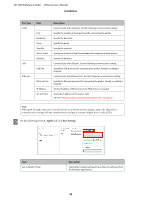
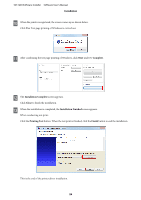
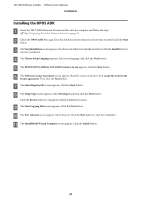
TM-T20II Software Installer Software User's Manual Installation Custom Install !Caution: ❏ When installing, connect just one printer. Do not connect multiple printers. ❏ When you are prompted whether to restart the computer during the installation, select No and continue the installation. Restart the computer and the printer after all the installation is finished. If you select Yes and restart the computer during the installation, the rest of the drivers will not be installed. ❏ If you select more than one drivers to install them under Windows 2000, you will be prompted that this may cause the printer to malfunction. Under Windows 2000, you can install only one driver. The following items can be installed with the Custom Install. The TM-T20II Software & Documents Disc is required for Custom Install ❏ Advanced Printer Driver Ver.5 ❏ Sample and Manual ❏ OPOS ADK ❏ OPOS ADK for .NET ❏ JavaPOS ADK ❏ TM-T20II Utility ❏ Coupon Generator ❏ EpsonNet Config ❏ EPSON Monitoring Tool ❏ Epson TM Virtual Port Driver Displaying the Select Software Screen The TM-T20II Software & Documents Disc is required for Custom Install. You can select items you want to install in Select Software screen. Follow the steps below to display the Select Software screen. A Insert the TM-T20II Software & Documents Disc into the computer. The TM-T20II Software Installer is automatically read and the EPSON TM-T20II Software Installer screen appears. Click the Install Now button. Note: The displayed language can be changed from Select language. When the TM-T20II Software Installer is not automatically read, double click the TMInstallNavi.exe icon in the printer driver CD. B The License Agreement screen appears. Read the content and select the I accept the terms in the license agreement. Then click the Next button. 22
-
 1
1 -
2
-
3
-
4
-
5
-
6
-
7
-
8
-
9
-
10
-
11
-
12
-
13
-
14
-
15
-
16
-
 17
17 -
 18
18 -
 19
19 -
 20
20 -
 21
21 -
 22
22 -
 23
23 -
 24
24 -
 25
25 -
 26
26 -
 27
27 -
28
-
29
-
30
-
31
-
32
-
33
-
34
-
35
-
36
-
37
-
38
-
39
-
40
-
41
-
42
-
43
-
44
-
45
-
46
-
47
-
48
-
49
-
50
-
51
-
52
-
53
-
54
-
55
-
56
-
57
-
58
-
59
-
60
-
61
-
62
-
63
-
64
-
65
-
66
-
67
-
68
-
69
-
70
-
71
-
72
-
73
-
74
-
75
-
76
-
77
-
78
-
79
-
80
-
81
-
82
-
83
-
84
-
85
-
86
-
87
 |
 |