Epson WF-8090 Users Guide - Page 89
System Preferences, Print & Fax, Printers & Scanners, Options, & Supplies, Driver
 |
View all Epson WF-8090 manuals
Add to My Manuals
Save this manual to your list of manuals |
Page 89 highlights
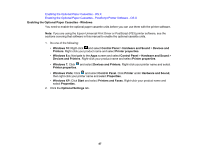
Note: If you are using the PostScript (PS3) printer software, see the section covering that software to enable the optional cassette units. 1. In the Apple menu or the Dock, select System Preferences. 2. Select Print & Fax, Print & Scan, or Printers & Scanners, select your product, and select Options & Supplies. 3. Select Driver or Options. You see a screen like this: 4. Select the number of optional cassette units installed for the Lower Cassette setting. 5. Click OK. The optional paper cassettes are now enabled. Parent topic: Installing the Optional Paper Cassette Units Related tasks Enabling the Optional Paper Cassettes - PostScript Printer Software - OS X 89
-
 1
1 -
2
-
3
-
4
-
5
-
6
-
7
-
8
-
9
-
10
-
11
-
12
-
13
-
14
-
15
-
16
-
17
-
18
-
19
-
20
-
21
-
22
-
23
-
24
-
25
-
26
-
27
-
28
-
29
-
30
-
31
-
32
-
33
-
34
-
35
-
36
-
37
-
38
-
39
-
40
-
41
-
42
-
43
-
44
-
45
-
46
-
47
-
48
-
49
-
50
-
51
-
52
-
53
-
54
-
55
-
56
-
57
-
58
-
59
-
60
-
61
-
62
-
63
-
64
-
65
-
66
-
67
-
68
-
69
-
70
-
71
-
72
-
73
-
74
-
75
-
76
-
77
-
78
-
79
-
80
-
81
-
82
-
83
-
 84
84 -
 85
85 -
 86
86 -
 87
87 -
 88
88 -
 89
89 -
 90
90 -
 91
91 -
 92
92 -
 93
93 -
 94
94 -
95
-
96
-
97
-
98
-
99
-
100
-
101
-
102
-
103
-
104
-
105
-
106
-
107
-
108
-
109
-
110
-
111
-
112
-
113
-
114
-
115
-
116
-
117
-
118
-
119
-
120
-
121
-
122
-
123
-
124
-
125
-
126
-
127
-
128
-
129
-
130
-
131
-
132
-
133
-
134
-
135
-
136
-
137
-
138
-
139
-
140
-
141
-
142
-
143
-
144
-
145
-
146
-
147
-
148
-
149
-
150
-
151
-
152
-
153
-
154
-
155
-
156
-
157
-
158
-
159
-
160
-
161
-
162
-
163
-
164
-
165
-
166
-
167
-
168
-
169
-
170
-
171
-
172
-
173
-
174
-
175
-
176
-
177
-
178
-
179
-
180
-
181
-
182
-
183
-
184
-
185
-
186
-
187
-
188
-
189
-
190
-
191
-
192
-
193
-
194
-
195
-
196
-
197
-
198
-
199
-
200
-
201
-
202
-
203
-
204
-
205
-
206
-
207
-
208
-
209
-
210
-
211
-
212
-
213
-
214
-
215
-
216
-
217
-
218
-
219
-
220
-
221
-
222
-
223
-
224
-
225
-
226
-
227
-
228
-
229
-
230
-
231
-
232
-
233
-
234
-
235
-
236
-
237
-
238
-
239
-
240
-
241
-
242
-
243
-
244
-
245
-
246
-
247
-
248
-
249
-
250
-
251
-
252
-
253
-
254
-
255
-
256
-
257
-
258
-
259
-
260
-
261
-
262
-
263
-
264
-
265
-
266
-
267
-
268
-
269
-
270
-
271
-
272
-
273
-
274
-
275
-
276
-
277
-
278
-
279
-
280
-
281
-
282
-
283
-
284
-
285
-
286
-
287
-
288
-
289
-
290
-
291
-
292
-
293
-
294
-
295
-
296
-
297
-
298
-
299
-
300
-
301
-
302
-
303
-
304
-
305
-
306
-
307
-
308
-
309
-
310
-
311
-
312
-
313
-
314
-
315
-
316
 |
 |

89
Note:
If you are using the PostScript (PS3) printer software, see the section covering that software to
enable the optional cassette units.
1.
In the Apple menu or the Dock, select
System Preferences
.
2.
Select
Print & Fax
,
Print & Scan
, or
Printers & Scanners
, select your product, and select
Options
& Supplies
.
3.
Select
Driver
or
Options
.
You see a screen like this:
4.
Select the number of optional cassette units installed for the
Lower Cassette
setting.
5.
Click
OK
.
The optional paper cassettes are now enabled.
Parent topic:
Installing the Optional Paper Cassette Units
Related tasks
Enabling the Optional Paper Cassettes - PostScript Printer Software - OS X