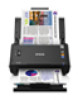
Epson WorkForce DS-520 User Manual - Page 30
Using the Network Interface Unit, Network Interface Unit Control Panel, Reset, Parent topic
 |
View all Epson WorkForce DS-520 manuals
Add to My Manuals
Save this manual to your list of manuals |
Page 30 highlights
Using the Network Interface Unit See these sections to use the optional Epson Network Interface Unit to scan over a network. Network Interface Unit Control Panel Connecting the Network Interface Unit Setting Up Network Scanning Scanning to Network Computers from the Network Interface Unit - Windows Network Interface Unit Control Panel 1 The power button (turns the unit on and off) 2 The LCD screen (displays status, operations, and error messages) 3 The settings button (selects product settings, network settings, and maintenance options) 4 The Reset button (returns the LCD to the default screen) 5 The Stop button (cancels scanning) 6 The OK button and arrows (use the arrows to highlight an option and the OK button to select it) 7 The start button (starts scanning when networking is enabled) Parent topic: Using the Network Interface Unit 30
-
 1
1 -
2
-
3
-
4
-
5
-
6
-
7
-
8
-
9
-
10
-
11
-
12
-
13
-
14
-
15
-
16
-
17
-
18
-
19
-
20
-
21
-
22
-
23
-
24
-
 25
25 -
 26
26 -
 27
27 -
 28
28 -
 29
29 -
 30
30 -
 31
31 -
 32
32 -
 33
33 -
 34
34 -
 35
35 -
36
-
37
-
38
-
39
-
40
-
41
-
42
-
43
-
44
-
45
-
46
-
47
-
48
-
49
-
50
-
51
-
52
-
53
-
54
-
55
-
56
-
57
-
58
-
59
-
60
-
61
-
62
-
63
-
64
-
65
-
66
-
67
-
68
-
69
-
70
-
71
-
72
-
73
-
74
-
75
-
76
-
77
-
78
-
79
-
80
-
81
-
82
-
83
-
84
-
85
-
86
 |
 |
