Epson WorkForce WF-2540 Quick Guide - Page 20
Sending a Fax From the Control Panel - manual
 |
View all Epson WorkForce WF-2540 manuals
Add to My Manuals
Save this manual to your list of manuals |
Page 20 highlights
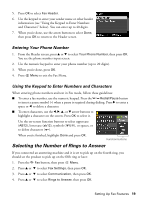
5. Press u or d or use the numeric keypad to select the number of rings, then press OK. Select more rings than you use for the answering machine. 6. Press x Menu to exit the Fax Menu. Sending a Fax From the Control Panel You can send a fax by manually entering a fax number, as described below. Note: To dial the number using a telephone, by redialing, or by selecting from your speed dial list, see the next section. To send a fax from your computer using the Epson FAX Utility, see your online User's Guide. 1. Press the K Fax button. 2. Place your original(s) for faxing (see page 6). 3. Use the numeric keypad to enter the fax number (see "Using the Keypad to Enter Numbers and Characters" on page 19). You can enter up to 64 digits. 4. To change fax settings, press x Menu and select settings as necessary. When you're done, press x Menu again. 5. Press the B&W or Color x Start button to send your fax. If you are prompted, select where you placed your document (ADF or scanner glass). Note: If the recipient's fax machine prints only in black and white, your fax is automatically sent in black and white even if you select color. ■ If you are scanning with the ADF, your document is automatically scanned and faxed. ■ If you place your document on the scanner glass, you can scan additional pages after the first one is sent. ■ If the fax number is busy, you see a redialing message and the product redials after one minute. To redial immediately, press Redial/Pause. To cancel faxing, press y Stop/Reset at any time. 20 Sending a Fax From the Control Panel
-
 1
1 -
2
-
3
-
4
-
5
-
6
-
7
-
8
-
9
-
10
-
11
-
12
-
13
-
14
-
 15
15 -
 16
16 -
 17
17 -
 18
18 -
 19
19 -
 20
20 -
 21
21 -
 22
22 -
 23
23 -
 24
24 -
 25
25 -
26
-
27
-
28
-
29
-
30
-
31
-
32
-
33
-
34
-
35
-
36
-
37
-
38
-
39
-
40
-
41
-
42
-
43
-
44
 |
 |
