Epson XP-6000 Users Guide - Page 163
Print, Print Settings, menu icon. Use the menu options
 |
View all Epson XP-6000 manuals
Add to My Manuals
Save this manual to your list of manuals |
Page 163 highlights
5. Select Print. You see a screen like this: 6. Do one of the following to select your photos: • Select the thumbnail images of the photos you want to print by pressing the + or - button. Each photo you select has a number on it to indicate the number of prints you selected. • Press the OK button to enlarge a thumbnail image. To select an image for print, press the + or - button. Press the left or right arrow button to scroll through and select additional photos. • To select all photos or a group of photos, select the menu icon. Use the menu options to browse, select, and change the display order of the photos. 7. Select Print Settings to select your paper and print settings as necessary. 8. Press the right arrow button. 163
-
 1
1 -
2
-
3
-
4
-
5
-
6
-
7
-
8
-
9
-
10
-
11
-
12
-
13
-
14
-
15
-
16
-
17
-
18
-
19
-
20
-
21
-
22
-
23
-
24
-
25
-
26
-
27
-
28
-
29
-
30
-
31
-
32
-
33
-
34
-
35
-
36
-
37
-
38
-
39
-
40
-
41
-
42
-
43
-
44
-
45
-
46
-
47
-
48
-
49
-
50
-
51
-
52
-
53
-
54
-
55
-
56
-
57
-
58
-
59
-
60
-
61
-
62
-
63
-
64
-
65
-
66
-
67
-
68
-
69
-
70
-
71
-
72
-
73
-
74
-
75
-
76
-
77
-
78
-
79
-
80
-
81
-
82
-
83
-
84
-
85
-
86
-
87
-
88
-
89
-
90
-
91
-
92
-
93
-
94
-
95
-
96
-
97
-
98
-
99
-
100
-
101
-
102
-
103
-
104
-
105
-
106
-
107
-
108
-
109
-
110
-
111
-
112
-
113
-
114
-
115
-
116
-
117
-
118
-
119
-
120
-
121
-
122
-
123
-
124
-
125
-
126
-
127
-
128
-
129
-
130
-
131
-
132
-
133
-
134
-
135
-
136
-
137
-
138
-
139
-
140
-
141
-
142
-
143
-
144
-
145
-
146
-
147
-
148
-
149
-
150
-
151
-
152
-
153
-
154
-
155
-
156
-
157
-
 158
158 -
 159
159 -
 160
160 -
 161
161 -
 162
162 -
 163
163 -
 164
164 -
 165
165 -
 166
166 -
 167
167 -
 168
168 -
169
-
170
-
171
-
172
-
173
-
174
-
175
-
176
-
177
-
178
-
179
-
180
-
181
-
182
-
183
-
184
-
185
-
186
-
187
-
188
-
189
-
190
-
191
-
192
-
193
-
194
-
195
-
196
-
197
-
198
-
199
-
200
-
201
-
202
-
203
-
204
-
205
-
206
-
207
-
208
-
209
-
210
-
211
-
212
-
213
-
214
-
215
-
216
-
217
-
218
-
219
-
220
-
221
-
222
-
223
-
224
-
225
-
226
-
227
-
228
-
229
-
230
-
231
-
232
-
233
-
234
-
235
-
236
-
237
-
238
-
239
-
240
-
241
-
242
-
243
-
244
-
245
-
246
-
247
-
248
-
249
-
250
-
251
-
252
-
253
-
254
-
255
-
256
-
257
-
258
-
259
-
260
-
261
-
262
-
263
-
264
-
265
-
266
-
267
-
268
-
269
-
270
-
271
-
272
-
273
-
274
-
275
-
276
-
277
-
278
-
279
-
280
-
281
-
282
-
283
-
284
-
285
-
286
-
287
-
288
-
289
-
290
-
291
-
292
-
293
-
294
-
295
-
296
-
297
-
298
-
299
-
300
-
301
-
302
-
303
-
304
-
305
-
306
-
307
-
308
-
309
-
310
-
311
 |
 |
163
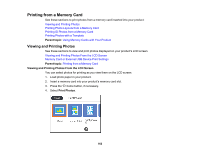
5.
Select
Print
.
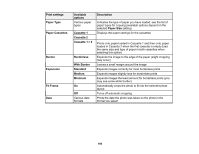
You see a screen like this:
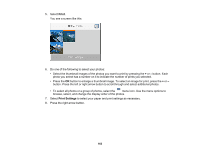
6.
Do one of the following to select your photos:
• Select the thumbnail images of the photos you want to print by pressing the
+
or
–
button. Each
photo you select has a number on it to indicate the number of prints you selected.
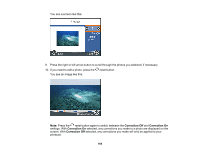
• Press the
OK
button to enlarge a thumbnail image. To select an image for print, press the
+
or
–
button. Press the left or right arrow button to scroll through and select additional photos.
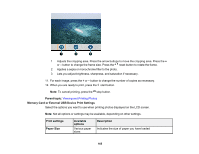
• To select all photos or a group of photos, select the
menu icon. Use the menu options to
browse, select, and change the display order of the photos.
7.
Select
Print Settings
to select your paper and print settings as necessary.
8.
Press the right arrow button.