Eureka LightSpeed 4700D Owners Manual - Page 10
FIG. 4, FIG. 5, FIG. 6
 |
View all Eureka LightSpeed 4700D manuals
Add to My Manuals
Save this manual to your list of manuals |
Page 10 highlights
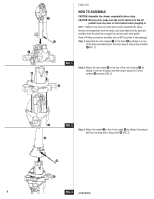
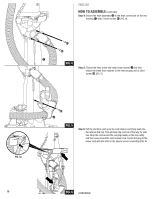
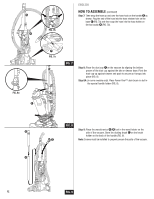
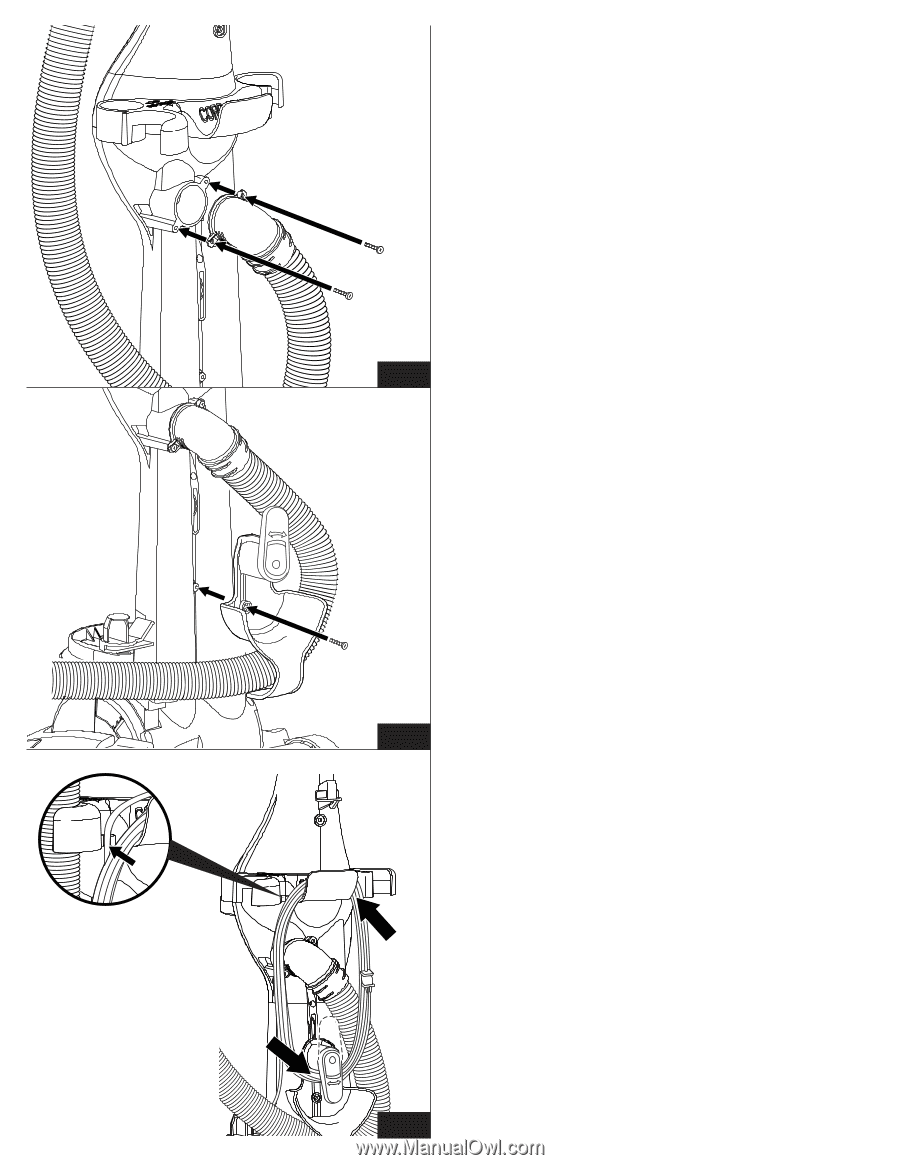
ENGLISH HOW TO ASSEMBLE (continued) Step 4: Secure the hose assembly ●D to the hose connection on the rear housing ●I with 2 short screws ●K1 (FIG. 4). ●K1 ●K1 ●I FIG. 4 Step 5: Thread the hose inside the lower hose retainer ●J and then attach the lower hose retainer to the rear housing with a short screw ●K1 (FIG. 5). FIG. 6a ●K1 ●J FIG. 5 Step 6: Pull the electrical cord up to the cord retainer and firmly push into the retainer (FIG. 6a). This will keep the cord out of the way for next use. Wrap the cord around the carrying handle on the tool caddy and then wrap around the cord release hook. Secure the plug to the power cord with the notch in the plug to prevent unwinding (FIG. 6). 10 FIG. 6 (CONTINUED)
-
 1
1 -
2
-
3
-
4
-
 5
5 -
 6
6 -
 7
7 -
 8
8 -
 9
9 -
 10
10 -
 11
11 -
 12
12 -
 13
13 -
 14
14 -
 15
15 -
16
-
17
-
18
-
19
-
20
-
21
-
22
-
23
-
24
-
25
-
26
-
27
-
28
-
29
-
30
-
31
-
32
-
33
-
34
-
35
-
36
 |
 |
10
ENGLISH
HOW TO ASSEMBLE
(continued)
Step 4:
Secure the hose assembly
●
D
to the hose connection on the rear
housing
●
I
with 2 short screws
●
K1
(FIG. 4).
FIG. 4
FIG. 5
FIG. 6
●
J
●
I
●
K1
(CONTINUED)
FIG. 6a
Step 5:
Thread the hose inside the lower hose retainer
●
J
and then
attach the lower hose retainer to the rear housing with a short
screw
●
K1
(FIG. 5).
Step 6:
Pull the electrical cord up to the cord retainer and firmly push into
the retainer (FIG. 6a)
.
This will keep the cord out of the way for next
use. Wrap the cord around the carrying handle on the tool caddy
and then wrap around the cord release hook. Secure the plug to the
power cord with the notch in the plug to prevent unwinding (FIG. 6).
●
K1
●
K1