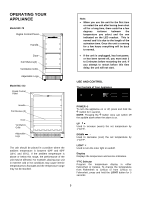
Fagor 15 Inch Beverage Center User's Manual - Page 8
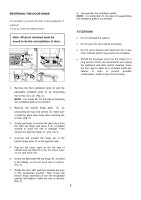
REVERSING THE DOOR HINGE, ATTENTION, Note: All parts removed must be, saved to do the reinstallation
 |
View all Fagor 15 Inch Beverage Center manuals
Add to My Manuals
Save this manual to your list of manuals |
Page 8 highlights
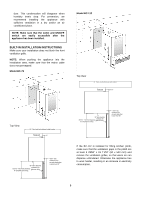
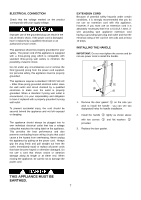
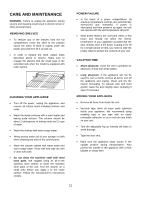
REVERSING THE DOOR HINGE It is possible to reverse the door on this appliance, if required. To do so, follow the steps below: Note: All parts removed must be saved to do the reinstallation of door. 8. Reassembly the ventilation grilles. NOTE: For model BC-79, the step of reassembling the ventilation grille is not needed. ATTENTION! • Do not overload the cabinet. • Do not open the door unless necessary. • Do not cover shelves with aluminum foil or any other material which may prevent air circulation. • Should the beverage center be left empty for a long period of time, we recommend you unplug the appliance and after careful cleaning, leave the door ajar to allow air to circulate inside the cabinet in order to prevent possible condensation, mold or odors from forming. 1. Remove the front ventilation grille ○2 and the A EA adjustable ventilation grille ○1 by unscrewing A E A the screws ○3 & ○4 . (Fig. 1) A EA A EA NOTE: For model BC-79, the step of removing the ventilation grille is not needed. 2. Remove the bottom hinge plate ○5 by A E A unscrewing the four lock screws ○6 . Make sure A EA to hold the glass door firmly after removing the screws. (Fig. 2) 3. Gently pull down to remove the glass door from the right top hinge and place it on a padded surface to avoid the risk of damage. Then remove the right top hinge ○7 . (Fig. 3 & 4) A EA 4. Unscrew and transfer the hinge pin of the bottom hinge plate ○5 to the opposite side. A EA 5. Pop out the cover caps on the left side of cabinet and use them to cover the screw holes on the right hand side. 6. Screw the alternative left top hinge ○9 , included A EA in the fittings, on the left hand side of cabinet. (Fig. 4) 7. Rotate the door 180° and then relocate the door to the designated position. Then screw the bottom hinge assembly on the left designated position and tighten it after the door is leveled. (Fig. 2) 8
-
 1
1 -
2
-
 3
3 -
 4
4 -
 5
5 -
 6
6 -
 7
7 -
 8
8 -
 9
9 -
 10
10 -
 11
11 -
 12
12 -
 13
13 -
14
-
15
-
16
-
17
-
18
-
19
-
20
-
21
-
22
-
23
-
24
-
25
-
26
-
27
-
28
-
29
 |
 |
