Fluke 1773/BASIC Product Manual - Page 43
Instrument Name., Language., Time Zone., Date and Time., Phase colors., Copy Service Data to USB
 |
View all Fluke 1773/BASIC manuals
Add to My Manuals
Save this manual to your list of manuals |
Page 43 highlights
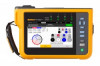
1773/1775/1777 Users Manual The menu on the left side opens submenus for Communication and Tools Settings: IP Address WiFi Client WiFi Access Point Remote Display Reset to Factory Defaults Copy Service Data to USB Firmware Update Instrument Name. Identify the Analyzer with a unique name. The name is typed in with the onscreen keyboard. Language. Select the preferred language from a list of available languages. Scoll up and down in the list to see all available languages. Time Zone. Set the time where the Anaylzer is in use. Touch the screen and chose the continent and country. Scroll the list up and down to see all the available countries. Date and Time. Set the format first from the available options. Chose the option for day, month, year. Chose the clock type as 12 or 24 hour format with the radio button. The date and time settings have manual or automatic options: The automatic sources of time are Internet time if the Anaylzer has an active Ethernet connection or WiFi signal. For more precise time (for IEC 61000-4-30 Class accuracy) an internal GPS clock is used. The GPS clock requires a GPS antenna that can pick up the GPS signal from at least two satellites. For a manual setting, input the date and time with the on-screen keyboard. Phase colors. These are assigned by the start-up wizard when the Anaylzer is used for the first time or has been reset. However, you can adjust these colors on the menu when you select a global region. Use this same screen to label the phase with letters. 38 MyFlukeStore Shop for Fluke products online at: www. .com 1.888.610.7664
-
 1
1 -
2
-
3
-
4
-
5
-
6
-
7
-
8
-
9
-
10
-
11
-
12
-
13
-
14
-
15
-
16
-
17
-
18
-
19
-
20
-
21
-
22
-
23
-
24
-
25
-
26
-
27
-
28
-
29
-
30
-
31
-
32
-
33
-
34
-
35
-
36
-
37
-
 38
38 -
 39
39 -
 40
40 -
 41
41 -
 42
42 -
 43
43 -
 44
44 -
 45
45 -
 46
46 -
 47
47 -
 48
48 -
49
-
50
-
51
-
52
-
53
-
54
-
55
-
56
-
57
-
58
-
59
-
60
-
61
 |
 |
