Fluke 576 FE 576 Users Manual - Page 11
See software and hardware set up on the next, two s, Focusing the Camera, The View Finder Guide
 |
View all Fluke 576 manuals
Add to My Manuals
Save this manual to your list of manuals |
Page 11 highlights
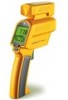
576 signals: "Flash has charged". The flash will now fire automatically. 7. For the next measurement, repeat points 5 and 6. 8. Once you have taken all your photos, connect the unit to the PC via USB. See software and hardware set up on the next two pages. Focusing the Camera To get sharp and clear pictures simply turn the focus ring depending on the distance of your target. Between 0.2 m (8 in) and 0.3 m (12 in.) adjust the lens to the flower symbol. Between 0.5 m (19 in) and infinity adjust the lens to the mountain symbol. Between 0.25 m (10 in.) and 0.6 m (23 in.) adjust the lens in the middle of both symbols. The View Finder Guide Rotate the cap to a horizontal position and look over it, as shown below. The embossed triangle will show you the approximate width of the photo. 11
-
 1
1 -
2
-
3
-
4
-
5
-
 6
6 -
 7
7 -
 8
8 -
 9
9 -
 10
10 -
 11
11 -
 12
12 -
 13
13 -
 14
14 -
 15
15 -
 16
16 -
17
-
18
-
19
-
20
-
21
-
22
-
23
-
24
-
25
-
26
-
27
-
28
-
29
-
30
-
31
-
32
-
33
 |
 |
