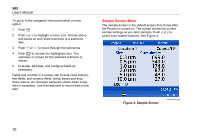
Fluke 985 Fluke 985 - Airborne Particle Counter - Manual - Page 19
Buffered Data Menu, Setup Menus, Delete Records, Sample Setup Menu - particle counter how to use
 |
View all Fluke 985 manuals
Add to My Manuals
Save this manual to your list of manuals |
Page 19 highlights
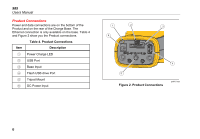
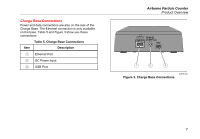
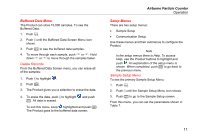
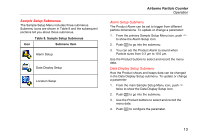
Buffered Data Menu The Product can store 10,000 samples. To see the Buffered Data: 1. Push . 2. Push until the Buffered Data Screen Menu icon shows. 3. Push to see the buffered data samples. 4. To move through each sample, push or . Hold down or to move through the samples faster. Delete Records From the Buffered Data Screen menu, you can erase all of the samples: 1. Push to highlight . 2. Push . 3. The Product gives you a selection to erase the data. 4. To erase the data, push to highlight . All data is erased. and push To exit this menu, keep highlighted and push . The Product goes to the buffered data screen. Airborne Particle Counter Operation Setup Menus There are two setup menus: • Sample Setup • Communication Setup Use these menus and their submenus to configure the Product. Note In the setup menus there is Help. To access Help, use the Product buttons to highlight and push . An explanation of the setup menu is shown. When completed, push to go back to the previous menu. Sample Setup Menu To see the primary Sample Setup Menu: 1. Push . 2. Push until the Sample Setup Menu icon shows. 3. Push to go to the Sample Setup screen. From this menu, you can set the parameters shown in Table 7. 11
-
 1
1 -
2
-
3
-
4
-
5
-
6
-
7
-
8
-
9
-
10
-
11
-
12
-
13
-
 14
14 -
 15
15 -
 16
16 -
 17
17 -
 18
18 -
 19
19 -
 20
20 -
 21
21 -
 22
22 -
 23
23 -
 24
24 -
25
-
26
-
27
-
28
-
29
-
30
-
31
-
32
 |
 |
