Frigidaire FGGF3685TS Installation Instructions - Page 13
Drill Pilot Holes and Fasten Bracket, Check Level and Position the Range
 |
View all Frigidaire FGGF3685TS manuals
Add to My Manuals
Save this manual to your list of manuals |
Page 13 highlights
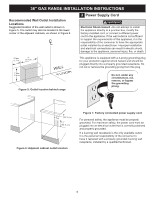
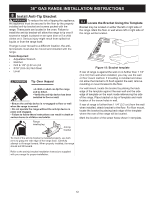
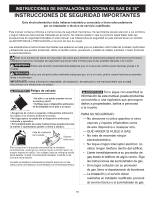
36" GAS RANGE INSTALLATION INSTRUCTIONS 8.2 Drill Pilot Holes and Fasten Bracket Drill a 1/8" pilot hole where screws are to be located. If bracket is to be mounted to the wall, drill pilot hole at an approximate 20° downward angle. If bracket is to be mounted to masonry or ceramic floors, drill a 3/16" (4.8 mm) pilot hole 1-3/4" deep. 8.3 Check Level and Position the Range Check the level of the final installation. Note: A minimum clearance of 1/8" is required between the bottom of the range and the levelling leg to allow room for the bracket. Use a spirit level to check your adjustments. Figure 16: Drill pilot holes The screws provided may be used in wood or concrete material. Use a 5/16" nut-driver or flat head screwdriver to secure the bracket in place. Leveling Leg Anti-Tip Bracket Figure 18: Use the oven racks to level appliance 1/8" Minimum Wall Mount Wall Plate Slide range into position. Floor Mount Figure 17: Fastening the bracket Figure 19: Slide appliance into bracket To check if the anti-tip bracket is installed properly, use both arms and grasp the rear edge of range back. Carefully attempt to tilt range forward. When properly installed, the range should not tilt forward. If range is moved to a different location, the anti-tip brackets must also be moved and installed with the range. 13
-
 1
1 -
2
-
3
-
4
-
5
-
6
-
7
-
 8
8 -
 9
9 -
 10
10 -
 11
11 -
 12
12 -
 13
13 -
 14
14 -
 15
15 -
 16
16 -
 17
17 -
 18
18 -
19
-
20
-
21
-
22
-
23
-
24
-
25
-
26
-
27
-
28
-
29
-
30
-
31
-
32
-
33
-
34
-
35
-
36
-
37
-
38
-
39
-
40
-
41
-
42
-
43
-
44
-
45
-
46
-
47
-
48
 |
 |
