Frigidaire PLGF659GC Installation Instructions (All Languages)
Frigidaire PLGF659GC - 36 Inch Pro Style Gas Range Manual
 |
UPC - 057112098968
View all Frigidaire PLGF659GC manuals
Add to My Manuals
Save this manual to your list of manuals |
Frigidaire PLGF659GC manual content summary:
- Frigidaire PLGF659GC | Installation Instructions (All Languages) - Page 1
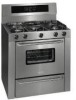
36 " GAS RANGE INSTALLATION INSTRUCTIONS INSTALLATION AND SERVICE MUST BE PERFORMED BY A QUALIFIED INSTALLER. IMPORTANT: SAVE FOR LOCAL ELECTRICAL INSPECTOR'S USE. READ AND SAVE THESE INSTRUCTIONS FOR FUTURE REFERENCE. If the information in this manual is not followed exactly, a fire or explosion - Frigidaire PLGF659GC | Installation Instructions (All Languages) - Page 2
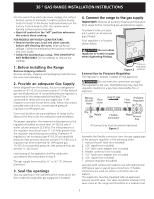
36" GAS RANGE INSTALLATION INSTRUCTIONS Important Notes to the Installer 1. Read all instructions contained in these installation instructions before installing range. 2. Remove all packing material from the oven compartments before connecting the gas and electrical supply to the range. 3. Observe - Frigidaire PLGF659GC | Installation Instructions (All Languages) - Page 3
the oven is done cooking. FOR MODELS WITH SELF-CLEAN FEATURE: • Remove broiler pan, food and other utensils before self-cleaning the oven. Wipe up excess spillage. Follow the precleaning instructions in the Use and Care Guide. • Unlike the standard gas range, THIS COOKTOP IS NOT REMOVABLE. Do - Frigidaire PLGF659GC | Installation Instructions (All Languages) - Page 4
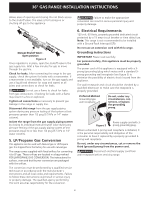
36" GAS RANGE INSTALLATION INSTRUCTIONS allows ease of opening and closing. Do not block access to the shutoff valve. The valve is for turning on or shutting off gas to the appliance. to appliance Manual Shutoff Valve - From gas supply line Open position Figure 4 Once regulator is in place, - Frigidaire PLGF659GC | Installation Instructions (All Languages) - Page 5
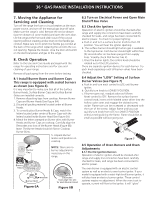
36 " GAS RANGE INSTALLATION INSTRUCTIONS 7. Moving the Appliance for Servicing and Cleaning Turn off the range line fuse or circuit breakers at the main power source, and turn off the manual gas shut-off valve. Make sure the range is cold. Remove the service drawer (warmer drawer on some models) - Frigidaire PLGF659GC | Installation Instructions (All Languages) - Page 6
36" GAS RANGE INSTALLATION INSTRUCTIONS similar to a light bulb. When the igniter has reached a temperature sufficient to ignite gas, the electrically controlled oven valve will open and flame will appear at the oven burner. There is a time lapse from 30 to 60 seconds after - Frigidaire PLGF659GC | Installation Instructions (All Languages) - Page 7
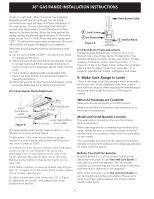
36 " GAS RANGE INSTALLATION INSTRUCTIONS 10. Anti-tip Bracket Installation Important Safety Warning This range must be properly secured to the floor by using the included anti-tip brackets and screws. Failure to install the brackets could allow the range to accidentally tip over if excessive weight - Frigidaire PLGF659GC | Installation Instructions (All Languages) - Page 8
gas licenciado de Massachusett. Este aparato se debe instalar con un largo conector flexible de gas de tres (3) pies/36 pulgadas. Una válvula manual de gas por arriba de la estufas 36" 36¼" (92.1 cm) entre los gabinetes Figura 1 Separación mínima de 0" en la parte posterior de la estufa debajo - Frigidaire PLGF659GC | Installation Instructions (All Languages) - Page 9
INSTALACION PARA LA ESTUFA A GAS DE 36" Notas importantes para el Instalador 1. Lea todas las instrucciones contenidas en este manual antes de instalar la estufa title 24 CFR part 3280". (Anteriormente "The Federal Standard for Mobile Home Construction and Safety title 24, HUD (Part 280)". O cuando - Frigidaire PLGF659GC | Installation Instructions (All Languages) - Page 10
LA ESTUFA A GAS DE 36" • En caso las instrucciones de prelimpiado en el Manual del Usuario. • A diferencia de la gama estándar cocinas de gas, ESTA PLANCHA DE COCINA NO de conectar el gas y la fuente eléctrica. Para evitar fugas, aplique sellador de tuberías en todas las partes roscadas machos ( - Frigidaire PLGF659GC | Installation Instructions (All Languages) - Page 11
INSTALACION PARA LA ESTUFA A GAS DE 36" La línea del suministro se debe de ser equipada de una válvula de cierre manual aprobada. Esta válvula se en el bolso que contiene la literatura titulada "FOR LP/PROPANE GAS CONVERSION." Siga las instrucciones que vienen con los orificios. La conversión - Frigidaire PLGF659GC | Installation Instructions (All Languages) - Page 12
INSTRUCCIONES DE INSTALACION PARA LA ESTUFA A GAS DE 36" En lugares en los que aya un enchufe de corriente eléctrica a la estufa a la fuente de poder principal, y apague la válvula de cierre manual de gas. Asegúrese de que la estufa esté fresca. Quite el cajón de servicio (el cajón calentador en - Frigidaire PLGF659GC | Installation Instructions (All Languages) - Page 13
INSTRUCCIONES DE INSTALACION PARA LA ESTUFA A GAS DE 36" 8.4 Ajuste de la Posición LOW (BAJA) Para la Vá 300°F. Para retirar el fondo del horno, retire los tornillos de ajuste del horno en la parte posteior del fondo del horno. jale hacia arriba, desenganche el frente del fondo del marco anterior - Frigidaire PLGF659GC | Installation Instructions (All Languages) - Page 14
DE INSTALACION PARA LA ESTUFA A GAS DE 36" Tubos del quemador del horno serie también le da la potencia nominal de los quemadores, el tipo de combustible y la presión a la cual fué ajustada la estufa en la fábrica. Antes de llamar al servicio Lea la sección Lista de Control de Averías en su Manual - Frigidaire PLGF659GC | Installation Instructions (All Languages) - Page 15
INSTRUCCIONES DE INSTALACION PARA LA ESTUFA A GAS DE 36" 10. Instrucciones para de instalación del la base de la estufa se suministra un orificio de ¼" para el anclaje al piso. Parte lateral del cuerpo Riel de la base Orificio para anclar la estufa al piso orificio ubicado aproximadamente - Frigidaire PLGF659GC | Installation Instructions (All Languages) - Page 16
/NARANJA Y.-YELLOW/AMARILLO BR.-BROWN/MORENO BL.-BLUE/AZUL BK.-BLACK/NEGRO TOP BURNER IGNITER QUEMADOR E ENCENDIDO SUPERIOR W-18 W-18 W-18 W-18 CAUTION: LABEL ALL WIRES PRIOR TO DISCONNECTION WHEN SERVICING CONTROLS. WIRING ERROR CAN CAUSE IMPROPER AND DANGEROUS OPERATION. VERIFY PROPER OPERATION
-
 1
1 -
 2
2 -
 3
3 -
 4
4 -
 5
5 -
 6
6 -
 7
7 -
8
-
9
-
10
-
11
-
12
-
13
-
14
-
15
-
16
 |
 |
36 " GAS RANGE INSTALLATION INSTRUCTIONS
INSTALLATION AND SERVICE MUST BE PERFORMED BY
A QUALIFIED INSTALLER.
IMPORTANT: SAVE FOR LOCAL ELECTRICAL INSPECTOR'S USE.
READ AND SAVE THESE INSTRUCTIONS FOR FUTURE REFERENCE.
If the information in this manual is not followed exactly, a fire
or explosion may result causing property damage, personal injury or death.
FOR YOUR SAFETY:
—
Do not store or use gasoline or other flammable vapors and liquids in the
vicinity of this or any other appliance.
—
WHAT TO DO IF YOU SMELL GAS:
•
Do not try to light any appliance.
•
Do not touch any electrical switch; do not use any phone in your building.
•
Immediately call your gas supplier from a neighbor's phone.
Follow the gas
supplier's instructions.
•
If you cannot reach your gas supplier, call the fire department.
—
Installation and service must be performed by a qualified installer, service
agency or the gas supplier.
NOTE: Wiring diagram for this appliance is enclosed in this booklet.
P/N 318201760 (0711) Rev. C
English – pages 1-7
Español – páginas 8-15
Wiring Diagram - pages 16
Printed in United States
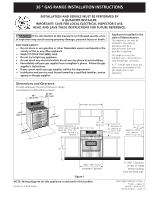
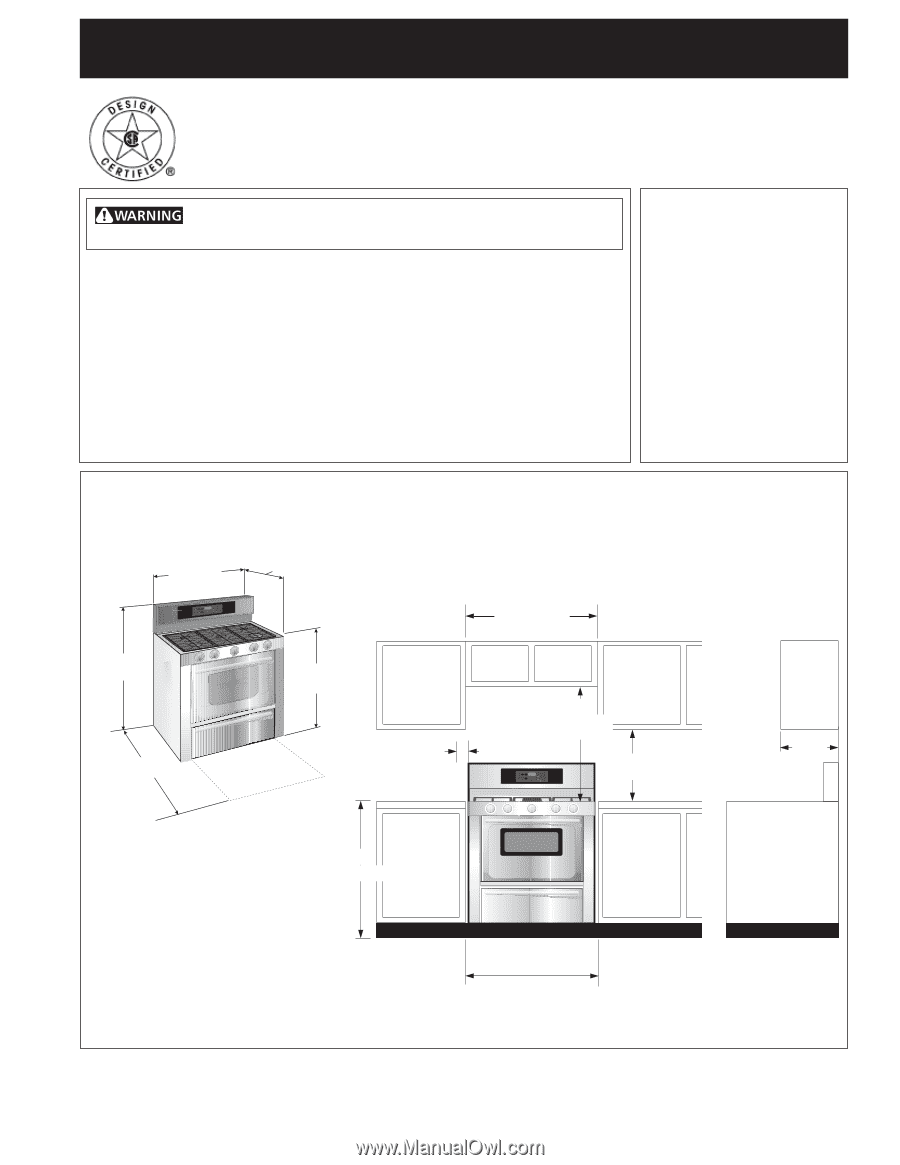
Dimensions and Clearance
Provide adequate clearance between range
and adjacent combustible surfaces.
Figure 1
36”
(91.4 cm)
25 5/8”
(65.1 cm)
36”
(91.4 cm)
43 7/8”
(111.4 cm)
47¾”
(121.3 cm)
36" (91.4 cm)
Minimum to
cabinets on
either side
of range
36¼" (92.1 cm)
Between Cabinets
Appliances Installed in the
state of Massachusetts:
This Appliance can only be
installed in the state of
Massachusetts by a
Massachusetts licensed
plumber or gasfitter.
This appliance must be
installed with a 3 foot (36 in.)
long flexible gas connector.
A "T" handle type manual gas
valve must be installed in the
gas supply line to this
appliance.
18"
(45.7 cm)
5" (12.7 cm)
30"
(76.2 cm)
Minimum
36"
(91.4 cm)
Minimumclearance on
either side of range
above 36" (91.4 cm)
height if a wall is
installed
Wall
13"
(33 cm)
0" Min. Clearance
at rear of range
below cooktop
from the back wall.
Maximum depth
for cabinets
above range top