Frigidaire PLGF659GC Installation Instructions (All Languages) - Page 7
Anti-tip Bracket Installation - 36
 |
UPC - 057112098968
View all Frigidaire PLGF659GC manuals
Add to My Manuals
Save this manual to your list of manuals |
Page 7 highlights
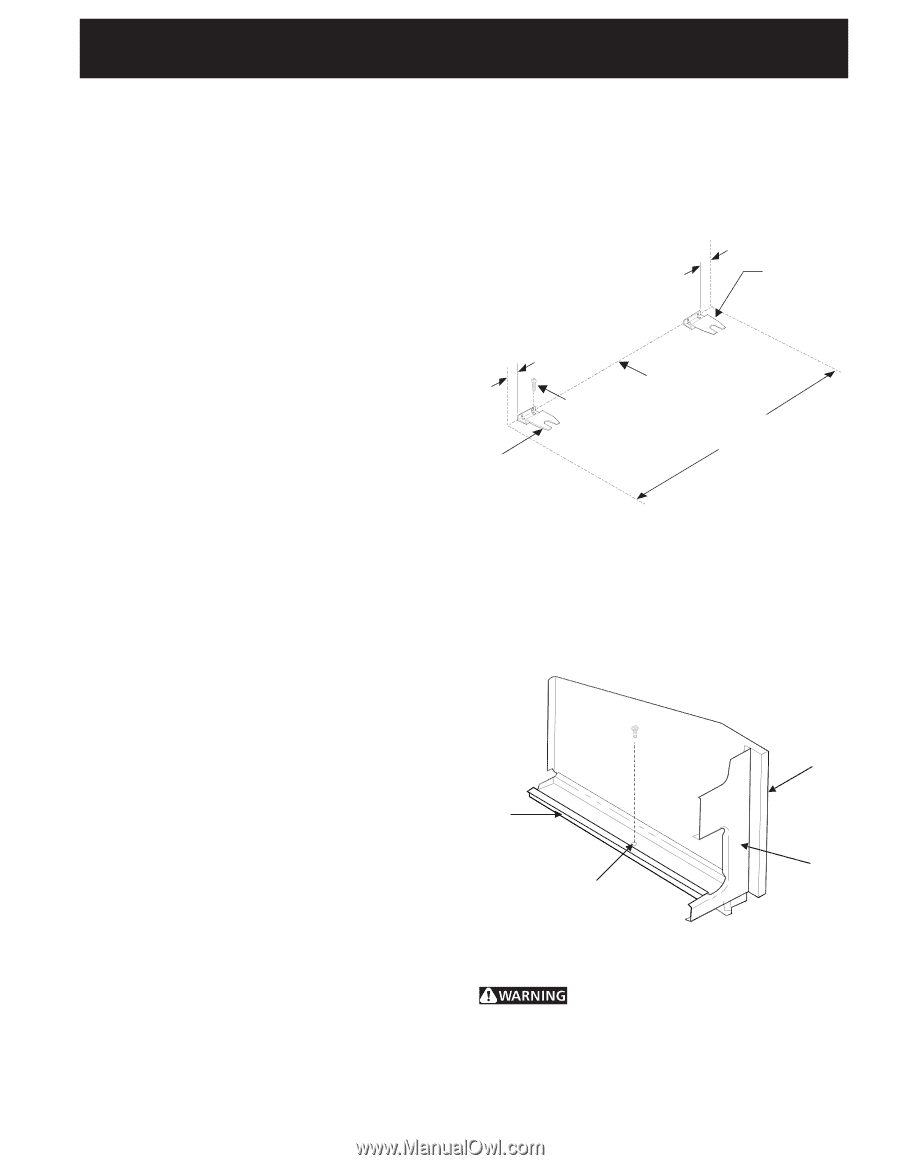
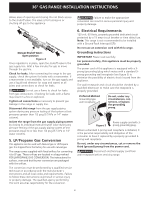
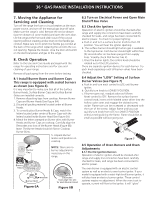
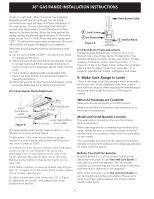
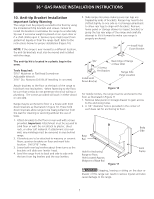
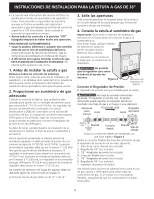
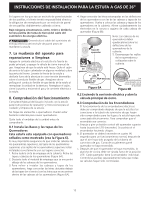
36 " GAS RANGE INSTALLATION INSTRUCTIONS 10. Anti-tip Bracket Installation Important Safety Warning This range must be properly secured to the floor by using the included anti-tip brackets and screws. Failure to install the brackets could allow the range to accidentally tip over if excessive weight is placed on an open door or if a child climbs upon it. Serious injury might result from spilled hot liquids or from the range itself. Refer to the instructions below for proper installation (Figure 10). NOTE: If the range is ever moved to a different location, the anti-tip brackets must also be moved and installed with the range. The anti-tip kit is located in a plastic bag in the oven. Tools Required: 5/16" Nutdriver or Flat Head Screwdriver Adjustable Wrench 3/16" Dia. Masonry Drill Bit (if installing in concrete) Attach brackets to the floor at the back of the range to hold both rear leg levelers. When fastening to the floor, be sure that screws do not penetrate electrical wiring or plumbing. The screws provided will work in either wood or concrete. Range may be anchored to floor in a house with hold down brackets as illustrated in Figure 10. These hold down brackets allow range to be freely pulled out from the wall for cleaning or servicing without the use of tools. 1. Attach brackets to the floor or rear wall with screws provided. Important: Attachment must be secured to solid floor or wall. Do not attach to plaster, sheet rock, or other soft material. If attachment is to rear wall, any moldings must be removed in area behind range. 2. If brackets are to be attached to masonry or ceramic floors, position brackets on floor and mark hole location. Drill 3/16" holes. 3. Lower both rear leg levelers about three turns so the brackets will slide over leveler head. 4. Level the range front to back and side to side with the two front leg levelers and the rear levelers. 5. Slide range into place making sure rear legs are trapped by ends of brackets. Range may need to be shifted slightly to one side as it is being pushed back to allow rear legs to align with brackets. Remove lower panel or storage drawer to inspect brackets or grasp the top rear edge of the range and carefully attempt to tilt it forward to make sure range is properly anchored. Install Hold 3/8" Down Bracket 3/8" Back Edge of Range or Rear Wall 2 Screws Per Bracket Install Hold Down Bracket Range Side Panel Location Figure 10 For mobile homes, the range must be anchored to the floor as illustrated in Figure 11. 1. Remove false panel or storage drawer to gain access to the anchoring holes. 2. A 1/4" diameter hole is provided in the center of each base rail for anchoring to floor. Base Rail Hole For Anchoring Range to Floor; Hole Located Approx. Midpoint of Base Rail. Figure 11 Body Side Front Frame Stepping, leaning or sitting on the door or drawer of this range can result in serious injuries and also cause damage to the range. 7
-
 1
1 -
 2
2 -
 3
3 -
 4
4 -
 5
5 -
 6
6 -
 7
7 -
 8
8 -
 9
9 -
 10
10 -
 11
11 -
 12
12 -
13
-
14
-
15
-
16
 |
 |