Frigidaire PLGF659GC Installation Instructions (All Languages) - Page 6
Make Sure Range Is Level - range broiler
 |
UPC - 057112098968
View all Frigidaire PLGF659GC manuals
Add to My Manuals
Save this manual to your list of manuals |
Page 6 highlights
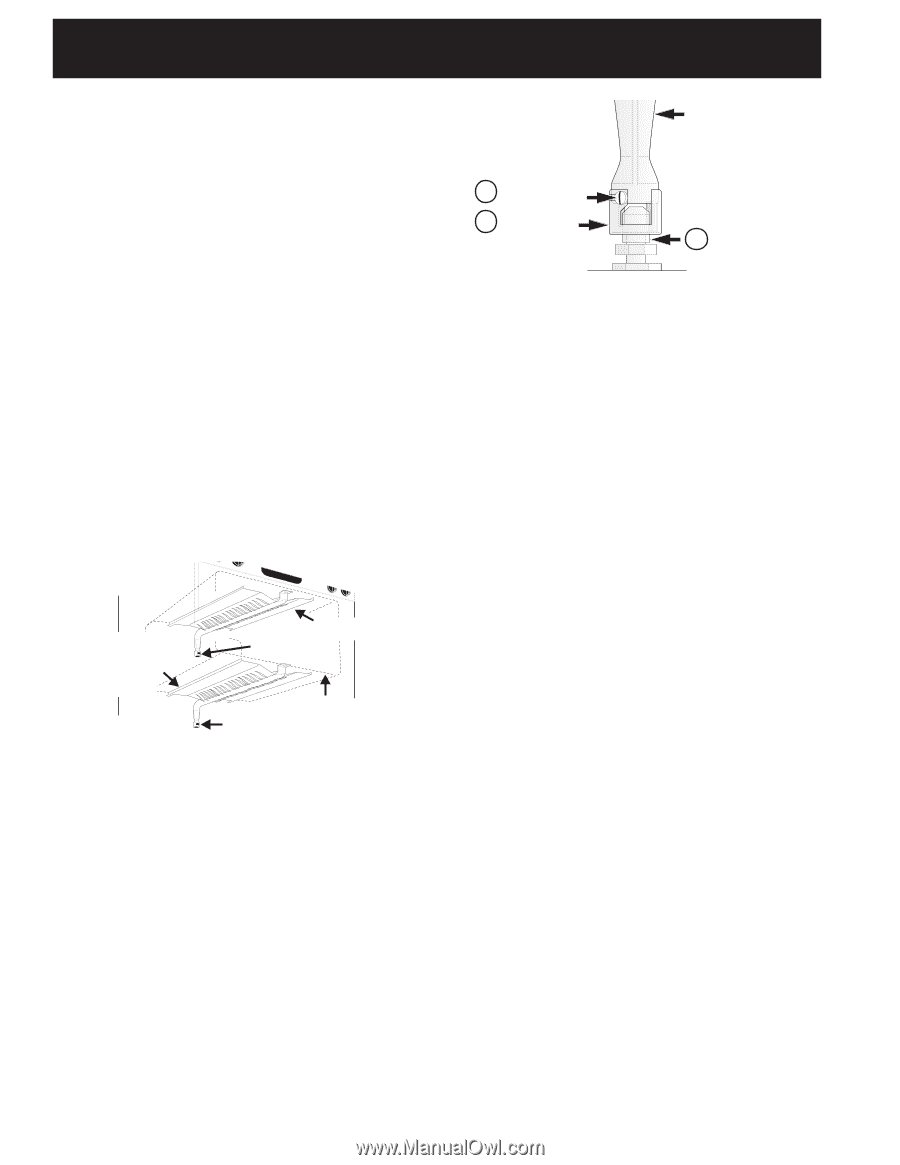
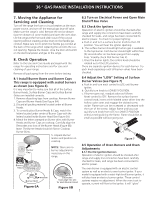
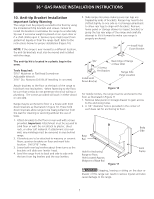
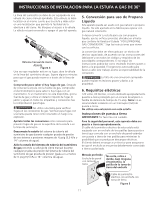
36" GAS RANGE INSTALLATION INSTRUCTIONS similar to a light bulb. When the igniter has reached a temperature sufficient to ignite gas, the electrically controlled oven valve will open and flame will appear at the oven burner. There is a time lapse from 30 to 60 seconds after thermostat is turned ON before the flame appears at the oven burner. When the oven reaches the display setting, the glowing igniter will go off. The burner flame will go "out" in 20 to 30 seconds after igniter goes "OFF". To maintain any given oven temperature, this cycle will continue as long as the display is set to operate. After removing all packing materials and literature from the oven: a) Set the oven to BAKE at 300°F. See Use & Care Guide for operating instructions. b) Within 60 seconds the oven burner should ignite. Check for proper flame (see 8.5.2), and allow the burner to cycle once (see cycle explanation above). Reset controls to off. c) If your model is equipped with a waist-high broiler burner, set oven to broil. See Use & Care Guide for operating instructions. d) Within 60 seconds the broil burner should ignite. Check for proper flame (see 8.5.3). Reset controls to off. 8.5.2 Oven Burner Flame Adjustment Lower Oven Burner Baffle (removable) Figure 8 Waist-High Burner Air Shutter Lower Oven Bottom Air Shutter (removable) The approximate oven burner flame length is 1 inch (distinct inner cone of blue flame). To determine if the oven burner flame is proper, remove the oven bottom and burner baffle and set the oven to bake at 300°F. To remove the oven bottom, remove oven hold down screws at rear of oven bottom. Pull up at rear, disengage front of oven bottom from oven front frame, and pull the oven bottom out of the oven. Remove burner baffle so that burner flame can be observed. If the flame is yellow, increase air shutter opening size (see "2" in Figure 9). If the entire flame is blue, reduce the air shutter opening size. To adjust flame loosen lock screw (see "3" in Figure 9), reposition air shutter, and tighten lock screw. Replace oven bottom. Oven Burner Tube 3 Lock Screw 2 Air Shutter Figure 9 1 Orifice Hood 8.5.3 Broil Burner Flame Adjustment The approximate flame length of the burner is 1 inch (distinct inner cone of blue flame). To determine if the broil burner flame is proper, set the oven to broil. If flame is yellow, increase air shutter opening size (see "2" in Figure 9 ). If the entire flame is blue, reduce the air shutter opening size. To adjust, loosen lock screw (see "3" in Figure 9), reposition air shutter, and tighten lock screw. 9. Make Sure Range Is Level Check if the range is level by placing a level horizontally on an oven rack. Check diagonally from front to back, then level the range by either adjusting the leveling legs or by placing shims under the corners of the range as needed. When All Hookups are Complete Make sure all controls are left in the OFF position. Make sure the flow of combustion and ventilation air to the range is unobstructed. Model and Serial Number Location The serial plate is located on the oven front frame behind the drawer. When ordering parts for or making inquiries about your range, always be sure to include the model and serial numbers and a lot number or letter from the serial plate on your range. Your serial plate also tells you the rating of the burners, the type of fuel and the pressure the range was adjusted for when it left the factory. Before You Call for Service Read the Before You Call for Service Checklist and operating instructions in your Use and Care Guide. It may save you time and expense. The list includes common occurrences that are not the result of defective workmanship or materials in this appliance. Refer to the warranty in your Use and Care Guide for our service phone number and address. Please call or write if you have inquiries about your product and/or need to order parts. 6
-
 1
1 -
 2
2 -
 3
3 -
 4
4 -
 5
5 -
 6
6 -
 7
7 -
 8
8 -
 9
9 -
 10
10 -
 11
11 -
 12
12 -
13
-
14
-
15
-
16
 |
 |