Fujitsu ST4121 User Guide - Page 64
Checking the Connection, Accessing Another Computer
 |
View all Fujitsu ST4121 manuals
Add to My Manuals
Save this manual to your list of manuals |
Page 64 highlights
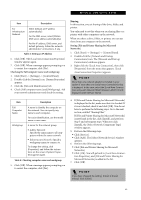
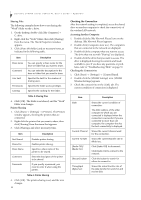
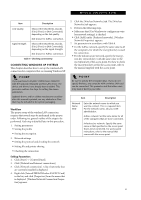
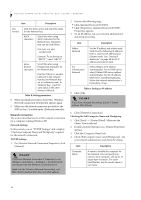
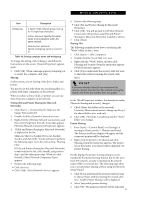
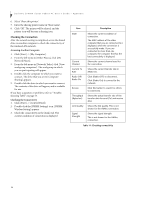
Stylistic ST4000 Series Tablet PC User's Guide - Appendix 6. Select 'Share this printer'. 7. Enter the sharing printer name in 'Share name'. 8. Click 'OK'. The printer will be shared, and the printer icon will become a sharing icon. Checking the Connection After the network setting is completed, access the shared drive on another computer to check the connectivity of the wireless LAN network. Accessing Another Computer 1. Click [Start] -> [My Computer]. 2. From the left menu in [Other Places], click [My Network Places]. 3. From the left menu in [Network Tasks], click [View workgroup computers]. The workgroup in which you are participating will appear. 4. Double click the computer to which you want to connect. The drive that you set in [Computer Sharing] appears. 5. Double click the drive to which you want to connect. The contents of the drive will appear, and is available for use. If you have a question or problem, refer to "Troubleshooting Table" on page 55. Checking the Connectivity 1. Click [Start] -> [Control Panel]. 2. Double-click the [PRISM Settings] icon. [PRISM Wireless Setting] appears. 3. Check the connectivity on the [Link] tab. The current condition of connection is displayed Item Description State Current Channel Current Tx Rate Radio Off/ Radio On Rescan Throughput (Bytes/sec) Link Quality Signal Strength Shows the current condition of connection. The MAC address of the other computer that you are connected to is displayed, when the connection is successfully made. If you are connected to more than one computer, the computer that has the best connectivity is displayed. Shows the current channel used for the connection. Shows the current transfer rate in Mbits/sec. Click [Radio OFF] to disconnect. Click [Radio On] to connect to the network. Click this button to search for others to connect to. Shows the actual transfer rate of the transfer data for send (Tx) and receive (Rx). Shows the link quality. This is not shown for the AdHoc connection. Shows the signal strength. This is not shown for the AdHoc connection. Table 11: Checking connectivity 54
-
 1
1 -
2
-
3
-
4
-
5
-
6
-
7
-
8
-
9
-
10
-
11
-
12
-
13
-
14
-
15
-
16
-
17
-
18
-
19
-
20
-
21
-
22
-
23
-
24
-
25
-
26
-
27
-
28
-
29
-
30
-
31
-
32
-
33
-
34
-
35
-
36
-
37
-
38
-
39
-
40
-
41
-
42
-
43
-
44
-
45
-
46
-
47
-
48
-
49
-
50
-
51
-
52
-
53
-
54
-
55
-
56
-
57
-
58
-
 59
59 -
 60
60 -
 61
61 -
 62
62 -
 63
63 -
 64
64 -
 65
65 -
 66
66 -
 67
67 -
 68
68 -
 69
69 -
70
-
71
-
72
-
73
-
74
 |
 |
