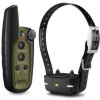
Garmin Sport PRO Owner s Manual - Page 7
Training Methods, Choosing the Correct Intensity Level, BarkLimiter - dog collar
 |
View all Garmin Sport PRO manuals
Add to My Manuals
Save this manual to your list of manuals |
Page 7 highlights
1 Select the correct contact point length for your dog's coat type: • For dogs with thicker coats, use the longer contact points. • For dogs with shorter coats, use the shorter contact points. 2 If necessary, use the included wrench to remove the contact points. 3 Twist the contact points into the collar. 4 Tighten with the included wrench, but do not overtighten. When you put the collar on the dog, make sure the contact points are tight against the neck. Dog Training You should research and investigate the training methods best suited for you, your dog, and your needs. When used properly, the Sport PRO training system is an effective training tool to aid your dog in reaching its full potential. The use of the training system should be part of an overall training program. Training Methods Momentary stimulation: Applies a brief stimulation when you press the training key, regardless of how long the key is depressed. Continuous stimulation: Applies stimulation to the dog the entire time you press the training key, for a maximum of 8 seconds. Your stimulations should typically be much shorter than 8 seconds. Tone: Activates an audible tone instead of stimulation. A tone can be used as either a positive or negative training cue, depending on your training program. Vibration: Applies vibration instead of stimulation to the dog the entire time you press the training key, for a maximum of 8 seconds. The effectiveness of vibration may vary based on the dog's temperament and experience. Choosing the Correct Intensity Level 1 Set the intensity to the lowest level. 2 Select a training key. 3 Observe the dog for a reaction, such as a head shake, neck movement, or just a change in expression. Sometimes dogs will vocalize due to the surprise of the electrical stimulation. If the dog vocalizes more than once, the intensity level is too high for beginning training. 4 If there is no reaction, increase the intensity level by one level until the dog has a slight but recognizable reaction to the stimulation. The intensity level that causes a slight but recognizable reaction is your dog's baseline level for beginning collar training. You do not need to, and should not, apply this intensity selection test again. After you begin training, the dog's performance guides your intensity selection. As the dog advances in training, you may need to change the level depending upon the training situation. Changing the Intensity Level You can select a different intensity level for each dog collar device. 1 Select a dog collar device (Selecting a Dog Collar Device, page 2). 2 Adjust the dial to increase or decrease the intensity level. BarkLimiter NOTICE Before playing with your dog, you should remove the dog collar device or deactivate the BarkLimiter feature. When using the BarkLimiter feature, you should remove all other collars, tags, or other items from your dog. These other items can cause the BarkLimiter feature to activate when the dog is not barking. The BarkLimiter feature can correct your dog automatically when the dog barks. The device detects vibrations to distinguish between barking and other vocalizations. You can use these methods when correcting your dog with the BarkLimiter feature. • Vibration instead of stimulation • Fixed stimulation • An automatic, gradual increase in stimulation intensity Automatic Intensity The device can set the stimulation intensity level automatically based on the barking behavior of the dog. The device starts at the lowest intensity level and increases the intensity level gradually until the dog stops barking. When the dog is quiet, the intensity decreases over time. The automatic intensity feature is designed to eliminate excessive nuisance barking. To stop barks more immediately, you should set the intensity level manually. Status LED The status LED flashes briefly when the dog collar device detects motion or corrects a bark. Green, yellow, or red Motion was detected, and no correction was flash applied. Blue flash A bark was detected, and a correction was applied. NOTE: A green, yellow, or red flash denotes how much charge is left in the dog device battery, ranging from high to low. Enabling the BarkLimiter Feature from the Handheld Device You can use your handheld device to enable BarkLimiter features. When you enable BarkLimiter mode from the handheld device, you can set the dog collar device to use auto-rise, vibration, or fixed stimulation levels. 1 Set the operating mode dial to AUX. 2 Select BARKLIMITER ON. The green LED flashes. 3 While the green LED is flashing, select an option: • To set vibration, select VIBE. • To set a fixed stimulation level, set the dial to a stimulation level and select CONTINUOUS. • To set auto-rise, select BARKLIMITER ON. A blue LED on the dog collar device indicates that it is in BarkLimiter mode. Turning Off the BarkLimiter Feature from the Handheld Device NOTE: If you enabled the BarkLimiter feature from the dog device, you cannot turn it off from the handheld device. 1 Set the dial to AUX. 2 Select BARKLIMITER OFF. Overriding the BarkLimiter Feature NOTE: If you enabled the BarkLimiter feature from the dog collar device, you cannot override it using the handheld device. If you need to apply a quick stimulation when your dog collar device is in BarkLimiter mode, you can override the BarkLimiter feature using the handheld device. You can return to BarkLimiter Dog Training 3


