Gastroback 42612 User Manual - Page 24
Step 1 - Stretching The Milk, Step 2 - Swirling The Milk
 |
View all Gastroback 42612 manuals
Add to My Manuals
Save this manual to your list of manuals |
Page 24 highlights
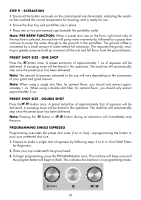
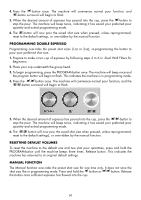
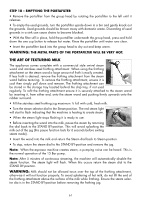
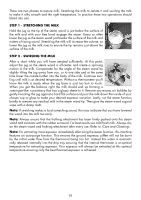
There are two phases to texture milk: Stretching the milk to aerate it and swirling the milk to make it silky smooth and the right temperature. In practice these two operations should blend into one. STEP 1 - STRETCHING THE MILK Hold the jug so the tip of the steam wand is just below the surface of the milk and with your free hand engage the steam. Every so often lower the jug so the steam wand just breaks the surface of the milk and makes a hissing sound. Stretching the milk will increase the volume, so lower the jug as the milk rises to ensure the tip remains just above the surface of the milk. STEP 2 - SWIRLING THE MILK After a short while you will have aerated sufficiently. At this point, adjust the jug so the steam wand is off-center and create a spinning motion in the milk. Compensate for the angle of the steam wand by slightly tilting the jug away from you, or to one side and at the same time lower the nozzle further into the body of the milk. Continue swirling until milk is at desired temperature. Without a thermometer you'll know the milk is ready when the jug base is ›just too hot‹ to touch. When you get the balance right the milk should end up forming a ›meringue-like‹ consistency that has a glassy sheen to it. Remove any excess air bubbles by gently knocking the jug against a hard flat surface and pour the milk down the inside of your chosen cup or glass to make your desired espresso variation. Lastly, run the steam function briefly to remove any residual milk in the steam wand tip. Then give the steam wand a good wipe with a damp cloth. Note: If stretching makes a loud screeching sound, this may inidicate that you have lowered the wand into the milk too early. Note: Always ensure that the frothing attachment has been firmly pushed onto the steam wand and connects with the rubber surround. For best results use cold fresh milk. Always clean the steam wand and frothing attachment after every use. Refer to ›Care and Cleaning‹. Note: For extracting more espresso immediately after using the steam function, this machine features an auto-purge function. This ensures the ground espresso coffee will not be burnt by the initial water flow from the thermocoil being too hot. Instead this water is automatically released internally into the drip tray ensuring that the internal thermostat is at optimal temperature for extracting espresso. Your espresso will always be extracted at this optimal temperature ensuring only the best flavored espresso is achieved. 62
-
 1
1 -
2
-
3
-
4
-
5
-
6
-
7
-
8
-
9
-
10
-
11
-
12
-
13
-
14
-
15
-
16
-
17
-
18
-
 19
19 -
 20
20 -
 21
21 -
 22
22 -
 23
23 -
 24
24 -
 25
25 -
 26
26 -
 27
27 -
 28
28 -
 29
29 -
30
-
31
-
32
-
33
-
34
-
35
-
36
-
37
-
38
 |
 |
