GE ASQ10AK User Manual - Page 12
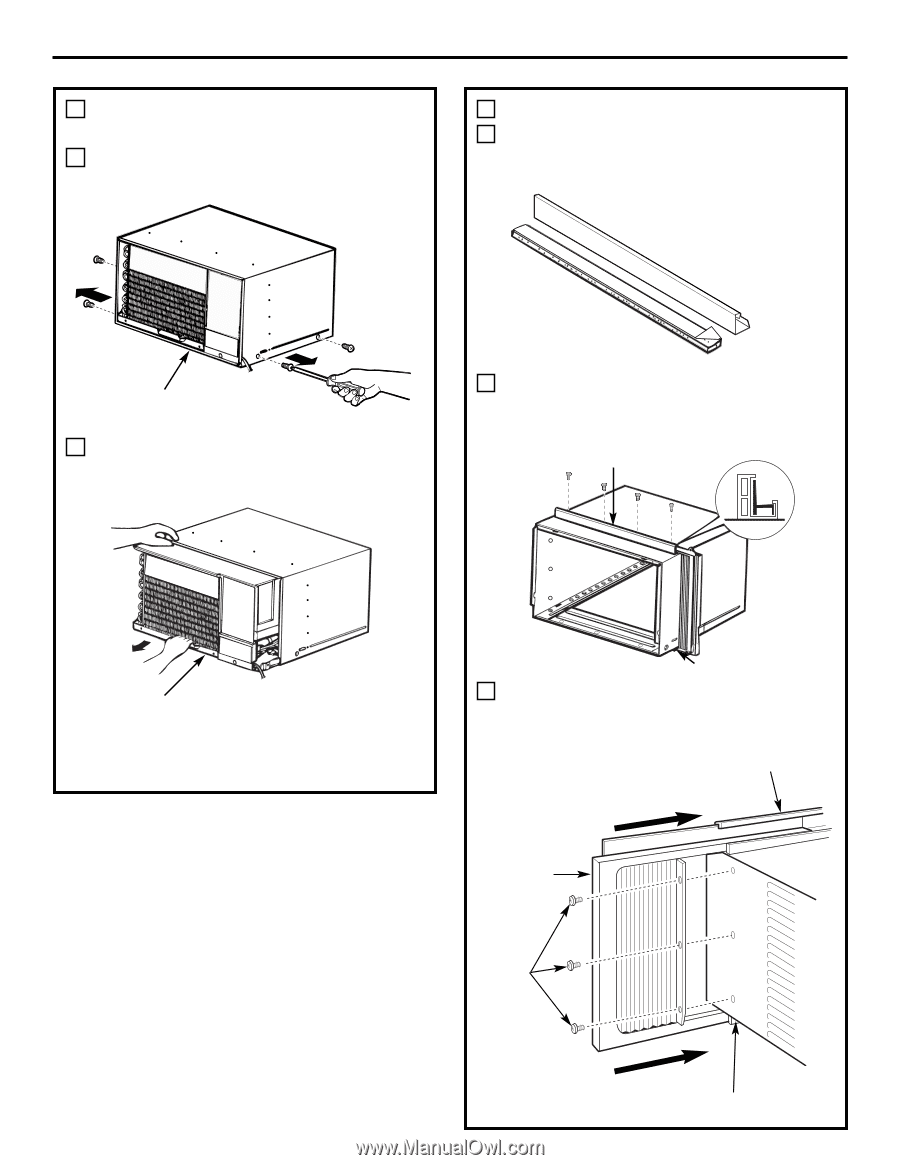
Prepare The Case, Remove The Air Conditioner, From The Case
 |
UPC - 084691159841
View all GE ASQ10AK manuals
Add to My Manuals
Save this manual to your list of manuals |
Page 12 highlights
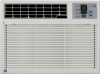
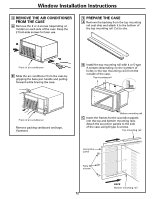
Window Installation Instructions 4 REMOVE THE AIR CONDITIONER FROM THE CASE A Remove the 2 or 4 screws (depending on model) on each side of the case. Keep the 2 front-side screws for later use. 5 PREPARE THE CASE A Remove the backing from the top mounting rail seal strip and attach it to the bottom of the top mounting rail. Cut to size. Front of air conditioner B Slide the air conditioner from the case by gripping the base pan handle and pulling forward while bracing the case. B Install the top mounting rail with 4 or 5 type A screws (depending on the number of holes in the top mounting rail) from the outside of the case. Top mounting rail Front of air conditioner Remove packing cardboard and tape, if present. Bottom mounting rail C Insert the frames for the accordion panels into the top and bottom mounting rails. Attach the accordion panels to the side of the case using 6 type A screws. Top mounting rail Accordion panel Type A screws 12 BACK Bottom mounting rail
-
 1
1 -
2
-
3
-
4
-
5
-
6
-
 7
7 -
 8
8 -
 9
9 -
 10
10 -
 11
11 -
 12
12 -
 13
13 -
 14
14 -
 15
15 -
 16
16 -
 17
17 -
18
-
19
-
20
-
21
-
22
-
23
-
24
-
25
-
26
-
27
-
28
-
29
-
30
-
31
-
32
-
33
-
34
-
35
-
36
-
37
-
38
-
39
-
40
 |
 |