GE ASQ10AK User Manual - Page 9
Installation, Air Conditioner, Instructions - parts
 |
UPC - 084691159841
View all GE ASQ10AK manuals
Add to My Manuals
Save this manual to your list of manuals |
Page 9 highlights
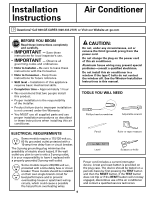
Installation Instructions Air Conditioner Questions? Call 800.GE.CARES (800.432.2737) or Visit our Website at: ge.com BEFORE YOU BEGIN Read these instructions completely and carefully. • IMPORTANT - Save these instructions for local inspector's use. • IMPORTANT - Observe all governing codes and ordinances. • Note to Installer - Be sure to leave these instructions with the Consumer. • Note to Consumer - Keep these instructions for future reference. • Skill level - Installation of this appliance requires basic mechanical skills. • Completion time - Approximately 1 hour • We recommend that two people install this product. • Proper installation is the responsibility of the installer. • Product failure due to improper installation is not covered under the Warranty. • You MUST use all supplied parts and use proper installation procedures as described in these instructions when installing this air conditioner. CAUTION: Do not, under any circumstances, cut or remove the third (ground) prong from the power cord. Do not change the plug on the power cord of this air conditioner. Aluminum house wiring may present special problems-consult a qualified electrician. Do not install this air conditioner in a window if the type C bolts do not contact the window sill. See the Window Installation Instructions in this manual. TOOLS YOU WILL NEED Phillips head screwdriver Adjustable wrench ELECTRICAL REQUIREMENTS Some models require a 115/120-volt a.c., 60 Hz grounded outlet protected with a 15-amp time delay fuse or circuit breaker. The 3-prong grounding plug minimizes the possibility of electric shock hazard. If the wall outlet you plan to use is only a 2-prong outlet, it is your responsibility to have it replaced with a properly grounded 3-prong wall outlet. Some models require 230/208-volt a.c., protected with a time delay fuse or circuit breaker. These models should be installed on their own single branch circuit for best performance and to prevent overloading house or apartment wiring circuits, which could cause a possible fire hazard from overheating wires. 9 Pencil Ruler or tape measure Level Scissors or knife Power cord includes a current interrupter device. A test and reset button is provided on the plug case. The device should be tested on a periodic basis by first pressing the TEST button and then the RESET button. If the TEST button does not trip or if the RESET button will not stay engaged, discontinue use of the air conditioner and contact a qualified service technician.
-
 1
1 -
2
-
3
-
 4
4 -
 5
5 -
 6
6 -
 7
7 -
 8
8 -
 9
9 -
 10
10 -
 11
11 -
 12
12 -
 13
13 -
 14
14 -
15
-
16
-
17
-
18
-
19
-
20
-
21
-
22
-
23
-
24
-
25
-
26
-
27
-
28
-
29
-
30
-
31
-
32
-
33
-
34
-
35
-
36
-
37
-
38
-
39
-
40
 |
 |
