GE ATP 1000 Installation Instructions - Page 3
Power Up and, Communication, Programming, Connecting the, Touchpad for, System - alphanumeric touchpad
 |
UPC - 782136711486
View all GE ATP 1000 manuals
Add to My Manuals
Save this manual to your list of manuals |
Page 3 highlights
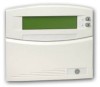
Power Up and Bus Communication Note Steps 3 through 9 are optional. Programming Connecting the Touchpad for System Programming Only After making all wiring connections from the touchpad to the panel, you are ready to power up the panel and verify correct communication between the touchpad and the panel. Upon power up, the panel scans the bus for connected devices, assigns a unit number to each bus device, and automatically learns the device ID number of each bus device. 1. Verify that all wiring between the panel and touchpad is correct. 2. Connect the panel battery and restore AC power. Alphanumeric touchpads briefly show SCANNING BUS DEVICES, then display date and time. 3. At the touchpad, enter program mode by pressing 8 + installer/dealer code (default = 4321) + 0 + 0. The touchpad should display SYSTEM PROGRAMMING. 4. Press ƒ and the display shows SECURITY. 5. Press A or B until the display shows ACCESSORY MODULES, then press ƒ. The display should read BUS DEVICES. 6. Press ƒ. The display shows the lowest device address and its ID. The following example shows what a device address display may look like: UNIT - ID 0-02110185* *The 8-digit SuperBus ID number is also located on a label on back of the touchpad. 7. Press A or B to cycle through all bus device addresses until the touchpad appears. 8. After verifying the touchpad device ID, press , repeatedly until the display shows SYSTEM PROGRAMMING. 9. Press A or B until the display shows EXIT PROGRAMMING READY, then press ƒ. The touchpad should show the date and time display. To program options for the newly installed touchpad (such as key beeps) see the specific panel installation instructions. For installations that don't include an alphanumeric touchpad as a permanent part of the system, you can connect one for system programming to the Programming Touchpad Header on the panel. To do this you must first connect a Programming Touchpad Cable (60-791) to the touchpad wires (see Programming Touchpad Cable Installation Instructions-466-1604, included with the cable). Then, use the appropriate procedure for connecting the touchpad. To connect a programming touchpad to a Concord Express, Concord, or Concord Ultra panel with software version 2.0 or later: 1. With the panel powered up, connect the cable to the Programming Touchpad Header (see Figure 4). ! Caution . When using the ATP1000 as a programming touchpad, be careful not to touch its circuit board which is exposed on the backside. T e s t S y s te m W e e k ly O ff A 1 p re s s b o th N o D e la y B 4 p re s s b o th F e a tu re s C 7 p re s s b o th S ta tu s D * S ta y 2 S ile n t 5 S y s te m 8 L ig h ts 0 A w ay 3 P ag e r 6 M enu 9 B yp ass # PROGRAMMING TOUCHPAD CABLE (60-791) 8642G29A.DSF Figure 4. Connecting a Programming Touchpad-Concord Express Shown, Concord Similar 2. Activate the touchpad by pressing 8 + CODE + 0 + 2. ATP1000 Touchpad/Display Installation Instructions 3
-
 1
1 -
 2
2 -
 3
3 -
 4
4 -
 5
5 -
 6
6
 |
 |
