GE JGP637BEJBB Owners Manual - Page 14
Installation Instructions, Sealed Gas Cooktop
 |
View all GE JGP637BEJBB manuals
Add to My Manuals
Save this manual to your list of manuals |
Page 14 highlights
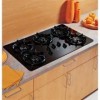
Installation Instructions 36″ Sealed Gas Cooktop If you have questions, call 1.800.GE.CARES or visit our Website at: ge.com In the Commonwealth of Massachusetts: • This product must be installed by a licensed plumber or gas fitter. • When using ball-type gas shut-off valves, they shall be the T-handle type. • A flexible gas connector, when used, must not exceed 3 feet. CAUTION: Before you begin-read these instructions completely and carefully. • IMPORTANT-Save these instructions for local inspector's use. • IMPORTANT-OBSERVE ALL GOVERNING CODES AND ORDINANCES. • Note to Installer-Be sure to leave these instructions with the Consumer. • Note to Consumer-Keep these instructions for future reference. • Note-This appliance must be properly grounded. • IMPORTANT: Leak testing of the appliance shall be conducted according to the manufacturer's instructions. • Skill level-Installation of this appliance requires basic mechanical skills. • Proper installation is the responsibility of the installer. • Product failure due to improper installation is not covered under the Warranty. PARTS INCLUDED MATERIALS YOU MAY NEED 2 screws Foam Tape 2 Hold Down Brackets TOOLS YOU WILL NEED Pipe Fittings Joint Sealant Shut Off Valves Flat-Blade Screwdriver Pipe Wrench 1/8″ Drill Bit & Electric or Hand Drill Phillips Head Screwdriver Pencil 14 Ruler or Straightedge Saber Saw
-
 1
1 -
2
-
3
-
4
-
5
-
6
-
7
-
8
-
 9
9 -
 10
10 -
 11
11 -
 12
12 -
 13
13 -
 14
14 -
 15
15 -
 16
16 -
 17
17 -
 18
18 -
 19
19 -
20
-
21
-
22
-
23
-
24
-
25
-
26
-
27
-
28
-
29
-
30
-
31
-
32
-
33
-
34
-
35
-
36
-
37
-
38
-
39
-
40
-
41
-
42
-
43
-
44
-
45
-
46
-
47
-
48
-
49
-
50
-
51
-
52
-
53
-
54
-
55
-
56
-
57
-
58
-
59
-
60
-
61
-
62
-
63
-
64
-
65
-
66
-
67
-
68
 |
 |
