GE PHP900DMBB Installation Instructions - Page 1
GE PHP900DMBB - 30" Induction Cooktop Manual
 |
UPC - 084691163671
View all GE PHP900DMBB manuals
Add to My Manuals
Save this manual to your list of manuals |
Page 1 highlights
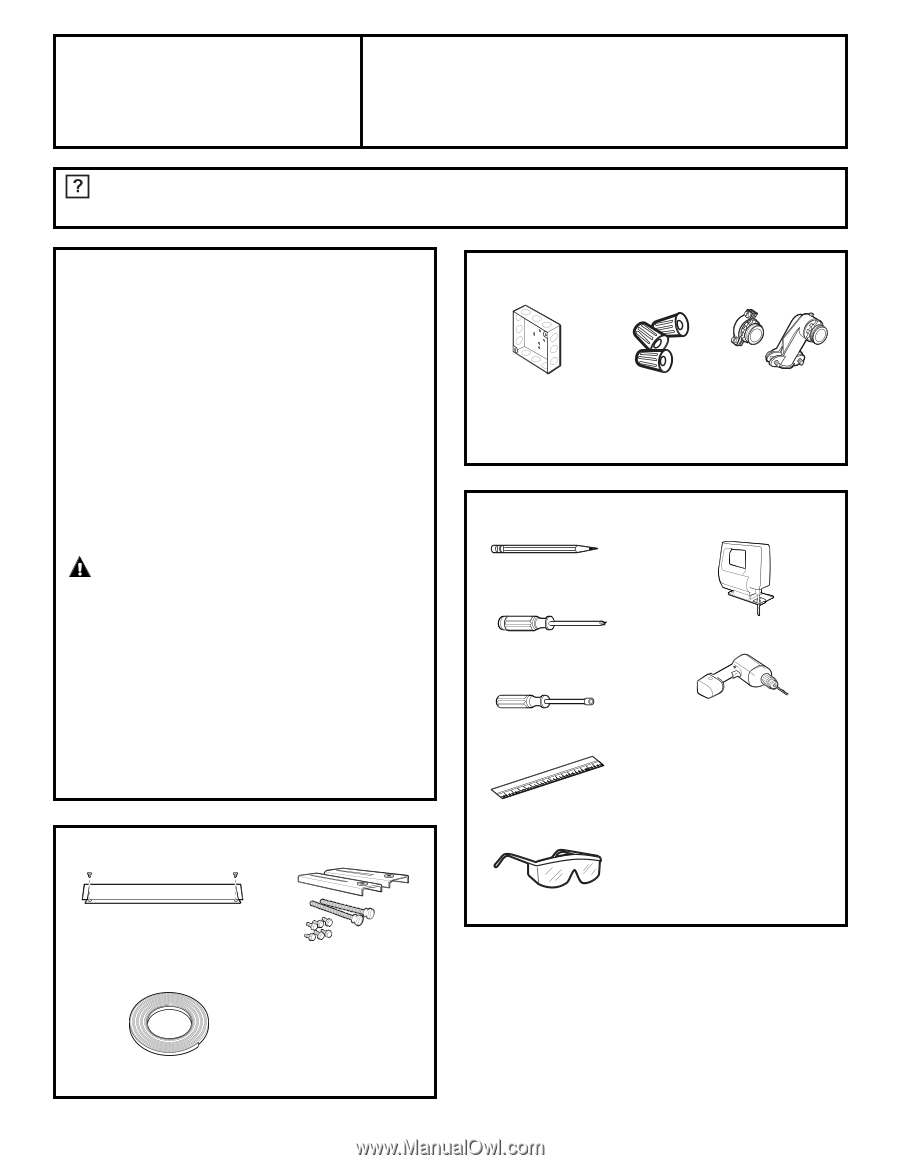
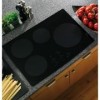
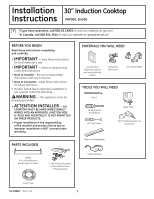
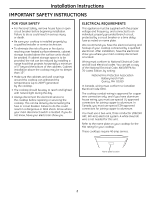
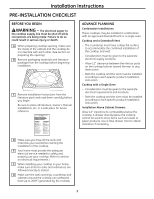
Installation 30″ Induction Cooktop Instructions PHP900, ZHU30 "If you have questions, call 800.GE.CARES or visit our website at: ge.com" "In Canada, call 800.561.3344 or visit our website at: geappliances.ca" BEFORE YOU BEGIN Read these instructions completely and carefully. • IMPORTANT - Save these instructions for local inspector's use. • IMPORTANT - Observe all governing codes and ordinances. • Note to Installer - Be sure to leave these instructions with the Consumer. • Note to Consumer - Keep these instructions for future reference. • Product failure due to improper installation is not covered under the Warranty. WARNING - This appliance must be properly grounded. • ATTENTION INSTALLER - ALL COOKTOPS MUST BE HARD WIRED (DIRECT WIRED) INTO AN APPROVED JUNCTION BOX. A "PLUG AND RECEPTACLE" IS NOT PERMITTED ON THESE PRODUCTS. • Proper installation is the responsibility of the installer and product failure due to improper installation is NOT covered under warranty. PARTS INCLUDED Baffle (For all installations except over an oven.) 2 Hold-Down Brackets 6 Hex-Head Screws 2 Thumbscrews MATERIALS YOU WILL NEED Junction Box (Sized for conduit per local electrical codes.) Large Size Wire Nuts 3/4" Strain Relief TOOLS YOU WILL NEED Pencil Phillips Head Screwdriver 1/4″ Nut Driver Saber Saw 1/8″ Drill Bit & Electric or Hand Drill Ruler or Straightedge Safety Glasses Foam Tape 31-10667 (06-07 JR) 1
-
 1
1 -
 2
2 -
 3
3 -
 4
4 -
 5
5 -
 6
6 -
 7
7 -
8
-
9
-
10
-
11
-
12
-
13
-
14
-
15
-
16
-
17
-
18
-
19
-
20
-
21
-
22
-
23
-
24
-
25
-
26
-
27
-
28
-
29
-
30
-
31
-
32
 |
 |