Gigabyte GA-6FXSV2 Manual - Page 21
/8 SATA 0~5 Serial ATA cable connectors, BAT CMOSattery, CAUTION
 |
View all Gigabyte GA-6FXSV2 manuals
Add to My Manuals
Save this manual to your list of manuals |
Page 21 highlights
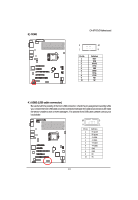
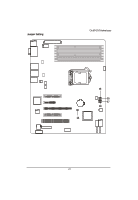
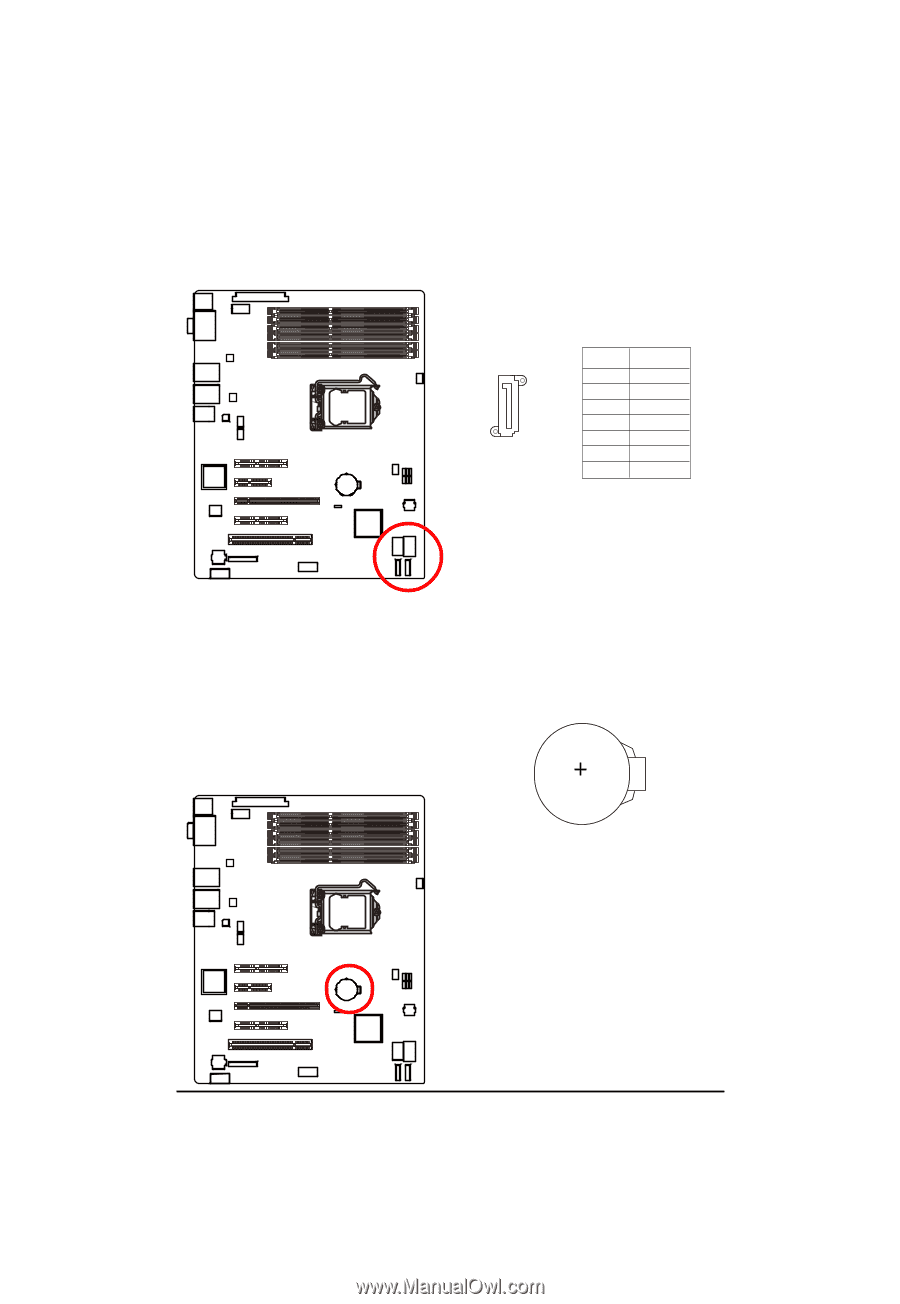
GA-6FXSV2 Motherboard 6/7/8 ) SATA 0~5 (Serial ATA cable connectors) SATA 3Gb/s can provide up to 300MB/s transfer rate. Please refer to the BIOS setting for the SATA 3Gb/s and install the proper driver in order to work properly. 7 Pin No. Definition 1 GND 2 TXP 3 TXN 4 GND 5 RXN 1 6 RXP 7 GND 9 ) BAT (CMOSattery) If you want to erase CMOS... 1.Turn OFF the computer and unplug the power cord. 2.Remove the battery, wait for 30 second. 3.Re-install the battery. 4.Plug the power cord and turn ON the computer. CAUTION Danger of explosion if battery is incorrectly replaced. Replace only with the same or equivalent type recommended by the manufacturer. Dispose of used batteries according to the manufacturer's instructions. 21
-
 1
1 -
2
-
3
-
4
-
5
-
6
-
7
-
8
-
9
-
10
-
11
-
12
-
13
-
14
-
15
-
 16
16 -
 17
17 -
 18
18 -
 19
19 -
 20
20 -
 21
21 -
 22
22 -
 23
23 -
 24
24 -
 25
25 -
 26
26 -
27
-
28
-
29
-
30
-
31
-
32
-
33
-
34
-
35
-
36
-
37
-
38
-
39
-
40
-
41
-
42
-
43
-
44
-
45
-
46
-
47
-
48
-
49
-
50
-
51
-
52
-
53
-
54
-
55
-
56
-
57
-
58
 |
 |
21
GA-6FXSV2 Motherboard
SATA 3Gb/s can provide up to 300MB/s transfer rate. Please refer to the BIOS setting for the
SATA 3Gb/s and install the proper driver in order to work properly.
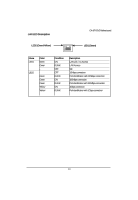
6/7/8 ) SATA 0~5 (Serial ATA cable connectors)
1
7
Pin No.
Definition
1
GND
2
TXP
3
TXN
4
GND
5
RXN
6
RXP
7
GND
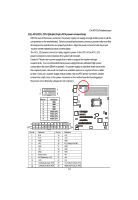
9 ) BAT (CMOSattery)
CAUTION
Danger of explosion if battery is incorrectly
replaced.
Replace only with the same or equivalent
type recommended by the manufacturer.
Dispose of used batteries according to the
manufacturer’s instructions.
If you want to erase CMOS...
1.Turn OFF the computer and unplug the power cord.
2.Remove the battery, wait for 30 second.
3.Re-install the battery.
4.Plug the power cord and turn ON the computer.