Gigabyte GV-R98P128D Manual - Page 12
Driver Installation
 |
View all Gigabyte GV-R98P128D manuals
Add to My Manuals
Save this manual to your list of manuals |
Page 12 highlights
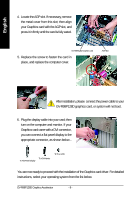
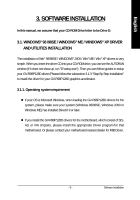
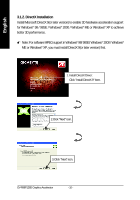
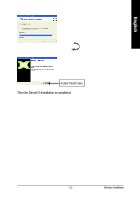
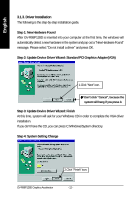
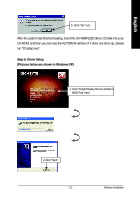
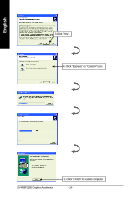
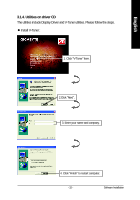
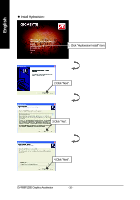
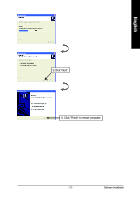
English 3.1.3. Driver Installation The following is the step-by-step installation guide. Step 1: New Hardware Found After GV-R98P128D is inserted into your computer at the first time, the windows will automatically detect a new hardware in the system and pop out a "New Hardware Found" message. Please select "Do not install a driver" and press OK. Step 2: Update Device Driver Wizard: Standard PCI Graphics Adapter(VGA) 1.Click "Next" icon. 0Don't click "Cancel", because the system will hang if you press it. Step 3: Update Device Driver Wizard: Finish At this time, system will ask for your Windows CD in order to complete the VGA driver installation. If you don't have the CD, you can press C:\Windows\System directory. Step 4: System Setting Change 2.Click "Finish" icon. GV-R98P128D Graphics Accelerator - 12 -
-
 1
1 -
2
-
3
-
4
-
5
-
6
-
 7
7 -
 8
8 -
 9
9 -
 10
10 -
 11
11 -
 12
12 -
 13
13 -
 14
14 -
 15
15 -
 16
16 -
 17
17 -
18
-
19
-
20
-
21
-
22
-
23
-
24
-
25
-
26
-
27
-
28
-
29
-
30
-
31
-
32
-
33
-
34
-
35
-
36
 |
 |