HTC EVO 4G User Manual - Page 56
Selecting a Ringer Type for an Entry, Assigning a Picture to an Entry
 |
View all HTC EVO 4G manuals
Add to My Manuals
Save this manual to your list of manuals |
Page 56 highlights
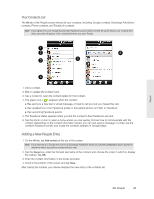
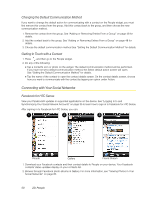
Tip: Tap the Number type (for example, ), to change the type of number. Tap X at the right side of a number to delete it. 5. Tap Save. (Scroll down the screen to see the Save button.) Selecting a Ringer Type for an Entry Assign a ringer type to an entry in People so you can identify the caller by the ringer type. (See "Sound Settings" on page 27.) 1. Display an entry in People. (See "Displaying an Entry in People" for details.) 2. Scroll down the screen, and then tap Ringtone. 3. Select a ring tone (the ring tone plays back) from the menu and tap OK. Assigning a Picture to an Entry Assign a picture to display each time a certain contact calls you. 1. Display an entry in People. (See "Displaying an Entry in People" for details.) 2. Scroll down the screen and tap Edit. 3. Tap at the top-left corner of the screen. 4. Tap Gallery or Camera. Ⅲ If you selected Gallery, select an album to find the picture, tap the picture you want to use, crop the picture, and tap Save. Ⅲ If you selected Camera, the camera will launch and you will use it to take a new picture. (See "Camera and Multimedia" on page 75.) 5. Tap Save. (Scroll down the screen to see the Save button.) Adding an Email Address to an Entry 1. Display an entry in People. (See "Displaying an Entry in People" for details.) 2. Scroll down the screen and tap Edit. 3. Under the Email section, tap the box after . 4. Enter the email address and tap Save. (Scroll down the screen to see the Save button.) Adding Additional Information to an Entry You can add additional information to an entry in People. 1. Display an entry in People. (See "Displaying an Entry in People" for details.) 2. Scroll down the screen and tap Edit. 3. Scroll down the screen and tap Add. 4. Tap the type of information you want to add such as Phone, Email, or Postal address. 46 2D. People
-
 1
1 -
2
-
3
-
4
-
5
-
6
-
7
-
8
-
9
-
10
-
11
-
12
-
13
-
14
-
15
-
16
-
17
-
18
-
19
-
20
-
21
-
22
-
23
-
24
-
25
-
26
-
27
-
28
-
29
-
30
-
31
-
32
-
33
-
34
-
35
-
36
-
37
-
38
-
39
-
40
-
41
-
42
-
43
-
44
-
45
-
46
-
47
-
48
-
49
-
50
-
 51
51 -
 52
52 -
 53
53 -
 54
54 -
 55
55 -
 56
56 -
 57
57 -
 58
58 -
 59
59 -
 60
60 -
 61
61 -
62
-
63
-
64
-
65
-
66
-
67
-
68
-
69
-
70
-
71
-
72
-
73
-
74
-
75
-
76
-
77
-
78
-
79
-
80
-
81
-
82
-
83
-
84
-
85
-
86
-
87
-
88
-
89
-
90
-
91
-
92
-
93
-
94
-
95
-
96
-
97
-
98
-
99
-
100
-
101
-
102
-
103
-
104
-
105
-
106
-
107
-
108
-
109
-
110
-
111
-
112
-
113
-
114
-
115
-
116
-
117
-
118
-
119
-
120
-
121
-
122
-
123
-
124
-
125
-
126
-
127
-
128
-
129
-
130
-
131
-
132
-
133
-
134
-
135
-
136
-
137
-
138
-
139
-
140
-
141
-
142
-
143
-
144
-
145
-
146
-
147
-
148
-
149
-
150
-
151
-
152
-
153
-
154
-
155
-
156
-
157
-
158
-
159
-
160
-
161
-
162
-
163
-
164
-
165
-
166
-
167
-
168
-
169
-
170
-
171
-
172
-
173
-
174
-
175
-
176
-
177
-
178
-
179
-
180
-
181
-
182
-
183
-
184
-
185
-
186
-
187
-
188
-
189
-
190
-
191
-
192
-
193
-
194
-
195
-
196
-
197
 |
 |
