Haier HWM80-FD756DD User Manual - Page 12
Installation, Troubleshooting, Preparation, Dismantle the transportation bolts, Adjusting the feet
 |
View all Haier HWM80-FD756DD manuals
Add to My Manuals
Save this manual to your list of manuals |
Page 12 highlights
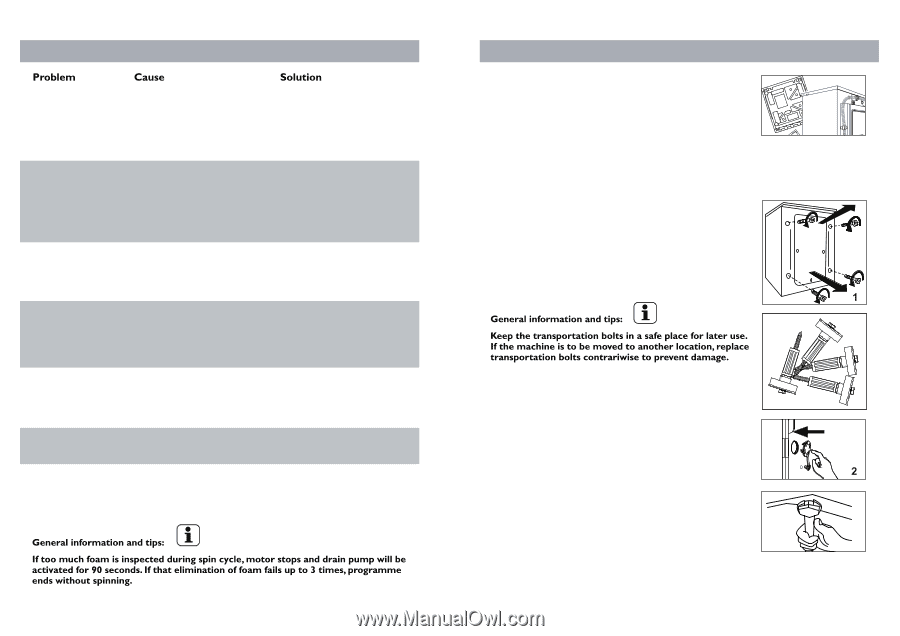
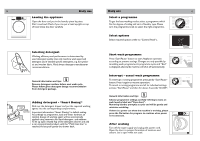
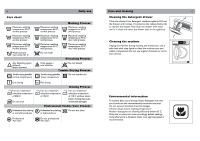
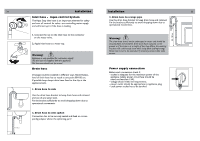
22 Troubleshooting Installation 23 Drainage failure. Strong vibration while spinning. Operation stops before completing wash cycle. Pump filter is blocked. Drain hose end is higher than 100 cm above floor level. Drain hose is blocked. Clean pump filter. Make sure that drain hose is properly installed. Unblock drain hose. Machine load is not correct.. Washing machine is located on an uneven surface or is not levelled. Not all transportation bolts have been removed. Adapt amount of laundry. Make sure that washing machine is on an even surface and levelled. Remove all transportation bolts. Water or electric failure. Check power and water supply. Preparation Remove all packaging material including polystyrene base. While opening the package, water drops may be seen on plastic bag and porthole.This normal phenomenon results from water tests in the factory. Dismantle the transportation bolts The transportation bolts are designed for clamping antivibration components inside the appliance during transportation. 1. Remove bolts on the rear side and take out plasticspacers from inner side of the machine. Operation stops for a period of time. No displayed "error code"? Programme performs soaking cycle? Programme break down. Activate display - see ".display". Touch "Start/Pause" to resume. If it seems appropriate cancel operation. Excessive foam floats drum and/or detergent drawer. Detergent is not a appropriate. Check detergent recommendations. Excessive use of detergent. Reduce amount of detergent Automatic adjustment Washing programme of washing time. duration will be adjusted. This is normal and doesn't affect functionality. 2. Fill left holes with blanking plugs. Spinning fails. Unbalance of laundry. Check machine load and laundry and run a spinning programme again. Adjusting the feet Adjust all feets to achieve a complete level position.This will minimize vibrations and noise during use. It will also reduce wear and tear.We recommend to use a spirit level for adjustment. Floor should be as stable and flat as possible.
-
 1
1 -
2
-
3
-
4
-
5
-
6
-
 7
7 -
 8
8 -
 9
9 -
 10
10 -
 11
11 -
 12
12 -
 13
13 -
 14
14
 |
 |