Harbor Freight Tools 62365 User Manual - Page 16
Transporting the Trencher
 |
View all Harbor Freight Tools 62365 manuals
Add to My Manuals
Save this manual to your list of manuals |
Page 16 highlights
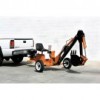
Safety Setup Transporting the Trencher 1. Lock the Boom in Place. Use the Bucket Lever to line the hole on the Bucket (32) up with the hole on the Boom Extension (34). Insert a Safety Locking Pin (15) and secure with a Ball Pin. 2. Use the Boom Swing Lever to line up the hole in the Boom Pivot (38) with the Hole in the Frame (90). Insert a Safety Locking Pin (15) and secure with a Ball Pin. See Figure H. Safety Locking Pin (15) 7. Place the Hitch Coupler (58) over the vehicle's hitch ball, pull the trigger, push down on the Handle, and release the Trigger, making sure it locks in the slot. See Figure J. Trigger Handle Adjustment Nut Safety Latch (41) Figure H 3. Put the Boom into the Shallow Position and raise it until the Pin on the side of the Main Boom (36) is close enough for the Safety Latch (41) to swing over it. To use the Safety Latch, pull out on the handle, swing it over the Pin, and lower it over the Pin, locking it in place. 4. When transporting the Trencher, make sure your hitch (not included) is compatible with the Hitch Coupler (92). Follow all of the safety warnings for towing in your vehicle's manual. The Hitch Coupler will only accept a 2 inch hitch ball. 5. To reduce friction between the hitch ball and Hitch Coupler (58), apply a layer of heavy-weight grease over the hitch ball. 6. Temporarily remove the "R" Pin and Safety Pin. Then, pull up on the Trigger and lift up on the Handle. See Figure I. R-Pin Hitch Ball (Not Included) Safety Chain (56) Figure J 8. Pull up and down on the Coupler to make sure the hitch ball is fitting snugly in the Coupler. There should be no play between the hitch ball and Coupler. If there is play, tighten the Adjustment Nut until no play is present. If the Adjustment Nut is too tight, the Handle will not lock. WARNING! If the Hitch Coupler is not secured properly, the ball could come loose while the Trencher is in motion, possibly causing property damage or SERIOUS PERSONAL INJURY. 9. Make sure to attach each side of the Safety Chain (56) equally to the towing vehicle's rear bumper or frame. CAUTION! Care must be taken when backing up the Trencher. Only back up the Trencher on a straight path. If the Trencher is allowed to turn off the straight path while backing up, the Trencher could jackknife, causing severe damage to the Trencher and to the towing vehicle. 10. To prevent accidents, turn off the engine, wait for it to cool, and disconnect its spark plug wire after use. Clean external parts with clean cloth, then store the equipment out of children's reach. Safety Pin Operation Maintenance Hitch Coupler (58) Page 16 Figure I For technical questions, please call 1-888-866-5797. Item 62365


