Harman Kardon TD262 Owners Manual - Page 9
tape counter
 |
View all Harman Kardon TD262 manuals
Add to My Manuals
Save this manual to your list of manuals |
Page 9 highlights
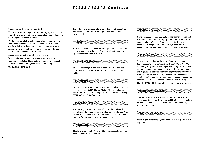
4. Set the INPUT LEVEL knob until regular musical peaks register uo to 0dB with occasional peaks registering as high as +3db'. 5. Press > to begin recording. 6. During recording, watch the Peak Level Indicators to make sure that regular peaks do not exceed +3dB'. • To insert a momentary blank space, press REC MUTE (TD 262 only). • To pause during recording, press o ii (REC/PAUSE). Press > (PLAY) to continue recording. • To stop recording, press • . 1. When using metal tape formulations with Dolby C noise reduction, it is possible to record occasional musical peaks as high as +5dB. To determine if saturation distortion has occurred while recording at higher levels, reset the counter to 000 during recording, then later rewind the tape back to that point and play back that section. This is a simple way to fine tune your cassette tape and deck. It uses interstation tape hiss as a test source. The BIAS FINE TRIM control is rotated in increments each time the Tape Counter advances 10 units. Then, when listening to playback , you can use the Tape Counter to determine which BIAS FINE TUNE position provided the best frequency response. Please note that the BIAS FINE TRIM control has less effect with metal tape than with LN or CrO2 tapes. 1. Make sure that the NR button on the TD262 / TD212 is in the OUT position (off). 2. Select the proper BIAS/EQUALIZATION setting to match the tape type being used. 3. Rotate the BIAS FINE TRIM control as far as it will go to the left (hi cut). We will refer to this as the "7 o'clock" position, since it corresponds to that position on a clock face. 4. Set your receiver/pre-amp/integrated amp's SOURCE selector to TUNER. 5. Turn off any MUTE and SEEK features on your tuner (or tuning section of a receiver) and tune between stations until you hear only loud hiss (interstation noise). 6. After loading a blank cassette into the deck, press >> to advance toward the middle of the tape. 7. Press • (STOP) and then o n (REC/PAUSE). 8. Set the INPUT level control until the Peak Level Meters read -3dB. 9. Reset the Tape Counter to 000. 10. Press > to begin recording. 11. When the Tape Counter reads 010, quickly rotate the BIAS FINE TRIM control clockwise to the "8 o'clock" position. 12. When the Tape Counter reads 020, rotate the BIAS FINE TRIM control to "9 o'clock". 13. Continue this operation until the Tape Counter reads 80 and the BIAS FINE TRIM knob has been rotated fully clockwise to the right as far as it will go (hi boost). 14. Press ■ and rewind the tape back to the point where the tape counter reads 000. 15. Select TAPE MONITOR on your receiver/pre-amp/etc. Turn up the volume to a relatively high level or plug in a set of headphones and listen through them. 16. Press > on the TD262 / TD212. 17. While watching the Tape Counter, listen to the interstation FM hiss. At each 10 tape counter units, the treble quality of the hiss should change slightly. Compare it with "live" interstation noise by pressing the TAPE MONITOR button in and out. When the playback hiss and the "live" hiss sound very close to the same, note the numbers on the Tape Counter. These correspond to the BIAS FINE TRIM adjustment for the particular tape you are using. 040 030 )150 040 030, ,050 040 030 "50 020-I 11-060 020-I I - 060 020- -060 010' Start 000 hi cut • 070 080 End hi boost 010' Start 000 hi cut • 070 080 End hi boost 010' , Start 000 hi cut /`070 080 End hi boost Figure 4 Adjusting Bias.Fine Trim If you wish, you may repeat the test making adjustments just in close proximity to what seems to be the optimal setting. This can further fine tune bias adjustments, although past a certain point, minute changes will be hard to detect. You should repeat this test again each time you change brands or formulations of cassette tape. All cassettes are provided with an erasure protection system. It consists of two small tabs covering square holes on the back of the cassette shell. When these small plastic tabs are removed, it is impossible to re-record the cassette. Thus you can protect a recorded tape form accidental erasure by prying these tabs off with a small screwdriver. If you wish to use an erasure-protected cassette again for recording, simply cover the holes with adhesive tape. After replacing a tape in its case, store it in a location well away from direct sunlight, high temperatures and excessive humidity. Be especially careful to avoid placing a cassette tape near television sets or loudspeakers where magnetic fields may partially erase the tape. Do not use old cassettes that no longer smoothly pass the tape from reel-to-reel. They may jam or otherwise provide unsatisfactory performance. 9
-
 1
1 -
2
-
3
-
 4
4 -
 5
5 -
 6
6 -
 7
7 -
 8
8 -
 9
9 -
 10
10 -
 11
11 -
 12
12
 |
 |
