Hayward Salt & Swim Salt & Swim Owner's Manual - Page 8
Connect and Fasten Cell Cap, Bonding - salt and swim cell
 |
View all Hayward Salt & Swim manuals
Add to My Manuals
Save this manual to your list of manuals |
Page 8 highlights
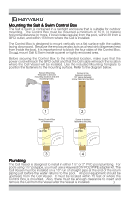
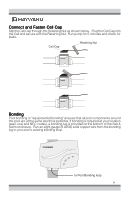
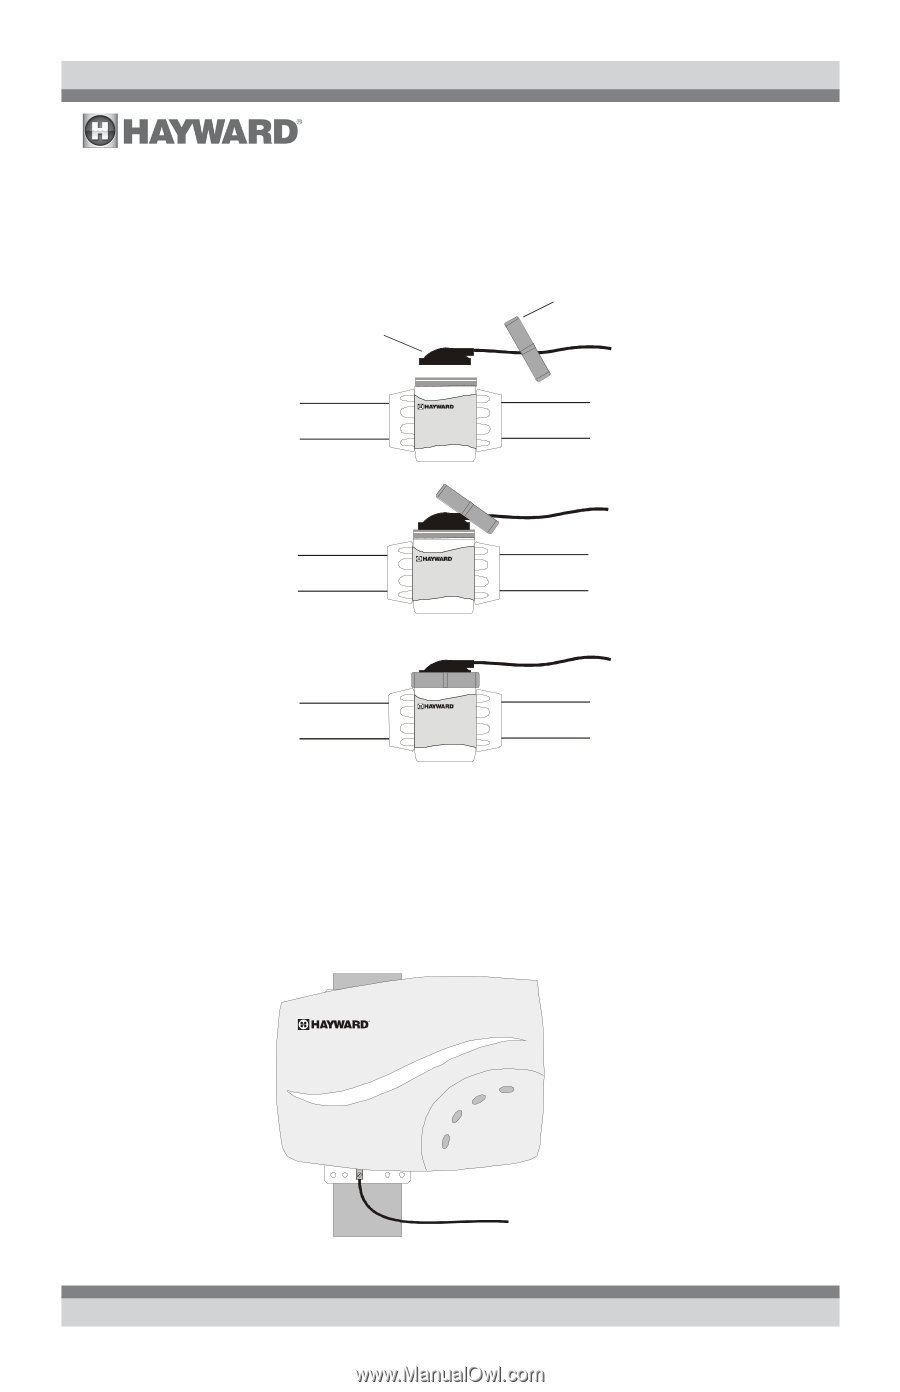
Connect and Fasten Cell Cap Slip the Cell Cap through the Retaining Nut as shown below. Plug the Cell Cap into the Cell and secure with the Retaining Nut. Run pump for 5 minutes and check for leaks. Cell Cap Retaining Nut Bonding Pool bonding or "equipotential bonding" ensures that all pool components around the pool are at the same electrical potential. If bonding is required at your location (see Local and NEC codes), a bonding lug is provided at the bottom of the Salt & Swim enclosure. Run an eight gauge (8 AWG) solid copper wire from the bonding lug to your pool's existing bonding loop. to Pool Bonding loop 6
-
 1
1 -
2
-
 3
3 -
 4
4 -
 5
5 -
 6
6 -
 7
7 -
 8
8 -
 9
9 -
 10
10 -
 11
11 -
 12
12 -
 13
13 -
14
-
15
-
16
-
17
-
18
-
19
-
20
-
21
-
22
-
23
-
24
 |
 |
6
Connect and Fasten Cell Cap
Connect and Fasten Cell Cap
Connect and Fasten Cell Cap
Connect and Fasten Cell Cap
Connect and Fasten Cell Cap
Slip the Cell Cap through the Retaining Nut as shown below.
Plug the Cell Cap into
the Cell and secure with the Retaining Nut. Run pump for 5 minutes and check for
leaks.
Bonding
Bonding
Bonding
Bonding
Bonding
Pool bonding or "equipotential bonding" ensures that all pool components around
the pool are at the same electrical potential. If bonding is required at your location
(see Local and NEC codes), a bonding lug is provided at the bottom of the Salt &
Swim enclosure.
Run an eight gauge (8 AWG) solid copper wire from the bonding
lug to your pool's existing bonding loop.
Cell Cap
Retaining Nut
to Pool Bonding loop