HealthRider H79t Treadmill English Manual - Page 11
Press the Left and Right Base Covers 83, 84
 |
View all HealthRider H79t Treadmill manuals
Add to My Manuals
Save this manual to your list of manuals |
Page 11 highlights
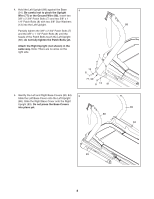
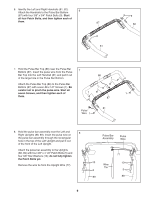
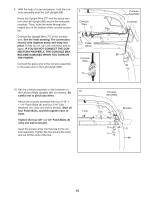
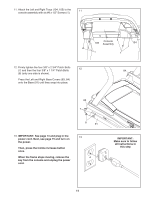
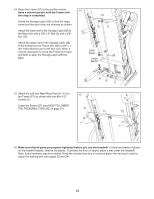
11. Attach the Left and Right Trays (104, 105) to the 11 console assembly with six #8 x 1/2" Screws (1). 105 Console Assembly 104 1 1 12. Firmly tighten the four 3/8" x 2 3/4" Patch Bolts (7) and then the four 3/8" x 1 1/4" Patch Bolts 12 84 (8) (only one side is shown). Press the Left and Right Base Covers (83, 84) onto the Base (91) until they snap into place. 83 7 8 91 13. IMPORTANT: See page 13 and plug in the 13 power cord. Next, see page 15 and turn on the power. Then, press the Incline increase button once. When the frame stops moving, remove the key from the console and unplug the power cord. IMPORTANT: Make sure to follow all instructions in this step 11
-
 1
1 -
2
-
3
-
4
-
5
-
 6
6 -
 7
7 -
 8
8 -
 9
9 -
 10
10 -
 11
11 -
 12
12 -
 13
13 -
 14
14 -
 15
15 -
 16
16 -
17
-
18
-
19
-
20
-
21
-
22
-
23
-
24
-
25
-
26
-
27
-
28
-
29
-
30
-
31
-
32
 |
 |
11
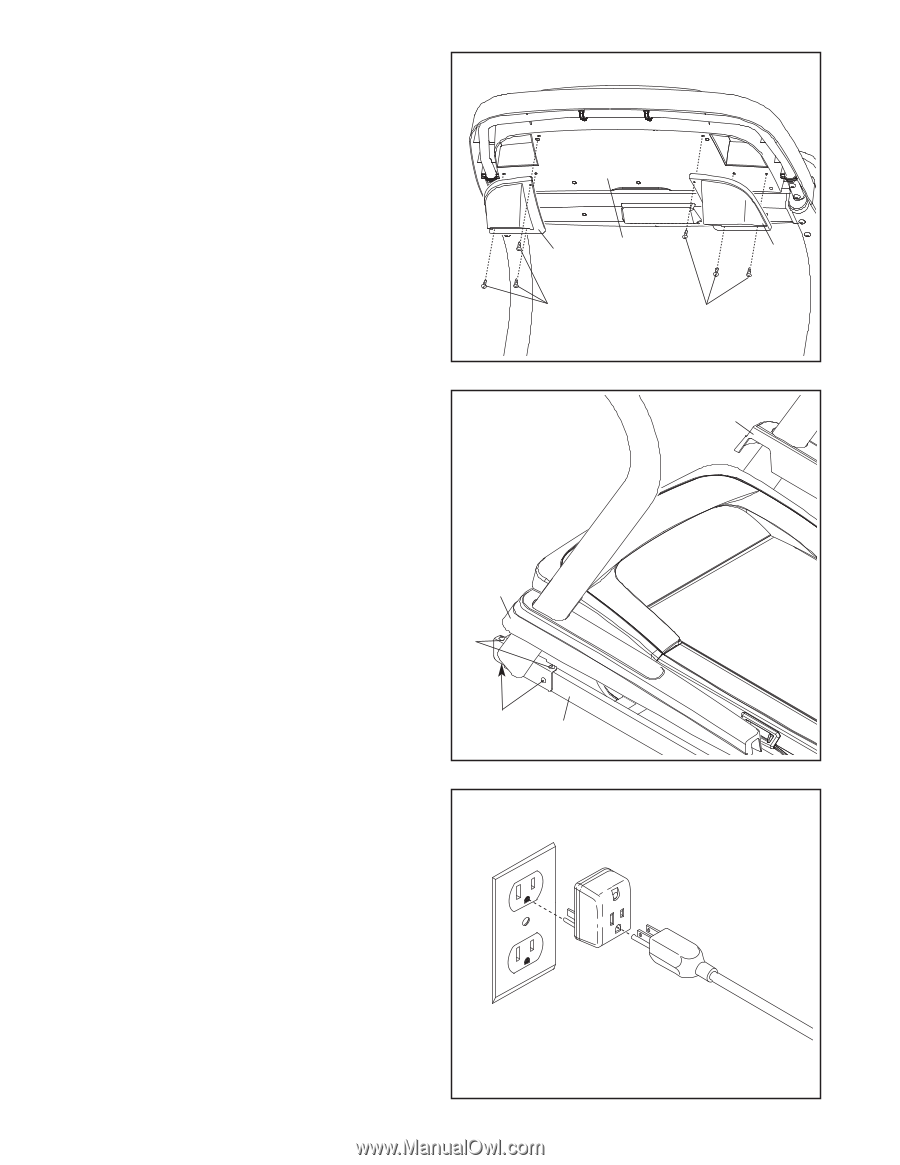
12. Firmly tighten the four 3/8" x 2 3/4" Patch Bolts
(7) and then the four 3/8" x 1 1/4" Patch Bolts
(8) (only one side is shown).
Press the Left and Right Base Covers (83, 84)
onto the Base (91) until they snap into place.
12
13.
IMPORTANT: See page 13 and plug in the
power cord. Next, see page 15 and turn on
the power.
Then, press the Incline increase button
once.
When the frame stops moving, remove the
key from the console and unplug the power
cord.
13
84
8
83
91
7
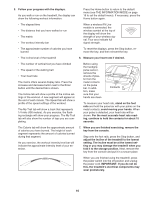
11. Attach the Left and Right Trays (104, 105) to the
console assembly with six #8 x 1/2" Screws (1).
11
1
104
105
1
IMPORTANT:
Make sure to follow
all instructions in
this step
Console
Assembly