HP 15-r200 15 Notebook PC 15 TouchSmart Notebook PC 15 Notebook PC 15 TouchSma - Page 117
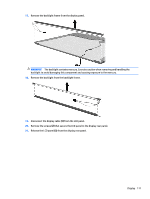
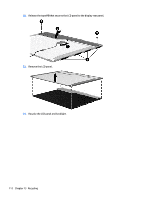
Remove the display panel frame, from the display panel.
 |
View all HP 15-r200 manuals
Add to My Manuals
Save this manual to your list of manuals |
Page 117 highlights
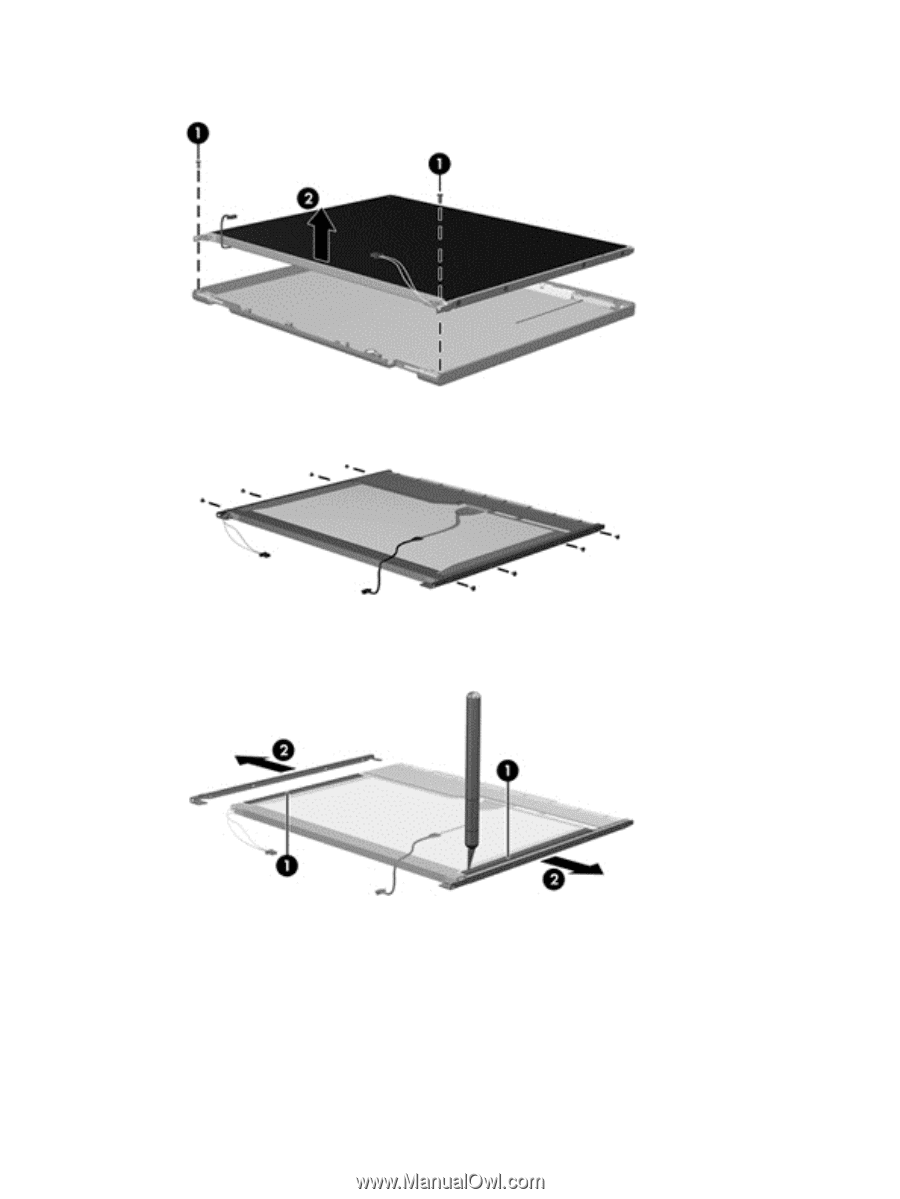
6. Remove the display panel assembly (2) from the display enclosure. 7. Turn the display panel assembly upside down. 8. Remove all screws that secure the display panel frame to the display panel. 9. Use a sharp-edged tool to cut the tape (1) that secures the sides of the display panel to the display panel frame. 10. Remove the display panel frame (2) from the display panel. 11. Remove the screws (1) that secure the backlight cover to the display panel. Display 109
-
 1
1 -
2
-
3
-
4
-
5
-
6
-
7
-
8
-
9
-
10
-
11
-
12
-
13
-
14
-
15
-
16
-
17
-
18
-
19
-
20
-
21
-
22
-
23
-
24
-
25
-
26
-
27
-
28
-
29
-
30
-
31
-
32
-
33
-
34
-
35
-
36
-
37
-
38
-
39
-
40
-
41
-
42
-
43
-
44
-
45
-
46
-
47
-
48
-
49
-
50
-
51
-
52
-
53
-
54
-
55
-
56
-
57
-
58
-
59
-
60
-
61
-
62
-
63
-
64
-
65
-
66
-
67
-
68
-
69
-
70
-
71
-
72
-
73
-
74
-
75
-
76
-
77
-
78
-
79
-
80
-
81
-
82
-
83
-
84
-
85
-
86
-
87
-
88
-
89
-
90
-
91
-
92
-
93
-
94
-
95
-
96
-
97
-
98
-
99
-
100
-
101
-
102
-
103
-
104
-
105
-
106
-
107
-
108
-
109
-
110
-
111
-
 112
112 -
 113
113 -
 114
114 -
 115
115 -
 116
116 -
 117
117 -
 118
118 -
 119
119 -
 120
120 -
 121
121 -
 122
122 -
123
-
124
 |
 |
6.
Remove the display panel assembly
(2)
from the display enclosure.
7.
Turn the display panel assembly upside down.
8.
Remove all screws that secure the display panel frame to the display panel.
9.
Use a sharp-edged tool to cut the tape
(1)
that secures the sides of the display panel to the display
panel frame.
10.
Remove the display panel frame
(2)
from the display panel.
11.
Remove the screws
(1)
that secure the backlight cover to the display panel.
Display
109