HP 2200 HP LaserJet 2200 Series - User Guide - Page 91
Tray 2 or Optional Tray 3 Paper Feed Area, Media into Tray 2 or Optional 250
 |
View all HP 2200 manuals
Add to My Manuals
Save this manual to your list of manuals |
Page 91 highlights
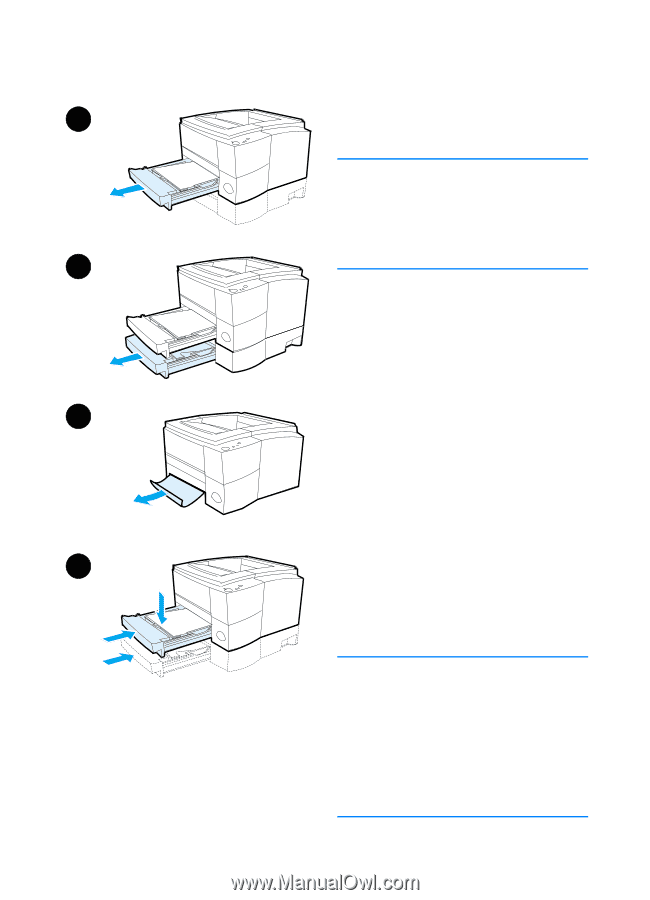
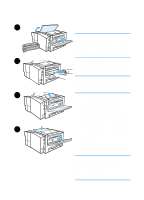
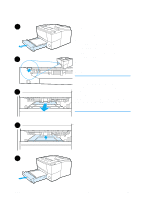
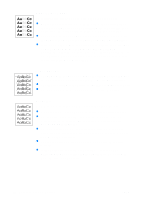
1 2 3 4 ENWW Tray 2 or Optional Tray 3 Paper Feed Area Note If paper has entered the toner cartridge area, follow the instructions in Toner Cartridge Area. It is easier to remove paper from the toner cartridge area than the paper feed area. 1 Slide out Tray 2 to expose the jammed paper. 2 Remove any misfed paper by pulling it out by the visible edge. Make sure that all of the paper is aligned in the tray (see Loading Media into Tray 2 or Optional 250sheet Tray 3). If Tray 3 is installed, remove any misfed paper and make sure that all of the paper is aligned in that tray. 3 If the paper is jammed in the paper feed area and cannot be accessed from the toner cartridge area, grasp the paper and carefully pull it free from the printer. 4 For the 250-sheet tray, push the paper down to lock the metal paper lift plate into place and slide the tray back into the printer. Note To reset the printer and continue printing, open the top cover all the way, then close it. If the Attention light does not go out, there is still jammed paper inside the printer. Check the toner cartridge, rear output, and duplexer areas for paper jams. Chapter 4 Problem Solving 81
-
 1
1 -
2
-
3
-
4
-
5
-
6
-
7
-
8
-
9
-
10
-
11
-
12
-
13
-
14
-
15
-
16
-
17
-
18
-
19
-
20
-
21
-
22
-
23
-
24
-
25
-
26
-
27
-
28
-
29
-
30
-
31
-
32
-
33
-
34
-
35
-
36
-
37
-
38
-
39
-
40
-
41
-
42
-
43
-
44
-
45
-
46
-
47
-
48
-
49
-
50
-
51
-
52
-
53
-
54
-
55
-
56
-
57
-
58
-
59
-
60
-
61
-
62
-
63
-
64
-
65
-
66
-
67
-
68
-
69
-
70
-
71
-
72
-
73
-
74
-
75
-
76
-
77
-
78
-
79
-
80
-
81
-
82
-
83
-
84
-
85
-
 86
86 -
 87
87 -
 88
88 -
 89
89 -
 90
90 -
 91
91 -
 92
92 -
 93
93 -
 94
94 -
 95
95 -
 96
96 -
97
-
98
-
99
-
100
-
101
-
102
-
103
-
104
-
105
-
106
-
107
-
108
-
109
-
110
-
111
-
112
-
113
-
114
-
115
-
116
-
117
-
118
-
119
-
120
-
121
-
122
-
123
-
124
-
125
-
126
-
127
-
128
-
129
-
130
-
131
-
132
-
133
-
134
-
135
-
136
-
137
-
138
-
139
-
140
-
141
-
142
-
143
-
144
-
145
-
146
-
147
-
148
-
149
-
150
-
151
-
152
-
153
-
154
-
155
-
156
-
157
-
158
-
159
-
160
-
161
-
162
-
163
-
164
-
165
-
166
-
167
-
168
-
169
-
170
-
171
-
172
 |
 |