HP 3600 Service Manual - Page 245
Print the print-quality (PQ) troubleshooting s, Disable cartridge check (special mode test)
 |
View all HP 3600 manuals
Add to My Manuals
Save this manual to your list of manuals |
Page 245 highlights
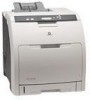
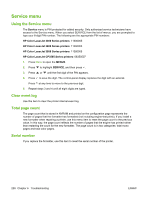
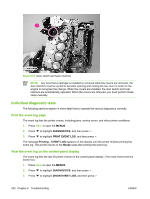
Print the print-quality (PQ) troubleshooting pages The PQ troubleshooting pages are print-quality assessment pages that you can use to troubleshoot print-quality problems. Follow the instructions on the first page of the print-quality troubleshooting pages to solve print-quality problems. 1. Press Menu to open the MENUS. 2. Press to highlight DIAGNOSTICS, and then press . 3. Press to highlight PQ TROUBLESHOOTING, and then press . The message PRINTING... PQ TROUBLESHOOTING appears on the control-panel display until the printer finishes printing the PQ troubleshooting pages. The printer returns to the Ready state after printing the PQ troubleshooting pages. Disable cartridge check (special mode test) Use this diagnostic test to print internal pages or send an external job to the printer when one or more print cartridges are removed or exchanged. Because the cartridges are not keyed, the diagnostic test can be run when one to four cartridges have been removed or moved to another location (exchanged). Consumable supply errors are ignored while the printer is in this mode. When the printer is in this mode, you can navigate the menus and print internal pages or send an external print job to the printer. This diagnostic test can be used to isolate print-quality problems that are related to individual cartridges and to isolate individual cartridge problems, such as noise. NOTE: Any time that a cartridge is installed or removed while the covers are removed, the door interlock must be cycled to simulate opening and closing the top cover in order for the engine to recognize the change. When the covers are installed, the door switch and fuser interlock are automatically operated. When the covers are removed, you must perform these steps manually. 1. Press Menu to open the MENUS. 2. Press to highlight DIAGNOSTICS, and then press . 3. Press to highlight DISABLE CARTRIDGE CHECK, and then press . To exit this diagnostic test, press Stop and then select EXIT DIAGNOSTICS. Paper-path sensor test This test shows the status of each paper-path sensor. 1. Press Menu to open the MENUS. 2. Press to highlight DIAGNOSTICS, and then press . 3. Press to highlight PAPER PATH SENSORS, and then press . 4. Print an internal page, and observe the status of the sensors as the page moves through the printer. Paper-path test This diagnostic test generates one or more test pages that you can use to isolate the cause of jams. ENWW Diagnostics 233
-
 1
1 -
2
-
3
-
4
-
5
-
6
-
7
-
8
-
9
-
10
-
11
-
12
-
13
-
14
-
15
-
16
-
17
-
18
-
19
-
20
-
21
-
22
-
23
-
24
-
25
-
26
-
27
-
28
-
29
-
30
-
31
-
32
-
33
-
34
-
35
-
36
-
37
-
38
-
39
-
40
-
41
-
42
-
43
-
44
-
45
-
46
-
47
-
48
-
49
-
50
-
51
-
52
-
53
-
54
-
55
-
56
-
57
-
58
-
59
-
60
-
61
-
62
-
63
-
64
-
65
-
66
-
67
-
68
-
69
-
70
-
71
-
72
-
73
-
74
-
75
-
76
-
77
-
78
-
79
-
80
-
81
-
82
-
83
-
84
-
85
-
86
-
87
-
88
-
89
-
90
-
91
-
92
-
93
-
94
-
95
-
96
-
97
-
98
-
99
-
100
-
101
-
102
-
103
-
104
-
105
-
106
-
107
-
108
-
109
-
110
-
111
-
112
-
113
-
114
-
115
-
116
-
117
-
118
-
119
-
120
-
121
-
122
-
123
-
124
-
125
-
126
-
127
-
128
-
129
-
130
-
131
-
132
-
133
-
134
-
135
-
136
-
137
-
138
-
139
-
140
-
141
-
142
-
143
-
144
-
145
-
146
-
147
-
148
-
149
-
150
-
151
-
152
-
153
-
154
-
155
-
156
-
157
-
158
-
159
-
160
-
161
-
162
-
163
-
164
-
165
-
166
-
167
-
168
-
169
-
170
-
171
-
172
-
173
-
174
-
175
-
176
-
177
-
178
-
179
-
180
-
181
-
182
-
183
-
184
-
185
-
186
-
187
-
188
-
189
-
190
-
191
-
192
-
193
-
194
-
195
-
196
-
197
-
198
-
199
-
200
-
201
-
202
-
203
-
204
-
205
-
206
-
207
-
208
-
209
-
210
-
211
-
212
-
213
-
214
-
215
-
216
-
217
-
218
-
219
-
220
-
221
-
222
-
223
-
224
-
225
-
226
-
227
-
228
-
229
-
230
-
231
-
232
-
233
-
234
-
235
-
236
-
237
-
238
-
239
-
 240
240 -
 241
241 -
 242
242 -
 243
243 -
 244
244 -
 245
245 -
 246
246 -
 247
247 -
 248
248 -
 249
249 -
 250
250 -
251
-
252
-
253
-
254
-
255
-
256
-
257
-
258
-
259
-
260
-
261
-
262
-
263
-
264
-
265
-
266
-
267
-
268
-
269
-
270
-
271
-
272
-
273
-
274
-
275
-
276
-
277
-
278
-
279
-
280
-
281
-
282
-
283
-
284
-
285
-
286
-
287
-
288
-
289
-
290
-
291
-
292
-
293
-
294
-
295
-
296
-
297
-
298
-
299
-
300
-
301
-
302
-
303
-
304
-
305
-
306
-
307
-
308
-
309
-
310
-
311
-
312
-
313
-
314
-
315
-
316
-
317
-
318
-
319
-
320
-
321
-
322
-
323
-
324
-
325
-
326
-
327
-
328
-
329
-
330
-
331
-
332
-
333
-
334
-
335
-
336
-
337
-
338
-
339
-
340
-
341
-
342
-
343
-
344
-
345
-
346
-
347
-
348
-
349
-
350
-
351
-
352
-
353
-
354
-
355
-
356
-
357
-
358
-
359
-
360
-
361
-
362
-
363
-
364
-
365
-
366
-
367
-
368
-
369
-
370
-
371
-
372
-
373
-
374
-
375
-
376
 |
 |