HP 4415s Drives - Windows 7 - Page 24
edge of the computer., Turn the computer display-side up
 |
UPC - 884962601167
View all HP 4415s manuals
Add to My Manuals
Save this manual to your list of manuals |
Page 24 highlights
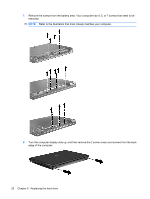
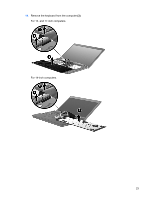
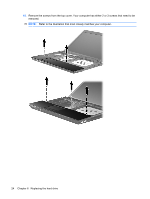
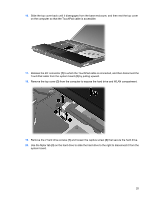
7. Remove the screws from the battery area. Your computer has 4, 5, or 7 screws that need to be removed. NOTE: Refer to the illustration that most closely matches your computer. 8. Turn the computer display-side up, and then remove the 2 screw covers and screws from the back edge of the computer. 20 Chapter 6 Replacing the hard drive
-
 1
1 -
2
-
3
-
4
-
5
-
6
-
7
-
8
-
9
-
10
-
11
-
12
-
13
-
14
-
15
-
16
-
17
-
18
-
 19
19 -
 20
20 -
 21
21 -
 22
22 -
 23
23 -
 24
24 -
 25
25 -
 26
26 -
 27
27 -
 28
28 -
 29
29 -
30
-
31
-
32
-
33
-
34
-
35
-
36
-
37
-
38
-
39
-
40
-
41
-
42
-
43
-
44
-
45
-
46
 |
 |
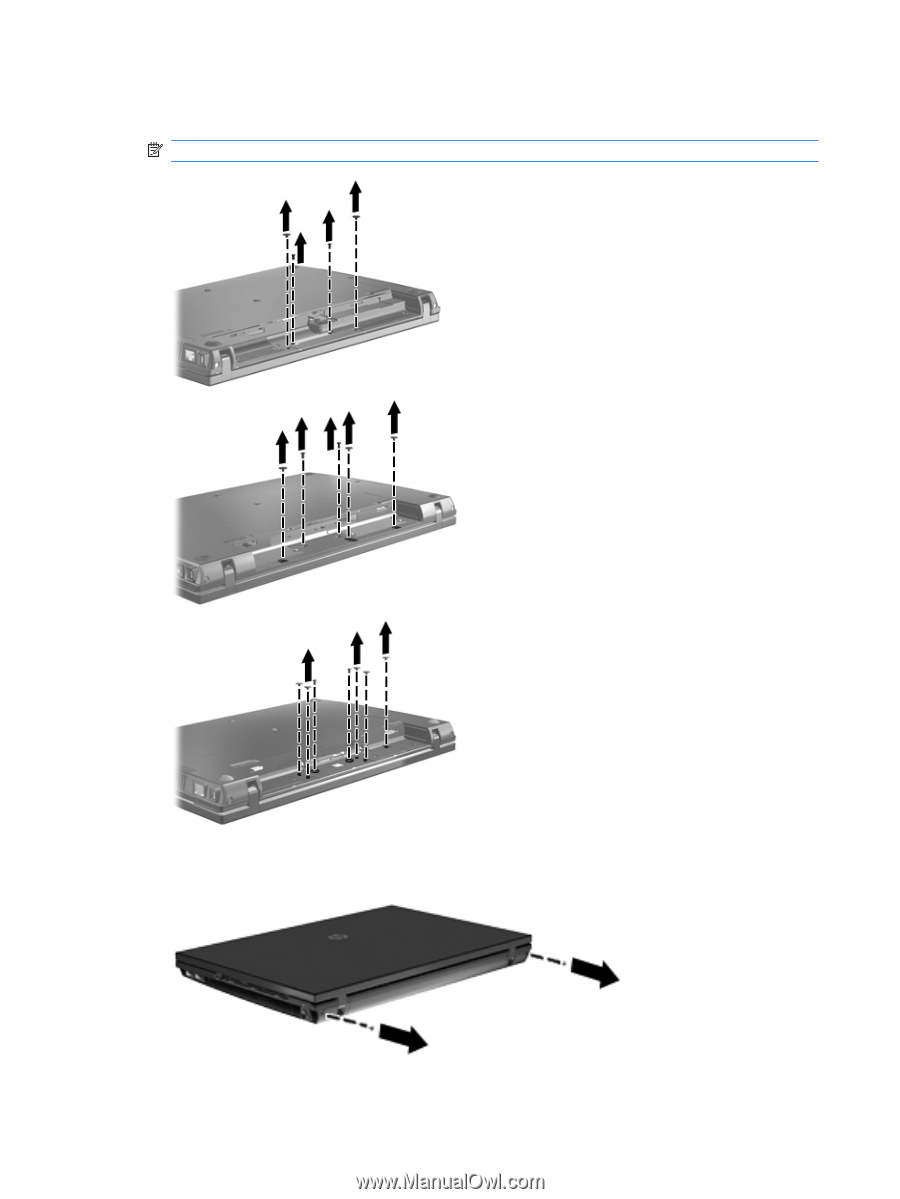
7.
Remove the screws from the battery area. Your computer has 4, 5, or 7 screws that need to be
removed.
NOTE:
Refer to the illustration that most closely matches your computer.
8.
Turn the computer display-side up, and then remove the 2 screw covers and screws from the back
edge of the computer.
20
Chapter 6
Replacing the hard drive