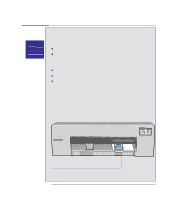
HP 450c HP DesignJet 430, 450C, and 455CA Printer - User's Guide - Page 105
Printing the Print Quality Test Print - cartridge error
 |
View all HP 450c manuals
Add to My Manuals
Save this manual to your list of manuals |
Page 105 highlights
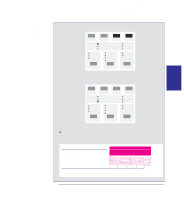
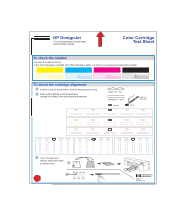
Special internal prints Using the Print Quality Test Print INTERNAL 5 PRINTS Printing the Print Quality Test Print 1 Before printing, set the Media Type and Print Quality on the front panel to the settings that you want to test. The size of the Print Quality Test Print is B/A3 so you must use media (roll or sheet) that is this size or larger. Use the same type of media that you were using when the print quality problem was discovered. 2 Load a sheet of media in portrait orientation. 3 When the Ready light comes on, press the Form Feed and Media Source keys together. The Ready light begins to flash, and the media moves slightly forward. The carriage moves to the right side of the printer, and the fan comes on. The printer prints the Print Quality Test Print. 4 Unload the media. 5 Study each of the test patterns in the order listed to determine the type of print quality problem. 6 If you encounter problems of print quality using non-HP media and after the Print Quality Test Print the same quality problems appear, you should try using genuine HP media. Repeat the Print Quality Test Print using HP Media. Test 1 (Warm-up) This pattern warms up the cartridges, leaving them in what should be a perfect operating condition; you can ignore this pattern. Test 2 (Nozzles) This tests all 96 nozzles of each cartridge of the printer. For each color there are 96 diagonally stepped lines, with every fifth or seventh identified by number. There are two possible errors shown by this test (see the following diagram): Nozzles not printing or weak. If the diagonally stepped lines are broken in one or more steps, it indicates that these specific nozzles may be blocked and are not printing. Nozzles misdirected. If the diagonally stepped lines are not equally positioned in every step, it indicates that this specific nozzles may be misdirected. To correct these errors, try the following: 1 Prime the cartridges (see page 7-7) and print the Print Quality Test Print again to see if there has been any improvement. 2 If the error is still present, replace the failing cartridge (see page 7-2) and print the Print Quality Test Print again. 5-13
-
 1
1 -
2
-
3
-
4
-
5
-
6
-
7
-
8
-
9
-
10
-
11
-
12
-
13
-
14
-
15
-
16
-
17
-
18
-
19
-
20
-
21
-
22
-
23
-
24
-
25
-
26
-
27
-
28
-
29
-
30
-
31
-
32
-
33
-
34
-
35
-
36
-
37
-
38
-
39
-
40
-
41
-
42
-
43
-
44
-
45
-
46
-
47
-
48
-
49
-
50
-
51
-
52
-
53
-
54
-
55
-
56
-
57
-
58
-
59
-
60
-
61
-
62
-
63
-
64
-
65
-
66
-
67
-
68
-
69
-
70
-
71
-
72
-
73
-
74
-
75
-
76
-
77
-
78
-
79
-
80
-
81
-
82
-
83
-
84
-
85
-
86
-
87
-
88
-
89
-
90
-
91
-
92
-
93
-
94
-
95
-
96
-
97
-
98
-
99
-
 100
100 -
 101
101 -
 102
102 -
 103
103 -
 104
104 -
 105
105 -
 106
106 -
 107
107 -
 108
108 -
 109
109 -
 110
110 -
111
-
112
-
113
-
114
-
115
-
116
-
117
-
118
-
119
-
120
-
121
-
122
-
123
-
124
-
125
-
126
-
127
-
128
-
129
-
130
-
131
-
132
-
133
-
134
-
135
-
136
-
137
-
138
-
139
-
140
-
141
-
142
-
143
-
144
-
145
-
146
-
147
-
148
-
149
-
150
-
151
-
152
-
153
-
154
-
155
-
156
-
157
-
158
-
159
-
160
-
161
-
162
-
163
-
164
-
165
-
166
-
167
-
168
-
169
-
170
-
171
-
172
-
173
-
174
-
175
-
176
-
177
-
178
-
179
-
180
-
181
-
182
-
183
-
184
-
185
-
186
-
187
-
188
-
189
-
190
-
191
-
192
-
193
-
194
-
195
-
196
 |
 |
