HP 4550 HP Color LaserJet 4550 printer family - Software Technical Reference - Page 160
Options panel
 |
View all HP 4550 manuals
Add to My Manuals
Save this manual to your list of manuals |
Page 160 highlights
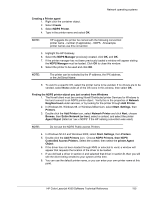
Appendix A: Job Status and Alerts • Job History: displays a page containing information about the history of jobs printed to this printer from this PC (described further below). Of the five buttons at the top of the printer status panel, the first four should be readily apparent to anyone who has used a web browser. The Refresh button is necessary for updating the printer status page when the printer has no embedded web server. When displaying embedded web content, the web server will automatically repost its page contents and refresh the browser window when status changes. The last button represents job history. The Job History page consists of a table containing Document Name, Owner, State, and Pages. The Document Name is the name reported to the driver by the application. The Owner is the windows user (login) name. The State is either Printed, Canceled, Failed, or Unknown. The Pages column is "N of M" where N is the number of pages printed. and M is the total number of pages to print. For jobs whose state is "Printed," N should be equal to M. They may differ in Canceled or Failed jobs. The specific layout and cosmetic appearance of this page is subject to change. There are a number of situations where the printer status panel will not be able to display printer status information. These situations occur when: 1. Job Status and Alerts is retrieving information from the printer; 2. There is a bidi communication failure; and 3. Job Status and Alerts can communicate with the printer but they don't understand each other. For each of these three cases, the printer status window will display an animated gif image that is intended to substitute for an error or progress message. Options panel There are a number of aspects of the Job Status and Alerts software that users may wish to configure in order to specify a combination of behaviors that's well suited to the user's style of working. What makes the Options panel unique is the category selection, located in the light gray band across the top of the panel. These controls include a drop-down list control, where the user may select from an expandable list of options categories, and a Next button, which selects the next category in the list in circular fashion. Selecting a different choice from the drop-down list (or clicking the Next button) causes the contents of the panel below to be updated with a different set of options that correspond to the selected category. The installer program allows the administrator to create a custom installation disk that will install preconfigured options for Job Status and Alerts. The administrator will be able to specify the default Document Alert and Refresh Rate options, and will have the choice of making the Refresh Rate sub-panel not appear to the end user. If this option is selected, then the end user will only have one sub-panel available for Job Status and Alerts Options (Document Alerts), and the scope controls will not be shown at the top of the Options panel. Within both the Document Alerts and the Refresh Rate sub-panels, the user must first select a printer to set the scope of the Options settings to be changed. The default setting is All Printers, which means that any changes made to the settings below will apply to all configured printers. If a change in scope is desired, the specific printer (or All Printers) must be selected before the settings are adjusted. At any given time, any change made to any of the Options settings will apply to the printer specified in the drop-down list. Changing the printer scope after changing the Options settings will not have the desired effect. The Document Alerts options consist of four check boxes representing four different types of notice that the user may be interested in. If none of these options are checked, then no document alerts will appear during the course of a print job to the selected printer. When at least one option is checked and an in-progress print job has triggered that condition, the Job Status window will appear with the Job Status panel displaying the particular status condition that triggered the alert. HP Color LaserJet 4550 Software Technical Reference 160
-
 1
1 -
2
-
3
-
4
-
5
-
6
-
7
-
8
-
9
-
10
-
11
-
12
-
13
-
14
-
15
-
16
-
17
-
18
-
19
-
20
-
21
-
22
-
23
-
24
-
25
-
26
-
27
-
28
-
29
-
30
-
31
-
32
-
33
-
34
-
35
-
36
-
37
-
38
-
39
-
40
-
41
-
42
-
43
-
44
-
45
-
46
-
47
-
48
-
49
-
50
-
51
-
52
-
53
-
54
-
55
-
56
-
57
-
58
-
59
-
60
-
61
-
62
-
63
-
64
-
65
-
66
-
67
-
68
-
69
-
70
-
71
-
72
-
73
-
74
-
75
-
76
-
77
-
78
-
79
-
80
-
81
-
82
-
83
-
84
-
85
-
86
-
87
-
88
-
89
-
90
-
91
-
92
-
93
-
94
-
95
-
96
-
97
-
98
-
99
-
100
-
101
-
102
-
103
-
104
-
105
-
106
-
107
-
108
-
109
-
110
-
111
-
112
-
113
-
114
-
115
-
116
-
117
-
118
-
119
-
120
-
121
-
122
-
123
-
124
-
125
-
126
-
127
-
128
-
129
-
130
-
131
-
132
-
133
-
134
-
135
-
136
-
137
-
138
-
139
-
140
-
141
-
142
-
143
-
144
-
145
-
146
-
147
-
148
-
149
-
150
-
151
-
152
-
153
-
154
-
 155
155 -
 156
156 -
 157
157 -
 158
158 -
 159
159 -
 160
160 -
 161
161 -
 162
162 -
 163
163 -
 164
164 -
 165
165 -
166
-
167
-
168
-
169
-
170
-
171
-
172
-
173
-
174
-
175
-
176
-
177
-
178
-
179
-
180
-
181
-
182
-
183
-
184
-
185
-
186
-
187
-
188
-
189
-
190
-
191
-
192
-
193
-
194
-
195
-
196
-
197
-
198
-
199
-
200
-
201
-
202
-
203
-
204
-
205
-
206
-
207
-
208
-
209
-
210
-
211
-
212
-
213
-
214
-
215
-
216
-
217
-
218
-
219
-
220
-
221
-
222
-
223
-
224
-
225
-
226
-
227
-
228
-
229
-
230
-
231
-
232
-
233
-
234
-
235
-
236
-
237
-
238
-
239
-
240
-
241
 |
 |
